Best Beginner Artisan Cheese-Making Equipment Systems
What's inside
- Best Beginner Artisan Cheese-Making Equipment Systems
- Quick comparison of the leading setup types
- Best choices by beginner situation
- Head-to-head: complete kit versus DIY equipment
- Capacity: buy for your milk, not the advertised maximum
- Food-safe materials and temperature accuracy
- Cleanup and ownership realities
- Common beginner mistakes
- Final buying recommendation
- Best Beginner Artisan Cheese-Making Equipment Systems
- Quick comparison of the leading setup types
- Best choices by beginner situation
- Head-to-head: complete kit versus DIY equipment
- Capacity: buy for your milk, not the advertised maximum
- Food-safe materials and temperature accuracy
- Cleanup and ownership realities
- Common beginner mistakes
- Final buying recommendation
As an Amazon Associate I earn from qualifying purchases. This post may contain affiliate links at no extra cost to you.
Best Beginner Artisan Cheese-Making Equipment Systems
The best artisan cheese making equipment systems for beginners are a small stainless-steel pot-and-thermometer setup for occasional fresh cheese, a complete fresh-cheese kit for guided learning, or a larger water-bath system for regular batches and harder cheeses.
Do not choose by the number of included tools alone. The useful comparison is whether a system controls temperature accurately, accommodates the batch sizes you actually want to make, uses food-safe materials, and can be cleaned without trapping milk residue in difficult seams.
As an Amazon Associate we earn from qualifying purchases at no extra cost to you.
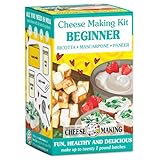


Quick comparison of the leading setup types
| Setup or example | Typical contents | Practical batch size | Temperature control | Best for | Typical market range |
|---|---|---|---|---|---|
| New England Cheese Making Supply 30-Minute Mozzarella and Ricotta Kit | Rennet, citric acid, cheese salt, thermometer, cheesecloth and instructions | 1–2 gallons of milk per batch | Stovetop control with included thermometer | Fast fresh cheeses and first-time makers | $25–$45 |
| Mad Millie Fresh Cheese Kit | Cheese cultures or enzymes, rennet, salt, cloth, molds and draining equipment | About 1–2 gallons per batch, depending on recipe | Manual stovetop control | Ricotta, paneer, chèvre-style and other fresh cheeses | $45–$80 |
| CheeseMaker beginner cheese-making kit | Basic ingredients, thermometer, cheesecloth, molds and recipe guidance | Usually 1–2 gallons per batch | Manual stovetop control | Beginners wanting several recipe styles | $50–$100 |
| DIY stainless-steel pot system | 8–12-quart pot, digital thermometer, skimmer, colander, butter muslin and molds | 1–3 gallons per batch | Manual, or indirect heat with a water bath | Lowest long-term cost and flexible upgrades | $60–$160 |
| Electric cheesemaking kettle or sous-vide water-bath system | Thermostatic vessel, inner basket or pot, thermometer, molds and draining tools | 2–5 gallons per batch | Digital or thermostatic control, commonly within 1–2°F | Frequent makers and temperature-sensitive recipes | $150–$500+ |
Kit contents and batch limits vary by package and recipe, so check the current manufacturer specification before ordering replacement cultures or molds. The figures above are practical working ranges rather than guaranteed yields.
Best choices by beginner situation
| Your situation | Recommended system | Why it fits | What to avoid |
|---|---|---|---|
| Budget under $75 and only a few batches per year | Fresh-cheese kit or DIY 8-quart pot setup | Enough equipment for mozzarella, ricotta, paneer and soft cheeses without a large investment | Large electric kettles that occupy storage space |
| Complete beginner who wants printed guidance | Mad Millie, New England Cheese Making Supply or CheeseMaker kit | Ingredients and recipes reduce the number of separate purchases | Buying a tool-only kit without cultures or rennet |
| Small kitchen with limited storage | 8-quart stainless pot, compact digital thermometer and collapsible draining basket | Most pieces can serve ordinary cooking duties | Dedicated 5-gallon equipment for one-gallon batches |
| Making cheese weekly | 12-quart pot with water-bath capability or an electric kettle | Better temperature stability and room for repeatable batches | Thin aluminum pots and low-cost analog thermometers |
| Interested in aged cheese later | Modular stainless setup with cheese molds, follower and press compatibility | Can expand into curd cutting, pressing and controlled aging | A fresh-cheese-only kit with no reusable molds |
Head-to-head: complete kit versus DIY equipment
Complete beginner kits
A packaged kit is the easiest route when you do not yet know which cheese styles you will make. The ingredient portions are often matched to the recipes, and a kit may include citric acid, microbial rennet, cheese salt, cheesecloth, a thermometer and one or more draining molds. This eliminates several shopping decisions.
The limitation is that starter kits commonly focus on fresh cheese. They may not include a large enough pot, a proper curd knife, a cheese press, a pH meter or aging equipment. Some bundled thermometers are adequate for general stovetop work but slow to respond or difficult to read while submerged. Treat the kit as a starting point, not a complete creamery.
DIY stainless-steel systems
A DIY system costs more attention at the beginning but usually gives better long-term value. An 8-quart pot is suitable for roughly one gallon of milk, while a 12-quart pot gives more headroom for stirring and curd cutting. Choose 18/8 or 18/10 stainless steel with a flat, stable base. Avoid reactive bare aluminum or copper unless it has a food-safe lining designed for acidic foods.
The most useful DIY shopping list is a digital thermometer with a probe rated for at least 212°F, a stainless or nylon skimmer, a colander, butter muslin, a curd knife, two draining molds and a stainless pot. A water bath made by placing the cheese pot inside a larger pot can slow temperature changes and costs much less than an electric kettle.
Thermostatic kettles and water baths
Temperature control becomes more valuable as you move from ricotta and paneer to cultured cheeses. A kettle that holds a target temperature within approximately 1–2°F reduces repeated burner adjustments, especially during culture ripening and curd cooking. It does not replace correct sanitation, timing or acidity control, but it makes the process more repeatable.
The tradeoff is cost, counter space and cleanup. A dedicated kettle can weigh 10–25 pounds and may require a large sink or removable inner vessel. For a beginner making one gallon once a month, the improvement may not justify the price. For two- to five-gallon weekly batches, the saved attention can be worthwhile.
Capacity: buy for your milk, not the advertised maximum
Milk is not the final volume problem. The pot must also hold a thermometer, enough space for gentle stirring and a layer of curd without splashing. A useful rule is to fill a vessel to no more than two-thirds of its stated capacity.
For example, a 12-quart pot should comfortably handle a 2-gallon batch. Two gallons equals 8 quarts, leaving 4 quarts of working headroom. If milk costs about $5 per gallon, a two-gallon batch starts at approximately $10 in milk. Assuming a 1.5-pound finished yield, the milk cost is about $6.67 per pound before cultures, rennet, salt, energy and aging losses. That calculation shows why a large kettle only pays off when it is used regularly or for larger batches.
Food-safe materials and temperature accuracy
- Best pot material: stainless steel with smooth, accessible welds and no peeling coating.
- Acceptable accessories: food-grade silicone, nylon rated for hot liquids, borosilicate glass and washable polyester cheesecloth.
- Use caution with: untreated wood, chipped enamel, porous plastic and ordinary fabric that retains milk fat or detergent.
- Thermometer target: a readable digital unit with approximately ±1°F stated accuracy across the 86–212°F range.
- Useful design feature: a clip or probe holder that keeps the sensor off the pot bottom, where the metal may be hotter than the milk.
Check thermometer accuracy in an ice-water slurry and boiling water before important batches. Ice water should read close to 32°F, while boiling water varies with altitude but should be near 212°F at sea level. If the reading is several degrees off, replace or calibrate the thermometer rather than adjusting a recipe by guesswork.
Cleanup and ownership realities
Cleanup is where inexpensive equipment can become frustrating. Fine curd particles collect around pot handles, thermometer clips and seams. Rinse equipment in cool water first to remove milk proteins, then wash with hot water and unscented dish detergent. Very hot water applied immediately to milk residue can make proteins cling more firmly.
Sanitize equipment according to the culture or recipe instructions, and allow cloths to dry fully between uses. Do not put dairy-soaked cloth in a sealed container while damp. Replace cheesecloth when it becomes permanently stained, develops an odor or loses its weave. Butter muslin lasts longer because it is denser and easier to wash, but it still becomes a consumable item.
The parts most likely to wear first are cloth, inexpensive thermometer probes, plastic draining molds and rubber seals on electric kettles. Rennet and cultures also have limited storage lives. Keep cultures and rennet refrigerated as directed, label opened packets with the date, and avoid buying multi-year quantities before you know how often you will make cheese.
Common beginner mistakes
- Using ultra-pasteurized milk when a recipe requires milk capable of forming a firm curd.
- Heating by the burner setting alone instead of measuring the milk temperature.
- Cutting the curd too small or stirring too aggressively, which can reduce yield.
- Using kitchen towels that contain detergent fragrance or fabric softener.
- Choosing a pot that is too full to stir safely.
- Buying a kit without checking whether milk, cultures, rennet or salt are included.
Final buying recommendation
For most beginners, a fresh-cheese kit from an established cheesemaking supplier is the simplest first purchase if you want guided recipes and premeasured ingredients. If you already own a suitable pot, spend the money on a reliable digital thermometer, butter muslin and reusable molds instead. Choose a 12-quart stainless-steel DIY system when you expect to make cheese weekly or want to progress into pressed and aged styles. Move to a thermostatic kettle only after temperature consistency and batch volume have become real limitations rather than hypothetical upgrades.
