Best Affordable Soldering Iron Kit for Small Electronics Repairs
What's inside
As an Amazon Associate I earn from qualifying purchases. This post may contain affiliate links at no extra cost to you.
Small electronics repairs do not require a professional rework station, but the cheapest soldering iron can make simple jobs frustrating. A useful starter kit should heat consistently, hold its temperature reasonably well, include a stable stand, and come with tips and solder that are usable rather than disposable. For most repairs, expect to spend about $20 to $45. Spending more than that makes sense when you solder frequently, work with lead-free solder, or need precise temperature control.
As an Amazon Associate we earn from qualifying purchases at no extra cost to you.


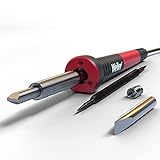
What to Look For in an Affordable Soldering Iron Kit
For circuit boards, wire repairs, switches, battery tabs, and connector work, a 40- to 65-watt iron is the practical range. Lower-powered 25-watt irons can work on small signal wires, but they struggle to transfer heat into ground planes, thick wires, and larger connector terminals. Excessive heating time then increases the chance of lifting a circuit-board pad.
Adjustable temperature control is more useful than a high wattage number. Look for a stated range of roughly 200 to 450 degrees Celsius (392 to 842 degrees Fahrenheit). Temperature markings are not always accurate on inexpensive irons, but adjustment still lets you use less heat on delicate boards and more heat on heavy joints.
A ceramic heating element usually heats faster and holds temperature better than the basic metal elements found in the cheapest pencil irons. A silicone power cord is also worthwhile: it stays flexible near the workbench and is less likely to transmit movement to the tip.
At minimum, the kit should include a metal stand, brass wool or a damp sponge, several replaceable tips, and a small amount of rosin-core solder. A stand that is too light can tip when you pull the iron out. Brass wool is preferable to a wet sponge for frequent work because it removes oxidation without cooling the tip as sharply.
Best Budget Categories Compared
| Kit type | Typical price | Best for | Main limitation |
|---|---|---|---|
| Basic fixed-temperature pencil | $10–$20 | Occasional wires and simple joints | Slow recovery and limited control |
| Adjustable 40–65W kit | $20–$35 | General small electronics repairs | Temperature display may be approximate |
| Compact digital station | $35–$70 | Regular repair work and lead-free solder | More cost and bench space |
| USB-C or battery-powered iron | $25–$60 | Portable repairs and field kits | Depends on power supply or battery capacity |
For most buyers, an adjustable-temperature soldering iron kit is the value sweet spot. It costs only a little more than a fixed-temperature iron but handles a much wider range of jobs. These kits are often sold under several brands with nearly identical housings and accessories, so compare the warranty, cord quality, included tips, and customer photos rather than the logo alone.
Which Kit Makes Sense for Your Repairs?
Choose a basic fixed-temperature iron if you repair a controller once a year, attach speaker wires, or replace a simple cable. The cheaper option is fine when the joints are small, accessible, and not connected to a large metal mass. Keep sessions short and let the iron fully heat before touching the joint.
Choose an adjustable station for routine work on game consoles, toys, audio equipment, keyboard cables, and small circuit boards. A station separates the control box from the handpiece, usually provides a safer holder, and makes it easier to return to a known temperature. A 60-watt station is not automatically better than a 40-watt station, but it normally recovers heat faster after touching a large joint.
A 60-watt digital soldering station kit is worth considering if you plan to use lead-free solder. Lead-free alloys generally need more heat and punish an iron with poor recovery. For small leaded-solder work, a reliable 40-watt adjustable iron is usually enough.
USB-C irons are convenient for field repairs, but check the power requirement carefully. Many need a USB-C power supply capable of 45 to 65 watts. A phone charger may power the display but leave the iron underpowered. Battery models are handy for a loose wire or emergency repair, yet their short runtime and proprietary tips make them less economical as a main bench tool.
Tips, Solder, and Safety
A medium chisel tip is the best first tip for most small electronics. It transfers heat better than a very fine needle tip and can still reach ordinary through-hole pads. Add a fine conical tip for tight spaces, but do not use it for every job; its small contact area often causes longer heating and damaged pads.
Buy quality rosin-core solder separately if the included spool looks unusually thin or leaves a crusty, dull joint. For general hobby repairs, 0.6 to 0.8 mm solder is easy to control. Leaded 60/40 solder melts at a lower temperature and is easier for beginners, while lead-free solder is preferable where regulations or personal policy require it. Wash your hands after handling solder, avoid eating at the bench, and use ventilation or a small fume extractor.
Set the iron around 320 to 350°C for common leaded solder and roughly 350 to 390°C for lead-free work, then adjust based on the joint. Touch the tip to both the pad and component lead, feed solder into the heated joint, and remove solder before removing the iron. A typical small joint should take about one to three seconds. If it takes ten seconds, increase heat slightly, use a larger tip, or clean and tin the tip.
Common Failure Modes
The most common cheap-iron problem is temperature drift. The tip may be hot enough in free air but cool dramatically when placed on a ground plane. This produces dull, grainy joints and encourages users to hold the iron on the board too long. Another failure is a loose tip. Keep the tip seated and clean; do not overtighten a retaining collar while the iron is hot.
Oxidized tips stop accepting solder. Wipe them on brass wool, add a small amount of fresh solder, and leave a thin coating on the working surface between joints. Never file or sand a plated tip. If the plating is gone, replacement is the only reliable fix.
Budget kits also vary in electrical isolation and build quality. Do not work on powered equipment, mains circuits, lithium battery packs, or high-voltage capacitors unless you understand the hazards. For ordinary low-voltage board repairs, a reputable adjustable kit with a grounded plug, stable stand, and replaceable tips offers the best balance of cost and control.
When to Buy
Prices commonly fall during major holiday promotions, back-to-school sales, and tool-focused events. Watch the normal price for a week rather than trusting a large “discount” badge. A kit discounted from $35 to $25 is a useful deal; a $12 kit marked down from an inflated $30 reference price may not be. Replacement tips and solder can erase the savings, so check their availability before buying.
If you already have a stand and solder, buying a replacement adjustable soldering iron with tips can be cheaper than another oversized bundle. For a first purchase, however, a complete 40- to 65-watt kit is the most sensible starting point.