Best Entry-Level Miter Saws
What's inside
- Best Entry-Level Miter Saws for Beginners in 2026
- Quick Picks by Situation
- What a Beginner Actually Needs
- Capacity Comparison for Common Materials
- Best Beginner Choices Explained
- Setup Steps That Improve Accuracy
- Safety Features Worth Paying For
- Ownership Costs and Common Wear
- Final Buying Recommendation
- Related Guides
- Best Entry-Level Miter Saws for Beginners in 2026
- Quick Picks by Situation
- What a Beginner Actually Needs
- Capacity Comparison for Common Materials
- Best Beginner Choices Explained
- Setup Steps That Improve Accuracy
- Safety Features Worth Paying For
- Ownership Costs and Common Wear
- Final Buying Recommendation
- Related Guides
As an Amazon Associate I earn from qualifying purchases. This post may contain affiliate links at no extra cost to you.
Best Entry-Level Miter Saws for Beginners in 2026
The best entry level miter saw for most first-time users is a 10-inch corded compound saw with a clear bevel scale, positive detents, a stable fence, and enough capacity for common 2×4, 2×6, and trim work; the right choice depends on whether you value low cost, portability, cutting capacity, or easier accuracy.
Quick Picks by Situation
| Best for | Recommended type or model | Why it fits | Typical market range |
|---|---|---|---|
| Lowest-cost first saw | 10-inch single-bevel compound saw, such as the Metabo HPT C10FCGS | Simple controls, light weight, and enough capacity for basic trim and framing cuts | $140–$220 |
| General home projects | 10-inch sliding compound saw, such as the DEWALT DWS715 or similar 10-inch slider | Better reach for wider boards while remaining easy to understand | $220–$350 |
| Frequent DIY use | 10-inch dual-bevel slider, such as the DEWALT DWS779 | Tilts both directions, reducing the need to flip crown molding | $400–$550 |
| Limited workshop space | Compact 8-1/2-inch sliding saw, such as the Makita LS0815F | Smaller footprint and lower weight than most 10-inch sliders | $300–$450 |
| Maximum cutting reach | 12-inch dual-bevel slider, such as the DEWALT DWS780 | Handles wide stock and larger molding, but costs more and needs more bench space | $650–$850 |
What a Beginner Actually Needs
A miter saw does not need every professional feature to produce clean cuts. Beginners should prioritize controls that are easy to see and repeat. A large miter handle, clearly marked angles, positive stops at common settings, and a secure work clamp matter more than a high no-load speed.
As an Amazon Associate we earn from qualifying purchases at no extra cost to you.
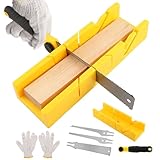
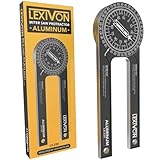

A single-bevel saw tilts in one direction, usually to the left. It is adequate for picture frames, baseboard, shelving, simple furniture, and most crosscuts. A dual-bevel saw tilts left and right. This is more convenient for crown molding and angled assemblies because you can keep the finished face oriented consistently instead of turning the workpiece around.
Choose a sliding model when you need to cut boards wider than the saw can crosscut in one pass. A non-sliding 10-inch saw is often less expensive, lighter, and easier to position, but its capacity is commonly limited to roughly 5-1/2 to 6 inches at 90 degrees. A 10-inch slider often reaches about 12 inches at 90 degrees, depending on the exact design.
Capacity Comparison for Common Materials
| Saw class | Typical 90-degree crosscut | Typical 45-degree miter cut | Approximate weight | Best material range |
|---|---|---|---|---|
| 8-1/2-inch compact slider | About 8 inches wide | About 5-1/2 inches wide | 30–40 lb | Trim, 1x boards, small shelving, occasional 2x lumber |
| 10-inch non-slider | About 5-1/2 to 6 inches wide | About 4 inches wide | 30–40 lb | 2×4, 2×6 on some models, baseboard, casing, small furniture parts |
| 10-inch slider | About 11-3/4 to 12 inches wide | About 8 inches wide | 45–60 lb | 2×4, 2×6, 2×8, flooring, shelving, wide trim |
| 12-inch slider | About 13-1/2 to 14 inches wide | About 9-1/2 inches wide | 55–70 lb | Large baseboard, deck components, wide boards, substantial molding |
These are useful planning figures rather than guarantees. Actual capacity changes with the blade diameter, fence position, bevel angle, and whether the manufacturer permits the workpiece to be cut flat or standing vertically. Always confirm the manual before attempting a wide or unusually thick cut.
Best Beginner Choices Explained
Best low-cost option: 10-inch single-bevel compound saw
A basic 10-inch single-bevel saw is the least intimidating way to learn. The controls are usually limited to the miter lock, bevel lock, blade guard, and trigger. It can crosscut framing lumber and most household trim, and replacement 10-inch blades are widely available.
The limitation is width. If the saw is non-sliding, it may not cut a 2×8 across its full width. This class is a good fit when the project list consists mainly of 2x4s, 2x6s, narrow shelving, door casing, and baseboard. Expect roughly $140 to $220 for a reputable corded model, depending on included features and sales.
Best all-purpose choice: 10-inch sliding compound saw
A 10-inch slider is the safest recommendation for a homeowner who does not yet know what projects are ahead. It retains manageable controls while cutting much wider stock than a non-slider. Models such as the DEWALT DWS715 are commonly associated with the 10-inch compound category, although buyers should verify whether a specific version is sliding and whether it is single- or dual-bevel.
Sliding rails add weight, cost, and another source of play. To preserve accuracy, pull the head smoothly toward yourself, start the blade away from the material, then push through the cut without forcing the mechanism sideways. A slider is usually worth the extra cost if you expect to build shelving, planter boxes, flooring frames, or furniture from wider boards.
Best for repeated trim work: 10-inch dual-bevel slider
A dual-bevel slider is convenient rather than essential. It is especially helpful for crown molding, where flipping a long piece can be confusing or can place the finished edge against the fence incorrectly. The DEWALT DWS779 is an example of this higher-capacity category.
For a first saw, buy this type when you already expect frequent renovation or trim work. It is heavier, occupies more bench depth, and commonly costs $400 to $550. A beginner who only needs occasional crosscuts may get better value from a simpler single-bevel saw plus a quality blade.
Setup Steps That Improve Accuracy
- Mount or support the saw securely. Bolt it to a bench or place it on a rigid stand with equal-height supports. Unsupported board ends can lift during the cut and change the angle.
- Check the blade before adjusting the saw. Install the correct blade direction, tighten it according to the manual, and confirm that the guard returns freely.
- Verify the fence and table. Use a reliable square to check that the blade is 90 degrees to the fence and table. A small correction now prevents every repeated cut from being wrong.
- Make a test cut in scrap. Cut a short piece, label the angle, and check it with a square or by joining it to a matching piece. Do not rely only on the printed detent marks.
- Support the workpiece against the fence. Keep the board flat, clamp short or unstable pieces, and keep your hands outside the marked no-hand zone on the table.
- Cut with controlled motion. Start the motor with the blade clear of the stock, let it reach speed, lower it steadily, and wait for the blade to stop before raising the head.
Safety Features Worth Paying For
Look for a transparent lower blade guard, an electric brake, a hold-down clamp, a clearly accessible trigger, and a positive spindle lock for blade changes. A laser or LED cut line can help beginners position the blade, but it does not replace a test cut or a properly aligned fence. Dust collection is also important: connect a shop vacuum when possible, wear eye and hearing protection, and avoid loose clothing or gloves near the rotating blade.
Never cut small pieces freehand if they can twist or fall into the blade path. For very short parts, use a stop block and a longer sacrificial support, while ensuring the offcut cannot become trapped between the blade and fence.
Ownership Costs and Common Wear
The first consumable is usually the blade. The general-purpose blade included with a saw may be suitable for construction lumber, but a 60- or 80-tooth blade produces cleaner results in finished trim. A 10-inch replacement blade commonly costs about $25 to $70; specialized thin-kerf or premium blades can cost more.
Dust accumulation is the next concern. Brush or vacuum the table, fence, vents, and rail assemblies regularly. On sliding saws, keep the rails clean and follow the manual before applying lubricant; excess oil can attract abrasive dust. The parts most likely to cause accuracy problems over time are a dull or damaged blade, loose fence fasteners, worn detents, and play in the sliding mechanism.
A useful ownership calculation is cost per use. A $180 saw used for 30 projects costs about $6 per project before blades. A $450 dual-bevel slider used for 15 projects costs about $30 per project. If both meet the material capacity you need, the simpler saw is the better entry-level purchase.
Final Buying Recommendation
Choose a 10-inch single-bevel saw if your projects are mostly narrow trim and 2×4 lumber and you want the lowest price and weight. Choose a 10-inch sliding saw if you want one beginner-friendly tool that can handle common 2×6 and 2×8 work. Choose a dual-bevel model only when repeated molding or renovation work justifies its extra size and cost. Whichever class you select, accurate support, a sharp appropriate blade, and deliberate safe operation will affect your results more than a long feature list.
