Best Affordable Tools for Cutting and Installing Trim
What's inside
As an Amazon Associate I earn from qualifying purchases. This post may contain affiliate links at no extra cost to you.
What you need for a clean trim job
For baseboards, door casing, and small crown molding, you can get by with a tape measure, pencil, level, stud finder, caulk gun, and a saw that makes repeatable cuts. The right saw depends on the trim and how many rooms you’re doing. A manual miter box can handle a short run of inexpensive pine; a power miter saw saves time on a whole house and makes it easier to repeat angles.
Plan for the fasteners and finish, too. A brad nailer makes installation quicker, but a hammer and finish nails are adequate for a small project. Keep a coping saw or a fine-tooth hand saw available for inside corners: walls are rarely square, and a perfectly cut 45-degree joint often opens up when the corner is actually 88 or 93 degrees.
As an Amazon Associate we earn from qualifying purchases at no extra cost to you.


Budget tool options compared
| Tool | Typical budget range | Best for | Main trade-off |
|---|---|---|---|
| Manual miter box and back saw | $15–$40 | A few short runs of small trim | Slow; cut accuracy depends on the box and careful clamping |
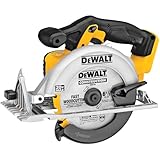
| 7¼-inch circular saw with guide | $50–$120 | Long, straight cuts and basic carpentry | Needs a stable guide; awkward for precise small miters |
| 10-inch compound miter saw | $120–$250 | Repeated trim cuts and mixed angles | Takes storage space; budget models may need calibration |
| Cordless brad nailer | $100–$250 | Room-scale installation without compressor setup | Higher upfront cost; battery platform matters |
| Pneumatic brad nailer and compressor | $80–$200 combined | Occasional work if you already own a compressor | Hose and compressor add setup and noise |
Prices vary by retailer, kit contents, and sales. Treat these as rough US ranges, not a promise of a current shelf price. For occasional repairs, renting a miter saw or borrowing one can cost less than buying a tool that will sit unused.
Choose the saw for the job, not the largest blade
A manual miter box is the cheapest sensible choice when you’re cutting a few pieces of narrow casing or baseboard. It avoids dust and power-tool setup, but inexpensive boxes can flex, and their fixed slots won’t necessarily give you a tight fit on imperfect walls. Clamp the molding, use a sharp fine-tooth saw, and test the cut on scrap before trimming the finished piece.
For a room or more, a 10-inch compound miter saw is a practical value. It handles common trim sizes and repeated bevel or miter cuts without the price and bulk of many sliding saws. A sliding model is useful for wider boards, but it adds cost and requires more bench depth. Check the saw’s actual crosscut capacity against your trim width before buying; blade diameter alone does not tell you what it can cut.
Budget saws may arrive slightly out of square. Verify the fence and blade with a reliable square, then make test cuts and adjust if the saw allows it. A one-degree error can leave a visible gap across a long miter. Use a sharp blade with a higher tooth count for cleaner trim cuts, support long stock level with the saw table, and keep hands outside the marked danger area. A circular saw is a cheaper general-purpose alternative if you already own one, but a guide and careful setup are essential for consistent miters.
Pick a fastening method you’ll actually use
For one doorway or a small repair, a hammer, nail set, and finish nails are enough. They cost little and work without a compressor or charged battery. The downside is slower work and a greater chance of denting soft trim or bending a nail. Pre-drill near the ends of brittle hardwood pieces, and set nail heads just below the surface without crushing the wood.
For multiple rooms, a 18-gauge brad nailer is a useful middle ground: its smaller holes are easy to fill, and the nails hold most lightweight casing and baseboard in place while adhesive or caulk does its job. Brads are not a substitute for hitting framing when the trim needs a firm mechanical attachment. Use nails long enough to pass through the trim and into the backing, but avoid blindly firing into suspected wiring or plumbing.
Choose cordless if you value quick setup and already own compatible batteries. A bare tool can be good value within a battery platform you have; buying a new battery and charger just for one nailer can erase the savings. Pneumatic nailers often cost less as a tool, but a compressor, hose, and noise make them less appealing if you have no air tools. For very occasional use, hand nailing remains the cheaper option.
Spend carefully on accuracy and finishing
A tape measure and pencil are not the place to economize to the point of frustration. A tape with a clear, rigid blade and a basic 4-foot level are sufficient for most rooms. Measure each wall separately rather than assuming matching walls are identical. Cut pieces slightly long when the fit allows, then trim to final length; a piece cut short cannot be repaired with caulk invisibly, especially at an outside corner.
Inside corners are a common failure point. Two 45-degree cuts may leave a gap when the corner is out of square or the walls bow. Cope one end of the molding to follow the profile of the adjoining piece, or test the angle on scrap and adjust the saw setting. Budget-friendly coping saws for trim are inexpensive and can produce a tight joint with practice. Keep a small file handy to remove rough spots rather than forcing the pieces together.
Expect to fill nail holes and caulk small gaps along painted trim, but don’t use caulk to disguise a badly cut joint. Caulk can shrink, crack, or show through paint when a gap is too wide. Sand filled holes smooth, prime bare wood where needed, and use paintable caulk sparingly. A cheap caulk gun can work, though a smooth-rod gun with a release lever gives better control and reduces the chance of leaving a bead that keeps creeping out.
When to buy and where not to overspend
Tools and kits often get discounted around major US holiday sales and during spring home-improvement promotions. Compare the full kit price with the bare tool plus battery and charger; a low advertised price may exclude the parts you need. If you expect to use a saw once, compare rental cost and transport time with the cost of buying, storing, and maintaining it.
For a small painted-trim project, the best-value setup is often a manual miter box, hand tools, and careful fitting. For repeated cuts across several rooms, a calibrated 10-inch miter saw and an 18-gauge nailer save enough time to justify their cost. Buy for the amount of work ahead, not for features that won’t change the fit of the trim.