Best Value Finish Nailer for Trim Installation and Cabinet Projects
What's inside
As an Amazon Associate I earn from qualifying purchases. This post may contain affiliate links at no extra cost to you.
Best Value Finish Nailer for Trim Installation and Cabinet Projects
For most trim installation and cabinet work, the best-value finish nailer is a reliable 16-gauge model with adjustable depth, a tool-free jam release, and enough power to drive 1-1/4- to 2-1/2-inch nails consistently. The right choice depends less on the lowest sticker price than on how often you will use it, whether you already own batteries, and whether you have an air compressor.
A pneumatic nailer usually delivers the lowest operating cost. A cordless nailer costs more at checkout but avoids a hose and compressor. For occasional baseboard, casing, and cabinet projects, either can be a sensible purchase. The expensive mistake is buying a weak or poorly supported tool that leaves proud nail heads, jams repeatedly, or becomes difficult to repair after the warranty ends.
As an Amazon Associate we earn from qualifying purchases at no extra cost to you.


Which Finish Nailer Gauge Should You Buy?
A 16-gauge finish nailer is the most useful all-around option. Its thicker nails hold casing, baseboard, door trim, and face frames securely, while still leaving a hole small enough to fill and paint. Nail lengths from 1-1/4 to 2-1/2 inches cover most interior trim.
An 18-gauge brad nailer is better for delicate molding, thin cabinet trim, and temporary positioning. Its smaller nails are less likely to split narrow stock, but they do not provide the same holding power in thick casing or heavy baseboard. If you are buying only one nailer for general finish work, choose 16 gauge. If your work is mostly small cabinet moldings and small returns, an 18-gauge tool may be the cheaper and more appropriate choice.
A 15-gauge nailer is useful for heavy door jambs, wide crown molding, and substantial built-ins. It leaves a larger hole and costs more to operate, so it is usually excessive for basic cabinet projects.
Best-Value Finish Nailer Types
| Type | Typical street price | Best for | Main trade-off |
|---|---|---|---|
| Pneumatic 16-gauge | $70-$160 for the tool | Frequent trim work and lowest long-term cost | Requires compressor, hose, and fittings |
| Cordless 16-gauge, tool only | $180-$350 | Repair work, punch-list jobs, and working away from power | Higher price and battery weight |
| Cordless 16-gauge kit | $250-$450 | Buyers starting a battery platform | Battery ecosystem increases total cost |
| 18-gauge cordless or pneumatic | $60-$300 | Cabinet trim and delicate molding | Less holding power than 16 gauge |
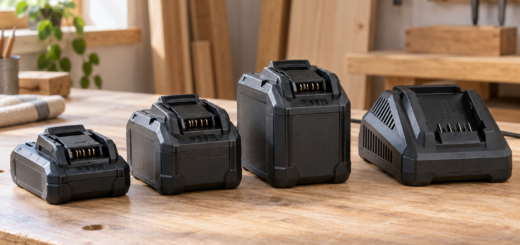
For a homeowner who already owns compatible batteries, a tool-only cordless nailer can be the best value. You avoid buying another charger and battery, and the convenience is worth paying for when you are moving between rooms. If you do not own batteries, compare the complete kit price rather than the bare tool price. A bargain tool-only listing can become expensive after adding a battery and charger.
For a shop, remodeler, or serious DIY user with a compressor already available, a pneumatic 16-gauge finish nailer generally offers the strongest value. Pneumatic tools are lighter, have no battery downtime, and can drive hundreds of nails without changing power sources. The compressor must be capable of roughly 2 to 4 CFM at 90 PSI, depending on the nailer, and a small tank may cycle frequently during long runs.
Features That Actually Matter
Depth adjustment is essential. Different wood densities, nail brands, and air pressures can change how far the nail sinks. A useful tool lets you adjust depth without reaching for a screwdriver. Start with the lowest setting that seats the nail, then increase it gradually. Driving too deep can crush the trim surface and create a crater larger than the nail hole.
A tool-free jam release saves time, particularly with inexpensive nails or when nails are loaded incorrectly. A narrow nose helps you place nails close to corners and inside cabinet frames. A selectable trigger is also worthwhile: sequential firing is safer and more controlled for trim, while bump firing is faster for repetitive work if the tool supports it.
Look for a belt hook that can be moved to either side, a clear nail magazine, and a dry-fire lockout. The lockout prevents wasted shots after the magazine runs empty and reduces wear on the nose. For cordless tools, pay attention to balance. A heavy battery behind the handle can make overhead crown molding tiring even if the nailer has plenty of power.
Do not overvalue a claimed nail capacity or a large adjustment dial. These are minor conveniences compared with consistent depth, low jam frequency, and available replacement parts. A brand with local service, common batteries, and a clear warranty can be a better bargain than an unfamiliar tool priced $30 less.
Performance on Trim and Cabinets
For baseboard and door casing, test the nailer on scrap material before installation. A 2-inch nail is often suitable when fastening 3/4-inch trim over drywall into framing, but the nail must actually enter wood. A nail that only penetrates drywall can loosen as the trim moves. Near the end of a board, stay at least 2 inches from the edge when possible to reduce splitting.
Cabinet work needs more restraint. Use shorter nails where the material is thin, and check the back side before firing into a face frame or panel. A 16-gauge nailer can split narrow stiles or punch through plywood edges. An 18-gauge 18-gauge brad nailer is often the safer choice for applied cabinet molding, toe-kick returns, and small scribe pieces.
Common failure modes include proud nail heads, overdriven nails, jams, and angled exit through the workpiece. Proud heads usually indicate low air pressure, insufficient depth adjustment, or a nailer that lacks power for the material. Overdriving is corrected by reducing depth or pressure. If nails consistently exit sideways, check your firing angle and whether the nail length is excessive.
Seasonal Buying and Price Checks
The best sales often appear around Father’s Day, fall home-improvement promotions, Black Friday, and major holiday weekends. Cordless kits tend to receive the deepest discounts because manufacturers use them to attract buyers to a battery platform. Pneumatic nailers are commonly discounted in multipacks or compressor bundles.
Before buying, check the normal price for at least two weeks if possible. A “sale” price may simply be the regular price with a temporary higher reference price. Also price nails separately. A tool that saves $40 but requires proprietary or unusually expensive fasteners will not remain the value leader after several projects.
For occasional trim installation, buy a dependable pneumatic 16-gauge nailer if you already have a suitable compressor. For mobile work, choose a cordless model on a battery platform you already use; otherwise, consider whether the extra $150 to $250 is worth avoiding a hose. If your projects are mainly cabinets and delicate molding, spend less on an 18-gauge cordless brad nailer rather than paying for a powerful 16-gauge tool you will rarely use.