Best 23 Gauge Pin Nailers for Fine Finish Work
What's inside
As an Amazon Associate I earn from qualifying purchases. This post may contain affiliate links at no extra cost to you.
Best 23 Gauge Pin Nailers for Fine Finish Work
For delicate moldings and small assemblies, choose a pin nailer with a narrow, non-marring nose and enough pin length for the material; the Metabo HPT NP35A is a strong corded all-rounder, while the Milwaukee M12 23 Gauge Pin Nailer suits cordless work and the Grex P635 is worth considering for frequent shop use. Pin nails leave tiny holes and are useful for positioning trim while glue dries, but they provide limited holding power on their own. The right pick depends less on headline capacity than on access, pin length, and how well you can place each fastener without denting the work.
Quick comparison
| Model | Power | Pin lengths | Magazine capacity | Best fit |
|---|---|---|---|---|
| Metabo HPT NP35A | Corded pneumatic | 5/8–1 3/8 in. | 100 pins | Shop work across a broad range of trim thicknesses |
| Milwaukee M12 23 Gauge Pin Nailer | 12V cordless | 1/2–1 3/8 in. | 120 pins | Portable trim and punch-list work |
| Grex P635 | Corded pneumatic | 3/8–1 3/8 in. | 100 pins | Fine trim and small assemblies needing shorter pins |
| Makita AF353 | Corded pneumatic | 5/8–1 3/8 in. | 100 pins | Regular shop use with a slim nose |
Specifications can vary by market or revision; check the manual for the exact model before buying. Magazine capacity is a convenience measure, not a sign of stronger fastening. All four are intended for headless 23-gauge pins, not brads or staples.
As an Amazon Associate we earn from qualifying purchases at no extra cost to you.

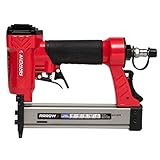

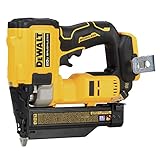
Choose by the work you do
- Small moldings and short pins: The Grex P635 accepts pins from 3/8 inch, useful when a thicker fastener could break through a narrow profile or exit a small assembly. Confirm that the pin is long enough to engage the backing material.
- One nailer for varied trim: The Metabo HPT NP35A covers 5/8 to 1 3/8 inches and uses a corded air supply. It makes sense if you already own a compressor and mainly work at a bench.
- Moving between rooms or sites: The Milwaukee M12 avoids an air hose and compressor. Its 120-pin magazine means fewer reloads than the 100-pin options, though battery, charger, and tool weight matter when working overhead or in tight corners.
- Frequent pneumatic shop work: The Makita AF353 is a practical option for users who prefer a slim pneumatic tool and already have a compatible air setup. Its 5/8-inch minimum pin length is less suited to very thin stock than the Grex.
For occasional projects, a compatible pneumatic nailer may be the lower-cost route if you already own a compressor. Buying a compressor just for pin nailing adds expense, noise, and storage needs; cordless becomes more attractive when portability saves setup time. Prices vary by kit and region, so compare the tool-only cost with the complete setup you actually need.
Why pin length and nose design matter more than capacity
A pin nailer’s narrow fastener leaves a small entry hole, but the pin can still split thin stock or emerge through the far side. As a starting point, choose a pin that passes through the trim and penetrates the backing by roughly 1/2 inch, then adjust for wood hardness and the shape of the molding. For example, 1/4-inch trim over a solid backing may call for a 3/4-inch pin. That is a fit estimate, not a universal rule: angled contact, gaps, or fragile edges can change the result.
Use the shortest pin that gives dependable engagement. Longer pins can improve reach into a backing piece, but they are not automatically stronger in a useful way: a pin driven too deep may split a small part, hit a hidden object, or emerge on the opposite face. Test on offcuts of the same material and thickness before fastening a visible piece.
The nose is your reference point for placement. A narrow profile helps you see the contact area and reach close to an edge, while a slippery or bulky nose can shift as you press the tool into a molding. Look for a nose design that gives clear sight of the firing point and does not leave marks when pressed firmly. Protective tips help, but a dirty, worn, or missing tip can still mar a finish.
Holding performance: pins position; glue does the structural work
On small moldings, pins are excellent temporary clamps: they keep a piece from sliding while adhesive sets, and the small holes are usually easier to fill or conceal than brad holes. On a tiny assembly, they can reduce movement during glue-up. They are not a substitute for a sound joint, screws, or another appropriate mechanical fastening method when the assembly must carry a load.
Wood species, grain direction, pin length, and how firmly the pieces fit all affect holding. A pin driven near the end of a narrow molding may split it; two pins placed at different angles can resist movement better than one, but are still not a structural joint. Apply an even layer of suitable glue, clamp or hold the parts in position, and use pins only to prevent shifting. For highly visible work, place pins where the holes can be filled, hidden, or kept out of the sightline.
Setup and ownership details that prevent frustrating results
- Match the pin type and length. Use straight 23-gauge headless pins approved for the tool. Do not force an incompatible brand or size into the magazine.
- Set air pressure by testing. For pneumatic models, start within the manufacturer’s specified range and test on scrap. Increase pressure only enough to seat pins consistently; excess pressure can bury pins or damage delicate stock. Cordless tools need a charged, compatible battery.
- Keep the nose square and steady. Press the contact nose firmly against the work before firing. On narrow trim, support the piece close to the firing point and avoid placing pins too near an edge or end.
- Inspect depth and placement. If pins sit proud, adjust the tool or pressure according to its manual. If they bury too deeply, reduce pressure or change the setting. A proud pin can often be carefully set with a nail punch; a buried pin may require filler.
- Clear jams safely. Disconnect the air supply or remove the battery before opening the magazine or clearing a jam. Follow the model’s instructions rather than reaching into the nose while the tool is powered.
Common wear points include the nose tip, driver blade, seals on pneumatic tools, and the magazine follower. Keep the magazine free of dust and pin fragments; debris can cause intermittent feeding or crooked shots. Use only the lubrication and maintenance schedule specified by the manufacturer—some modern pneumatic tools require little or no routine oiling. Frequent misfires after correct loading and setup may indicate a worn driver, damaged pins, or a service issue rather than a need to raise pressure.
Bottom line
Choose the Grex P635 when the ability to use short pins matters most, the Metabo HPT NP35A for broad pneumatic shop use, the Milwaukee M12 when portability and a larger magazine are priorities, or the Makita AF353 for regular pneumatic trim work. Before deciding, check the minimum pin length against your thinnest material, confirm the nose gives you the visibility your work needs, and consider whether you already own the compressor or battery platform. For delicate work, careful placement and a well-fitted glue joint matter more than magazine size.
