How to Make a Plunge Cut With a Circular Saw Safely
What's inside
- What a plunge cut is—and when to use one
- Choose the right saw, blade, and workpiece
- Before starting: inspect and support the work
- Step-by-step: how to make a plunge cut with the circular saw
- Kickback risks and how to reduce them
- Ownership details that affect cut quality
- When not to use a circular saw plunge cut
- Related Guides
- What a plunge cut is—and when to use one
- Choose the right saw, blade, and workpiece
- Before starting: inspect and support the work
- Step-by-step: how to make a plunge cut with the circular saw
- Kickback risks and how to reduce them
- Ownership details that affect cut quality
- When not to use a circular saw plunge cut
- Related Guides
As an Amazon Associate I earn from qualifying purchases. This post may contain affiliate links at no extra cost to you.
To make a plunge cut with the circular saw safely, mark the entry point, set the blade only slightly deeper than the workpiece, position the saw so the blade is clear of the material, and lower it gradually while keeping both hands and your body out of the kickback path.
As an Amazon Associate we earn from qualifying purchases at no extra cost to you.
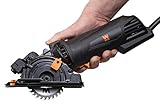


What a plunge cut is—and when to use one
A plunge cut starts in the middle of a panel rather than at an outside edge. It is useful for cutting an opening in plywood, trimming a section of subfloor, making a vent opening, or creating an access panel. The saw is lowered into the material while the motor is running, then guided along the marked line.
This technique is different from starting a normal edge cut. The blade is partly enclosed by the workpiece during entry, so a small change in angle, excessive depth, or a pinched blade can produce kickback. If the cut can be started from an edge, that is usually the lower-risk method.
Choose the right saw, blade, and workpiece
A standard sidewinder circular saw with a functioning lower blade guard can make plunge cuts, but the saw must be easy to control. A track saw is often more predictable for long, straight openings because its guide helps prevent the saw from wandering. A cordless saw reduces the risk of cutting the power cord, while a corded saw avoids battery-runtime interruptions.
| Situation | Suitable setup | Useful specification | Why it helps |
|---|---|---|---|
| Occasional plywood or subfloor cut | 5-1/2- or 6-1/2-inch circular saw | At least 2 inches of cutting depth at 90 degrees | Enough capacity for common 3/4-inch sheet goods and many flooring materials |
| Frequent cabinet or sheet-goods work | 6-1/2-inch saw with guide rail or track | About 2-1/8 inches at 90 degrees; 45-degree bevel adjustment | Combines capacity with more consistent straight cuts |
| Deep framing lumber or thick workpieces | 7-1/4-inch circular saw | At least 2-1/2 inches at 90 degrees | Provides additional blade clearance and depth range |
| Limited indoor workspace | Compact cordless saw | 5-1/2- or 6-1/2-inch blade; battery of 4 Ah or larger for repeated cuts | Less cord management, with adequate runtime for several sheet cuts |
Use a sharp blade designed for the material. A fine-tooth plywood or finish blade reduces splintering in veneer and cabinet panels; a general-purpose framing blade is more appropriate for construction lumber. Never use a wood blade to cut masonry, metal, or material containing hidden fasteners unless the blade and saw are specifically rated for it.
Before starting: inspect and support the work
- Disconnect the saw from power or remove the battery while installing the blade or changing settings.
- Check that the blade is sharp, correctly installed, and suitable for the material.
- Squeeze and release the lower guard. It should move smoothly and return fully over the teeth.
- Confirm that the base plate is flat and the depth and bevel locks hold securely.
- Support the panel on sacrificial boards so the blade will not strike the floor, sawhorses, or hidden supports.
- Keep the cutout area supported on both sides until the cut is nearly complete, but leave enough clearance for the blade.
- Inspect for nails, screws, plumbing, wiring, and other concealed hazards, especially when cutting a finished floor or wall panel.
Wear eye protection and hearing protection. Use a suitable dust mask or an attached dust extractor when cutting materials that generate fine dust. Keep loose clothing, cords, and hands away from the blade path.
Step-by-step: how to make a plunge cut with the circular saw
1. Mark the cut clearly
Draw the complete opening with a straightedge, square, or guide rail. Mark the waste side of each line so you know which side of the blade must follow the layout. For a rectangular opening, check both diagonals: if they are equal, the layout is square.
Plan the entry point. For a rectangular cutout, enter near the center of the waste area rather than trying to begin directly on a corner. Corners are more likely to cause the saw to twist, and the blade may overrun the line while the cutout is being removed.
2. Set the blade depth
Unplug the saw or remove its battery before adjusting it. Set the blade so its lowest tooth extends about 3 to 6 mm, or 1/8 to 1/4 inch, below the workpiece. For a 19 mm, or 3/4-inch, panel, the exposed cutting depth will usually be about 22 to 25 mm.
More blade exposure is not better. A deep setting increases the amount of tooth moving below the material and can make the saw harder to control. It also increases the chance of striking a hidden support or utility. Rotate the blade by hand, with the saw disconnected, to confirm that the teeth can clear the support below.
3. Position the saw safely
Place the front of the base plate on the material with the blade guard still covering the blade. The blade must be above the planned waste area, not over the section you intend to keep. Hold the front handle with one hand and the rear handle with the other.
Stand slightly to the side of the saw rather than directly behind it. If the blade binds and the saw moves backward, this stance keeps your body out of the most likely kickback line. Keep both feet balanced and make sure the cord or battery pack cannot catch on the workpiece.
4. Start the saw before entering
Pull the trigger while the blade is clear of the material and allow it to reach full speed. Do not lower a stationary blade into the panel. A running blade cuts more cleanly and is less likely to snag as it enters.
Some saws have a blade-brake feature, but do not rely on it as a substitute for releasing the trigger and waiting for the blade to stop before lifting or repositioning the tool.
5. Lower the blade gradually
Keep the front edge of the base plate resting on the panel and slowly pivot the saw downward around that front edge. Use controlled pressure; do not force the saw into the material. Watch the blade location through the sight notch or along the marked line, while keeping your fingers on the handles.
As the blade enters, keep the base plate flat. Do not twist the saw to correct the line while the teeth are engaged. If the saw begins to pull, chatter, or bind, release the trigger, hold the saw in place until the blade stops, and lift it out before investigating.
6. Complete the cut without overreaching
Once the blade is fully lowered, guide the saw along the marked line at a steady feed rate. Keep the blade from entering the part of the panel that will remain. At the end of the cut, support the waste piece so it cannot drop and pinch the blade.
For a rectangular opening, stop before the blade reaches the corner if the saw base would collide with the adjacent edge. Finish the last few millimeters with a handsaw, oscillating tool, or jigsaw. This is often cleaner and safer than forcing the circular saw to turn sharply.
7. Finish and inspect the opening
Release the trigger and wait for the blade to stop completely before lifting the saw. Disconnect power before clearing dust or removing the cutout. Inspect the edges for splintering, verify that the opening is the correct size, and check that no fastener or support was damaged.
Kickback risks and how to reduce them
- Blade pinching: Support the material so the kerf does not close behind the blade. Do not allow a large cutout to sag while it is still attached.
- Excessive depth: Keep blade exposure to roughly 3 to 6 mm below the workpiece whenever practical.
- Twisting: Make straight cuts and keep the base plate flat. Never rotate the saw to follow a curved corner.
- Dull or incorrect blades: Replace blades that burn, wander, require unusual force, or have damaged teeth.
- Unstable work: Clamp or properly support the panel. A moving workpiece can pull the saw sideways.
- Blocked guard: Stop using the saw if the lower guard sticks, catches on the material, or fails to cover the blade.
Ownership details that affect cut quality
The blade is usually the first consumable to wear. Resin buildup, overheated teeth, and repeated contact with screws can make a blade cut slowly and increase kickback risk. Clean resin from the blade according to the blade maker’s instructions, and replace it when sharpening no longer restores smooth cutting.
Keep the saw’s vents clear of dust, check the base plate for burrs, and periodically verify that the depth and bevel locks do not slip under pressure. A guide rail may need its anti-slip strips replaced after repeated use. For cordless saws, a larger battery can improve runtime but adds weight; for one or two occasional plunge cuts, a smaller battery may make the saw easier to control.
When not to use a circular saw plunge cut
Choose another method when the opening is too small for the saw base, the material contains unknown utilities, the cut requires a tight inside corner, or the workpiece cannot be supported securely. A jigsaw, oscillating tool, router, or a hole saw may be better suited, depending on the material and the required edge quality. If you cannot confirm what is behind a wall or floor, stop and investigate before cutting.
