How Do You Use a Circular Saw? A Safe Step-by-Step Guide
What's inside
- Step 1: Pick the Right Blade for the Material
- Step 2: Unplug or Remove the Battery, Then Set Depth and Bevel
- Step 3: Measure, Mark, and Support the Workpiece
- Step 4: Make the Cut
- Kickback: The One Hazard That Actually Hurts People
- Corded vs. Cordless vs. Worm Drive: Which Setup Fits You?
- Ownership Realities: What Wears Out and What Trips People Up
- FAQ
- Related Guides
- Step 1: Pick the Right Blade for the Material
- Step 2: Unplug or Remove the Battery, Then Set Depth and Bevel
- Step 3: Measure, Mark, and Support the Workpiece
- Step 4: Make the Cut
- Kickback: The One Hazard That Actually Hurts People
- Corded vs. Cordless vs. Worm Drive: Which Setup Fits You?
- Ownership Realities: What Wears Out and What Trips People Up
- FAQ
- Related Guides
As an Amazon Associate I earn from qualifying purchases. This post may contain affiliate links at no extra cost to you.
To use a circular saw, you set the blade depth so it barely clears the material, support the workpiece so the cutoff falls freely, align the baseplate’s notch with your cut line, and push the saw forward at a steady pace while the blade runs at full speed. That’s the core of it — the details below cover blade selection, bevel settings, and the safety habits that keep your fingers and your lumber intact. Whether you’re asking how to use a skill saw safely or just how to properly use a circular saw for the first time, the sequence is the same.
As an Amazon Associate we earn from qualifying purchases at no extra cost to you.
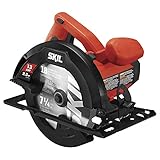


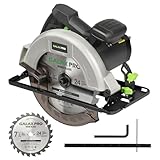
Step 1: Pick the Right Blade for the Material
The blade does the cutting; the saw just spins it. Most circular saws ship with a general-purpose 24-tooth blade that’s fine for rough framing lumber but will tear up plywood faces and melt through plastics poorly. Match the tooth count and geometry to what you’re cutting:
| Material | Blade Type | Tooth Count (7¼”) | Notes |
|---|---|---|---|
| Framing lumber, 2x stock | Ripping/framing carbide | 18–24 | Fast, rough cut; big gullets clear sawdust |
| Plywood, MDF | Crosscut/panel blade | 40–60 | More teeth = cleaner face veneer |
| Laminate, melamine | Fine crosscut or triple-chip | 60–80 | Cut good-side down; scoring pass first helps |
| Pressure-treated / wet lumber | Framing carbide | 18–24 | Keep blade clean; wet sawdust binds the blade |
| Cement board, masonry | Diamond or abrasive disc | N/A (continuous rim) | Wear a respirator — silica dust is serious |
| Thin aluminum, ferrous metal | Metal-cutting carbide | 30–48 | Clamp firmly; metal chips are hot and sharp |
One rule overrides everything: make sure the blade’s arbor size matches your saw (typically 5/8″ for 7¼” saws, 10mm or 20mm on worm-drive models) and that the rotation arrow on the blade matches the arrow on the saw’s guard.
Step 2: Unplug or Remove the Battery, Then Set Depth and Bevel
Before adjusting anything, kill the power. On a corded saw, unplug it. On a cordless saw — whether it’s a Makita, DeWalt, Milwaukee, or Ryobi — pull the battery pack out entirely.
Blade depth
Loosen the depth adjustment lever at the rear of the saw. Set the blade so the lowest tooth extends about 1/8″ to 1/4″ below the bottom of the material. This is the single most skipped step, and it matters for two reasons:
- Safety: Less exposed blade means less to hit if the saw kicks back, and less blade under the work to strike a sawhorse, bench, or your leg.
- Cut quality: Shallow exposure reduces tear-out and keeps the blade from grabbing too much material at once.
Bevel angle
Most circular saws tilt the baseplate from 0° to 45°, and some reach 50° or beyond. For a square crosscut, confirm the stop is at 0° — check it with a speed square against the blade. For a 45° miter on trim or decking, loosen the front bevel lever, tilt, and lock. Note that tilting the bevel reduces effective depth of cut: a 7¼” saw that cuts 2⅜” deep at 0° typically cuts only around 1¾” at 45°, which is not enough to fully sever a 2×6 in one pass.
Step 3: Measure, Mark, and Support the Workpiece
Mark your cut line clearly with a pencil and a speed square or combination square. For cuts where the edge must be dead straight — ripping plywood, for example — clamp a straightedge (a level, a factory-edge board, or a dedicated guide like a Kreg Rip-Cut or Accu-Cut track) parallel to the cut line, offset by the distance from your blade to the edge of the baseplate.
Proper support is where most beginners go wrong when learning how to use a circular saw safely. The goal: the piece you’re keeping is supported, and the cutoff can drop away freely without pinching the blade.
- Place the material across sawhorses or on foam insulation board laid on the ground.
- Position the cut line so the offcut overhangs the support — never trap the blade between two supported ends. A pinching kerf is what causes kickback.
- For plywood, support the sheet near the cut line so it doesn’t sag; sagging closes the kerf mid-cut and stalls or throws the saw.
- Keep the power cord or your body clear of the drop zone.
Step 4: Make the Cut
Here’s the cutting sequence, and it applies whether you’re using a compact 5½” trim saw or a full-size worm drive:
- 1. Wear safety glasses and hearing protection. Add a dust mask for MDF or treated lumber.
- 2. Grip the saw with both hands — front knob and rear handle. Stand to the side of the cut line, never directly behind the blade.
- 3. Rest the front of the baseplate on the workpiece with the blade clear of the edge. Line up the baseplate’s front notch (the 0° guide mark) with your pencil line.
- 4. Pull the trigger and let the blade reach full speed before touching the material. Starting while in contact with wood invites kickback.
- 5. Push forward at a steady, moderate pace. Let the blade’s speed do the work — forcing it slows the motor, burns the edge, and increases kickback risk. If the saw bogs down, slow your feed rather than pushing harder.
- 6. Follow through the cut and release the trigger. Keep the saw still until the blade stops; the lower guard retracts during the cut and springs back afterward.
Never pull the saw backward, never pin the lower guard open with your finger or tape, and never set the saw down while the blade is still coasting.
Kickback: The One Hazard That Actually Hurts People
Kickback happens when the blade binds in the kerf and the saw lunges back toward the operator. It’s fast — faster than your reflexes. The main causes, in order of how often they’re responsible:
| Cause | How It Happens | Prevention |
|---|---|---|
| Kerf pinching | Workpiece sags or shifts, closing the gap behind the blade | Support the offcut side properly; let cutoffs fall free |
| Blade wandering off line | Twisting the saw mid-cut binds the blade sideways | Use a guide; keep baseplate flat and pressure forward |
| Dull or dirty blade | Pitch buildup or worn teeth increase friction and grab | Clean blades with pitch remover; replace when cuts burn |
| Starting in contact | Blade touching wood when trigger is pulled | Spin up to full speed first, always |
Some newer saws include electronic kickback brakes that cut motor power when a sudden stall is detected — a worthwhile feature if you’re new to the tool, though it’s a backstop, not a substitute for technique.
Corded vs. Cordless vs. Worm Drive: Which Setup Fits You?
If you haven’t bought the saw yet, the choice affects how you’ll use it:
| Type | Typical Blade Size | Cutting Depth @ 0° | Weight | Best For | Typical Price Range |
|---|---|---|---|---|---|
| Compact cordless (5½–6½”) | 5½”–6½” | 1½”–2⅛” | 5–7 lbs | Sheet goods, light DIY, one-hand cuts | $70–$180 |
| Full-size sidewinder (7¼”) | 7¼” | ~2⅜” | 8–10 lbs | General purpose, framing to finish | $80–$250 |
| Worm drive / rear handle | 7¼” | ~2⅜” | 13–16 lbs | Framing, long rips, wet lumber | $180–$400 |
For most homeowners, a 7¼” cordless sidewinder on an 18V/20V platform you already own is the practical answer — enough depth for 2x material at 90°, light enough to control, and no cord to manage over a sheet of plywood.
Ownership Realities: What Wears Out and What Trips People Up
- Blades are consumables. A carbide framing blade stays sharp for a few projects; fine-tooth panel blades dull faster on MDF. Burning smells and rough edges mean it’s time to swap.
- Lower guards get sticky. Sawdust and pitch in the pivot make the guard sluggish. Blow it out with compressed air occasionally — a guard that doesn’t snap back is a real hazard.
- Cordless batteries sag under load. A 2.0Ah pack dies quickly ripping lumber; a 4.0–5.0Ah battery is the sensible minimum for a 7¼” saw.
- Common beginner mistakes: setting depth too deep, cutting good-side-up on plywood (tear-out goes on the top face, so mark and cut good-side down), and letting the cord trail into the blade path on corded models.
FAQ
Can a circular saw cut a 4×4?
Not in one pass — a 7¼” blade only reaches about 2⅜” deep. Cut from one side, flip the post, and finish from the other side, or use a reciprocating saw for the remainder.
Which side of the line do I cut on?
The blade removes about 1/16″ to 1/8″ (the kerf). Always position the blade on the waste side of your line so the kerf comes out of the offcut, not your measured piece.
Is it safe to use a circular saw left-handed?
Sidewinders place the blade on the right of the motor, so left-handers get a better sightline holding with the right hand. Rear-handle and blade-left saws (like the Milwaukee M18 Fuel rear-handle models) suit lefties better. Either way, never reach across the blade path.
Do I need a track or guide for straight cuts?
For crosscuts on lumber, no — a speed square works. For ripping sheet goods longer than about two feet, a clamped straightedge or track guide is strongly recommended; freehand rips wander more than people expect.