Best Affordable Measuring and Marking Kit for Cabinet Installation
What's inside
As an Amazon Associate I earn from qualifying purchases. This post may contain affiliate links at no extra cost to you.
A cabinet layout can go wrong by a fraction of an inch and still leave you with a visible gap, a drawer that rubs, or hardware that doesn’t line up. You don’t need a premium layout system to avoid those problems. A reliable tape measure, a sharp pencil, a level, and a square cover most cabinet installation work; add a marking gauge or story stick when you need repeatable spacing.
For a first-time installer, a sensible kit usually costs about $35–$80, depending on what you already own. Spend on tools that stay accurate and are easy to read. Skip specialty gadgets unless the job actually calls for them.
As an Amazon Associate we earn from qualifying purchases at no extra cost to you.


The core kit—and what each tool does
Tape measure: Choose a 16- or 25-foot tape with clear fractional markings, a sturdy hook, and a case that feels comfortable in your hand. A 16-foot tape is lighter and adequate for many kitchens; 25 feet is more useful for long walls and measuring rooms alone. Check the hook for looseness. A damaged or bent hook can shift readings, especially when measuring from an edge.
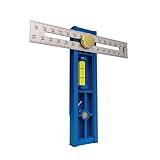
Combination square: A 12-inch model is useful for marking short lines, checking cabinet edges, and laying out hardware. It should lock firmly and read square against a known straight edge. A low-cost square is fine if it holds its setting; a loose head can make every mark wrong.
Level: A 24-inch level is a practical size for checking individual cabinets and short runs. For a longer wall or cabinet run, a longer level or straightedge helps reveal dips that a short tool misses. Before relying on a level, flip it end for end on the same surface. If the bubble changes position, don’t use it to set a cabinet line.
Marking tools: Use a sharp mechanical pencil or a fine carpenter’s pencil for visible layout lines. Keep a utility knife for scoring reference marks on finished surfaces, but practice on scrap first: a deep score can chip veneer or paint.
Browse a 16-foot tape measure with clear fractional markings if your current tape has a sticky hook or hard-to-read scale. For a basic add-on, a 12-inch combination square earns its place in more jobs than most specialty layout tools.
Where budget money is best spent
| Tool | Typical budget range | Good enough when | Pay more when |
|---|---|---|---|
| 16- or 25-foot tape | $8–$20 | The hook is intact and the markings are legible | You measure alone often or need a standout tape that stays extended |
| 12-inch combination square | $10–$25 | The head locks and the blade checks square | You need frequent, repeatable precision or the budget model slips |
| 24-inch level | $12–$30 | It passes the flip test and the vial is easy to read | You install long runs and want a longer, stiffer body |
| Story stick or marking gauge | $0–$25 | A scrap offcut can hold repeated measurements | You need frequent adjustable, repeatable marks |
Prices vary by retailer and season; these are practical ranges, not quotes for a particular brand or model. A cheap tool that passes a simple accuracy check can be a better buy than an expensive one that’s rarely used. On the other hand, a bargain square that won’t lock is false economy: the time spent finding and correcting layout errors can cost more than the tool.
Use a story stick for repeated measurements
Cabinet work involves repeating dimensions: cabinet widths, filler gaps, shelf positions, and handle locations. Instead of measuring the same distance again and again, transfer it to a straight scrap of plywood or a wood strip. Mark the reference points, label them, and use the stick to carry those marks across the run. This avoids small additions of measurement error.
For knobs or pulls, measure the hardware’s actual hole spacing rather than trusting its packaging alone. Make a drilling template from scrap, test it on an offcut, and confirm the first installed pull before drilling the rest. A 1/16-inch mismatch may be noticeable on a line of handles, and plugged holes in finished cabinet doors are difficult to hide.
A basic woodworking marking gauge can help when you repeatedly mark a consistent setback from an edge. For a one-off kitchen, though, a homemade story stick often does the job at no added cost.
A simple layout routine that prevents rework
First, check the wall and floor rather than assuming they’re straight. Measure the wall at the top, middle, and bottom of the planned cabinet run. Note the narrowest dimension, and check the floor at several points with a level or straightedge. A wall can bow by 1/4 inch or more; forcing cabinets to follow it can leave doors out of line or create an uneven countertop gap.
Mark the cabinet reference line with a level, then verify it from the opposite direction. Measure cabinet positions from one consistent starting point instead of chaining each measurement from the previous cabinet. Chained measurements accumulate error: four small 1/16-inch slips can become a 1/4-inch drift by the end of a run.
Before drilling or fastening, dry-position the cabinets, check the faces for alignment, and mark stud locations separately from cabinet layout marks. Use a pencil color or labeling system that distinguishes each. On finished surfaces, make marks where they’ll be concealed when possible. Erasing pencil from a light cabinet finish can leave a gray smear, while adhesive tape can pull weak paint or veneer.
When to buy a kit—and when to wait
Bundled measuring kits can save money if they include tools you’ll actually use, but compare the contents and individual prices. A set full of small rulers and redundant pencils is not a bargain if it lacks a dependable square or level. For a basic installation, buy the tape, square, and level separately if that lets you check quality and keep the total around $35–$80.
Seasonal sales around spring renovation periods, holiday promotions, and year-end clearance can lower tool prices, but discounts on inexpensive measuring tools may amount to only a few dollars. Don’t delay an installation over a small saving if your current tool is inaccurate. If you can wait, compare the regular price across retailers and look for a return policy that lets you test the tool at home.
For one cabinet run, borrowing a long level or using a straight, verified edge can be smarter than buying a premium tool. For repeated installations, prioritize a level that passes the flip test and a square that holds its setting. Accuracy and repeatability matter more than a large tool set or a familiar logo.