Best Value Tools for Building a Small Entryway Bench
What's inside
As an Amazon Associate I earn from qualifying purchases. This post may contain affiliate links at no extra cost to you.
A small entryway bench is a forgiving first furniture project: it can be built with a saw, drill, and a few clamps, and the parts are short enough to limit waste. The best value usually comes from buying only the tools you are missing, rather than assembling a full workshop for one bench. For a bench about 36 inches wide, 14 inches deep, and 18 inches high, these are the tools worth paying for—and the corners where a cheaper option is perfectly adequate.
As an Amazon Associate we earn from qualifying purchases at no extra cost to you.


Plan the tool budget around the build
Before shopping, settle on a design. A simple bench needs a seat, four legs, and rails joining the legs; a lower shelf adds more cuts and joints. Using construction lumber or pre-cut project boards can keep material costs down, but boards may be bowed, twisted, or cupped. A straightedge and careful inspection at the store can save more than buying a planer to fix bad stock later.
Set aside roughly $40–$100 for a basic drill and driver setup, $50–$120 for a circular saw with a usable guide, and $15–$40 for clamps and measuring tools. Those are broad street-price ranges, not guaranteed sale prices. If you already own a drill, put the money toward a better blade, clamps, or a straight board instead.
Buy first: drill, saw, and measuring tools
A cordless drill is the most useful purchase if you do not own one. A compact 12-volt model is usually enough for pilot holes and screws in a small bench; an 18- or 20-volt drill is more versatile for later projects but often costs more and weighs more. A separate impact driver is convenient, not essential. Driving long screws with a drill can work, but use a clutch and stop before the screw strips or pulls the joint out of square.
For cutting seat boards and rails, a corded circular saw is often the best low-cost choice if you have an outlet nearby. A cordless saw costs more once batteries are included, but is easier to use outside or in a cramped space. Look for a blade with at least 24 teeth for rough framing cuts; a 40-tooth blade generally leaves a cleaner edge on furniture parts. A cheap saw can do the job, but a dull or poor-quality blade tends to tear out the board edges and makes accurate cuts harder.
Buy a 16-foot tape measure, a pencil, and a combination square or reliable speed square. These cost little compared with power tools and help prevent a bench that rocks because one leg was cut short. Measure from the same reference edge each time; small errors compound when rails are cut to fit between legs.
Which saw is better value?
| Tool | Typical cost range | Best for | Main trade-off |
|---|---|---|---|
| Corded circular saw | $50–$100 | Occasional cuts at home | Needs an outlet and careful cord placement |
| Cordless circular saw | $80–$180, often bare tool | Frequent work away from outlets | Battery and charger can raise the real cost |
| Hand saw | $15–$40 | A few short cuts with patience | Slower; keeping cuts square takes practice |
For one bench, borrowing a circular saw or asking the lumberyard to make rough cuts may beat buying one. Store cuts are not always precise enough for final joinery, though, so confirm dimensions before relying on them. A hand saw is a reasonable budget choice for a small number of cuts, but it is easy to drift off square in thick stock.
Spend modestly on clamps and joints
Clamps hold the frame steady while you check it for square and drive fasteners. Two 24-inch bar clamps are a practical start; add two smaller clamps if the design has a shelf or narrow rails. Budget clamps are fine for light furniture work, but their pads can mark soft pine and their bars may flex under heavy pressure. Put scrap wood between the clamp and the bench, and tighten only until the joint closes.
For a first build, screws and glue are more approachable than mortise-and-tenon joinery. Drill pilot holes near board ends—about 1/8 inch is a useful starting point for common furniture screws—and test on scrap, since the right size depends on the screw and wood. Without a pilot hole, pine can split; with an oversized hole, the screw may fail to grip. A pocket-hole jig can simplify hidden rail connections, but it is optional: ordinary countersunk screws can work if the heads are placed neatly and the joints are designed for them.
Buy 24-inch bar clamps if you expect to build more than one project; for a single bench, borrowing them or using a small set of budget clamps is sensible. Don’t substitute spring clamps for the main frame assembly: they do not provide enough pressure to pull a loose joint tight.
Optional tools: useful, but not required
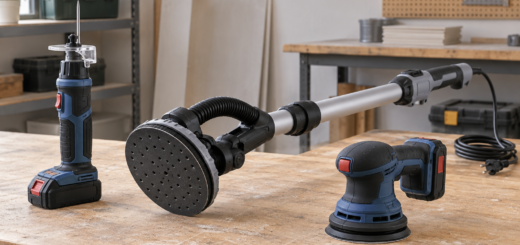
An orbital sander saves time, especially on a seat where rough edges are uncomfortable. A basic corded model is often better value than a premium cordless one for occasional use. Start with 80- or 100-grit paper to remove saw marks, then finish at 150 or 180 grit. Sanding directly through to very fine grits can make some finishes harder to absorb evenly.
A jigsaw is handy for curves and notches, but it is a poor substitute for a circular saw when you need several straight, square cuts. A miter saw can make repeatable crosscuts, yet it takes up space and is hard to justify for one small bench. If you want a cleaner edge without buying another machine, use a straightedge as a saw guide and make a test cut on scrap.
For sanding, compare corded random-orbit sanders before paying extra for cordless convenience. For joining rails, a pocket-hole jig kit is worth considering if hidden screw heads matter, but it does not make a weak or poorly fitted joint strong by itself.
Brand value and seasonal buying
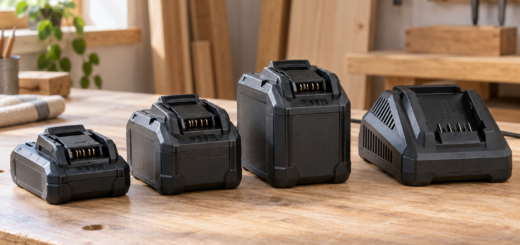
When comparing brands, compare the complete kit: tool, battery, charger, blade, and warranty. A low bare-tool price is not a bargain if you have no compatible battery. If you already own batteries in a platform, staying with that brand often makes financial sense. For a first cordless purchase, a smaller starter kit can cost less than buying a bare tool and battery separately, but check the included battery capacity and whether the charger is full-speed or basic.
Prices often soften around major holiday sales and spring project promotions, but discounts vary by retailer and model. Compare the price with recent regular pricing, not just the claimed percentage off. For a corded tool or simple clamp, there is little reason to wait months for a sale if the current price is fair. For a battery-platform purchase, waiting can pay because bundled kits are more common than steep discounts on batteries alone.
Avoid the mistakes that waste money
Do not buy every tool a furniture video uses. For this bench, a drill, a way to make straight cuts, a square, and a few clamps cover the essential work. A router, table saw, and premium dust extractor can wait. Spend the saved money on straight, dry lumber and a suitable finish; warped boards and rushed glue-ups are more likely to spoil the result than a mid-priced drill.
Check the frame for square before the glue sets, and dry-fit the parts first. If the bench rocks, measure the leg lengths on a level surface instead of assuming the floor is even. A low-cost tool is fine when it can make the required cut safely and accurately; replace it only when its limits show up as repeated errors, rough results, or unsafe handling.