Best Value Tools for Building a Small Outdoor Planter
What's inside
As an Amazon Associate I earn from qualifying purchases. This post may contain affiliate links at no extra cost to you.
For a small outdoor planter, you can usually get by with a tape measure, a saw, a drill, and a few clamps. The best value is rarely a large matching tool set: buy the tool that suits the cuts and materials you actually have, and avoid paying for power or features the job will not use. A basic planter roughly 2 feet long and 1 foot wide is within reach for a careful beginner.
As an Amazon Associate we earn from qualifying purchases at no extra cost to you.


Tools the job needs
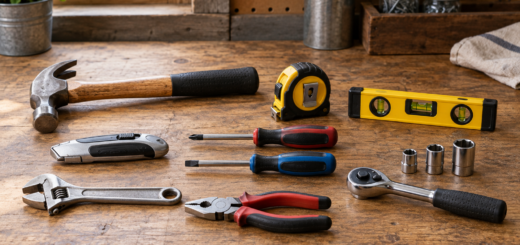
Most simple planters use straight boards, screws, and a rectangular layout. A tape measure and pencil handle marking; a square helps keep corners close to 90 degrees; a saw makes the cuts; and a drill/driver makes pilot holes and drives screws. Clamps are useful but optional if you can hold the pieces securely while fastening them.
If the lumberyard will cut boards to length, you may not need to buy a saw for this project. Ask whether cuts are included and check the measurements before leaving: store cuts can be a little rough, and even a small length mismatch can leave a planter out of square.
Where the money goes
| Tool | Budget choice | When to spend more | Value note |
|---|---|---|---|
| Tape measure | Basic 16-foot tape | Frequent measuring or rough jobsite use | A 25-foot tape is handy, but unnecessary for short planter boards. |
| Saw | Hand saw | Several cuts, thicker lumber, or repeated projects | Cheapest to buy and no battery to maintain; slower and more tiring. |
| Drill/driver | Entry-level corded drill or basic cordless model | Regular projects or driving many screws | For one planter, a borrowed drill can beat buying a full kit. |
| Square and clamps | Small speed square; improvised support | More woodworking or repeated assembly | Accuracy matters more than premium materials here. |
Choose a saw for the cut count
A hand saw is adequate for a handful of cuts in ordinary 1-inch-thick boards. It costs little, needs no electricity, and is easy to store. The trade-off is time: a beginner may need several minutes per cut, and the blade can wander if the board is not supported or the cut is rushed. Clamp the board to a stable surface and start with short strokes along the marked line.
For a planter requiring six or more crosscuts, or for repeated projects, a corded circular saw often provides better value than a cheap cordless saw with a small battery. It can make straight cuts quickly, but it needs a stable work surface, eye and hearing protection, and careful handling. A guide clamped to the board helps prevent crooked cuts. Compare corded circular saws if you expect to use one beyond this build; for a single planter, paying a lumberyard to cut the boards may be cheaper.
Drill, screws, and the cost of mistakes
A drill/driver is the most useful power tool in this build. A basic model has enough power for planter screws; a premium hammer drill is unnecessary unless you also plan to drill masonry. A corded drill is often the lowest-cost option if an outlet is nearby. Cordless is easier to move around, but the advertised tool price may not include a battery and charger. Compare the total kit price, not just the bare tool.
Use exterior-rated screws, around 2 to 2½ inches long for typical 1-inch boards, and drill pilot holes near board ends. Pilot holes reduce splitting, especially in dry lumber. Driving screws without them is possible, but a split end can weaken a corner and waste a board. A modest cordless drill/driver kit is a sensible buy if you have other household jobs lined up. If this is your only project, borrow one or choose a basic corded drill rather than paying extra for a battery platform you will not use.
Spend modestly on accuracy
A 16-foot tape is enough for a small planter and usually costs less than a longer, heavier tape. Check that its hook moves slightly at the end: that movement compensates for inside and outside measurements. Use a pencil line and mark the waste side so you know where the saw blade should go.
A small square is inexpensive insurance against a box that racks into a parallelogram. Check each corner during assembly, before tightening every screw. One or two clamps can hold a joint while you work, but they are not essential if you have a helper or can brace the boards on a flat surface. Avoid balancing a board on a chair or holding it with one hand while sawing; that is both less accurate and unsafe.
Do not overlook outdoor durability
Tool savings do not help if the planter fails outdoors. Use lumber rated for exterior use and fasteners labeled for outdoor exposure; ordinary interior screws can rust, stain the wood, or lose strength. If you use treated lumber, follow its handling guidance and keep the planter’s drainage holes clear. A liner can slow soil contact with the sides, but it should not trap water at the bottom.
Plan for drainage before assembly: several holes in the base are better than a sealed box. If the planter will sit on a deck, leave a small gap underneath or use feet so water can escape. Those details cost little and prevent a common failure—standing water that shortens the life of the wood.
When to buy, and when not to
Prices on outdoor and cordless tools often become more competitive around spring project season, holiday sales, and end-of-season clearance. Compare the same package: a bare cordless tool is not a bargain if you also need a battery and charger. Watch for kits that include accessories you will not use; a higher sticker price can still be poor value.
For one planter, the lowest-cost route is often to borrow a drill, buy a basic tape and square, and have the lumber cut at the store. For several planters or ongoing home projects, a circular saw and cordless drill/driver can earn their cost across multiple jobs. Skip specialty tools until you know you need them. A planter is a small build, and careful measuring, supported cuts, and pilot holes matter more than buying professional-grade gear.