Bench Grinder Safety by the Numbers: Tool Rest Gaps, Guard Angles and Wheel Speeds
What's inside
As an Amazon Associate I earn from qualifying purchases. This post may contain affiliate links at no extra cost to you.
The key bench grinder safety measurements are simple: the tool rest must sit no more than 1/8 inch (3 mm) from the wheel, the adjustable tongue guard (spark guard) no more than 1/4 inch (6 mm) from the wheel, the wheel’s rated maximum RPM must equal or exceed the grinder’s speed, and the guard should expose no more than about 90 degrees of the wheel. These numbers come from long-standing OSHA rules for bench and pedestal grinders, and checking them with a simple gauge before each session prevents most grinder accidents.
As an Amazon Associate we earn from qualifying purchases at no extra cost to you.

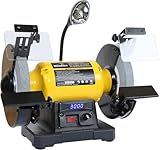
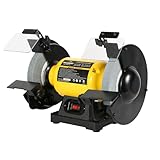
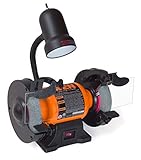
The Bench Grinder Safety Scale at a Glance
| Measurement | Safe limit | What goes wrong if exceeded |
|---|---|---|
| Tool rest to wheel gap | 1/8 in (3 mm) maximum | Work is dragged into the gap and jams; wheel can shatter |
| Tongue guard to wheel gap | 1/4 in (6 mm) maximum | Fragments of a burst wheel escape upward toward the face |
| Wheel periphery exposure | About 90 degrees total, starting no more than 65 degrees above horizontal | Larger arc of the wheel can throw debris at the operator |
| Wheel speed rating | Marked RPM equal to or above grinder RPM | Overspeed failure |
| Wheel flanges | Matching pair, at least about one-third of wheel diameter | Uneven clamping, cracking |
| Hearing exposure | Protection when sound levels approach 85 dB | Long-term hearing damage |
Making and Using a Gap Gauge
Wheels wear smaller with every session, so the gaps grow on their own. A gap gauge makes checking quick.
- Cut a piece of 1/8-inch hardboard, aluminum or acrylic about 1 by 3 inches. This is your tool rest gauge.
- Cut a second piece 1/4 inch thick, or stack two 1/8-inch pieces, for the tongue guard gauge.
- With the grinder unplugged and the wheel stationary, slide the gauge between rest and wheel. If it slides through loosely, close the gap.
- Tighten the rest lock, rotate the wheel by hand to make sure it does not touch anywhere, then recheck.
- Repeat for the tongue guard at the top of the wheel opening.
Some grinders come with plastic gap tools; a homemade gauge hung on a hook beside the grinder works just as well.
Wheel Speed: A Worked Example
Most 6-inch and 8-inch bench grinders in North America run at about 3,450 to 3,600 RPM. Wheel surface speed depends on diameter: surface feet per minute (SFPM) equals RPM times wheel circumference in feet.
| Wheel size | Grinder speed | Approx. surface speed | Wheel must be marked at least |
|---|---|---|---|
| 6 in | 3,450 RPM | About 5,400 SFPM | 3,450 RPM (most are rated well above) |
| 8 in | 3,450 RPM | About 7,200 SFPM | 3,450 RPM |
| 8 in | Slow-speed 1,750 RPM | About 3,700 SFPM | 1,750 RPM |
| 10 in | 3,450 RPM | About 9,000 SFPM | 3,450 RPM |
The calculation shows why a bigger wheel on the same motor is more energetic and why fitting a wheel not rated for the speed is dangerous. Always read the RPM marking on the wheel blotter (the paper label) before mounting.
Before Mounting a New Wheel: The Ring Test
Vitrified grinding wheels can crack in shipping. To ring test, hang the wheel on a finger or dowel through the arbor hole and tap it lightly with a wooden screwdriver handle about 45 degrees either side of vertical. A sound wheel gives a clear ring; a cracked one gives a dull thud. Do not use a wheel that thuds. Then mount it with both paper blotters in place, tighten the nut just enough to hold the wheel firmly, and fit the guards.
Start-Up Routine
- Stand to one side of the wheel’s plane when switching on; wheels most often fail at start-up.
- Let a new or freshly mounted wheel run at full speed for about a minute before grinding.
- Check for vibration; a wobbling wheel needs dressing or remounting.
- Dress glazed or grooved wheels with a dressing tool so the face stays flat and the rest gap stays even.
Operating Rules
- Grind on the face of a straight wheel, not the sides, unless the wheel is designed for side grinding.
- Keep small pieces in a clamp, vise-grip or holder; do not hold tiny parts with fingers.
- Quench steel in water often; hot parts cause burns and ruin temper.
- Never grind aluminum, brass or soft metals on a standard aluminum-oxide wheel; they load the wheel and can cause it to burst. Use a dedicated wheel.
- Keep the area free of sawdust, rags and solvents; sparks ignite them.
- Avoid loose gloves near the wheel; a glove can catch and pull a hand in.
PPE and Safety Gear to Buy
| Item | Spec to look for | Example products | Typical price range |
|---|---|---|---|
| Safety glasses | ANSI Z87.1+, side shields | 3M SecureFit, Pyramex Intruder | $5-$20 |
| Full face shield (worn over glasses) | ANSI Z87.1+ polycarbonate | 3M or Honeywell ratchet-headgear face shields | $15-$40 |
| Hearing protection | NRR 22-30 dB | 3M Peltor earmuffs, foam earplugs | $5-$40 |
| Dust mask | NIOSH N95, or P100 for long sessions | 3M 8210, half-mask with P100 cartridges | $2-$45 |
| Apron | Leather or flame-resistant cotton | Leather welding apron | $20-$50 |
| Eye shields on grinder | Undamaged, clear, correctly angled | Manufacturer replacement shields | $5-$20 |
The grinder’s built-in eye shields are a supplement, never a substitute, for glasses and a face shield.
Monthly Inspection Checklist
- Recheck both gaps with the gauge after wheel wear or dressing.
- Inspect wheels for chips, cracks and glazing.
- Confirm the grinder is bolted to a bench or stand that does not rock.
- Check the cord, plug and switch; replace damaged parts.
- Replace a wheel once it has worn to roughly 2 inches less than its original diameter, or when the rest can no longer be adjusted within 1/8 inch.
Bottom Line
Bench grinder safety is a short list of numbers: 1/8 inch at the tool rest, 1/4 inch at the tongue guard, a wheel rated for the grinder’s RPM and guards that expose no more than about a quarter of the wheel. Check them with a gauge, ring test new wheels, stand aside at start-up and wear glasses plus a face shield every time.
