How to Compare Entry-Level and Midrange Tools for Occasional DIY
What's inside
As an Amazon Associate I earn from qualifying purchases. This post may contain affiliate links at no extra cost to you.
Occasional DIYers rarely need the most powerful tool on the shelf. They need equipment that starts reliably, handles a few projects each year, and does not become a false bargain after a broken battery, stripped gear, or missing accessory. The useful comparison is not simply “cheap versus expensive.” It is whether an entry-level tool covers your actual jobs, and whether moving up to midrange buys durability, control, or a lower cost per use.
Define your workload before comparing brands
Start with the jobs you expect to do over the next two or three years. Hanging shelves, assembling furniture, drilling into studs, trimming small boards, and making occasional repairs place modest demands on tools. Building a deck, remodeling a room, cutting hardwood, or working outdoors every weekend is a different category.
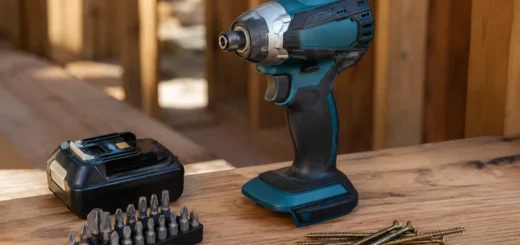
For occasional indoor work, an entry-level cordless drill is usually sufficient. A 12-volt drill can handle pilot holes, screws, cabinet hardware, and small wood bits. An 18- or 20-volt drill is more versatile for long screws and larger bits, but it is also heavier. If your work is limited to furniture and wall anchors, extra voltage often adds bulk rather than useful capability.
For cutting, a low-cost jigsaw is fine for shelving, plywood, and simple curves when the work is infrequent. A midrange model becomes more attractive when you need cleaner cuts, better blade guidance, less vibration, or several hours of continuous use.
What you actually get by spending more
Midrange tools do not automatically cut twice as fast or last twice as long. The usual improvements are more practical: a better chuck, smoother speed control, stronger battery contacts, more accurate fences, improved dust collection, and a motor that stays cooler under load.
| Factor | Entry-level tool | Midrange tool |
|---|---|---|
| Typical price | $30–$90 bare or corded | $80–$200 bare or corded |
| Best use | Small repairs and a few projects per year | Regular home maintenance and longer sessions |
| Controls | Basic clutch, trigger, or adjustment | More precise speed, clutch, depth, or fence settings |
| Common weak point | Battery capacity, chuck, switch, or plastic adjustment parts | Higher purchase cost and pricier batteries |
| Value case | Best when use is light and failure is not costly | Best when accuracy, comfort, or repeat use matters |
Consider a drill. If you use it for 20 minutes every few months, a basic model may provide excellent value. If you drive 200 screws during a weekend project, a midrange drill’s better grip, clutch consistency, and battery capacity can prevent fatigue and overheating. The cheaper drill may still finish the job, but it may require more pauses and produce more stripped screw heads.
Compare the complete purchase, not the tool body
Cordless tools are often advertised at an attractive bare-tool price. The battery and charger can add $40 to $150, depending on the platform. A $60 drill kit with one small battery may be a better first purchase than a $90 bare drill, even if the bare drill appears more advanced.
Before choosing, price a kit with two batteries, a charger, and the accessories you need. Also check replacement battery prices. A budget battery platform that costs $70 for a replacement pack can erase the savings after a few years. Batteries commonly lose noticeable capacity after several hundred charge cycles, and heat, storage at full charge, and leaving a pack empty can shorten that life.
If you only need one tool, a corded version can be the better value. A corded drill or jigsaw avoids battery aging and usually delivers steady power for less money. The trade-off is managing a cord, finding an outlet, and using an outdoor-rated extension cord when working outside.
For a first cordless purchase, compare cordless drill-driver kits by battery size, warranty, and included charger rather than by advertised voltage alone.
Judge brand value by the platform and support
Brand value matters most when you expect to add tools later. A reasonably priced drill can become expensive if every future tool requires a new battery and charger. A platform with drills, lights, sanders, and compact saws lets one or two batteries cover several jobs.
Do not assume a familiar brand is automatically the best buy. Look for replacement battery availability, parts support, warranty terms, and the number of tools you would realistically purchase. A three-year warranty is useful only if the seller and manufacturer are straightforward about claims.
For an occasional DIYer, a smaller platform may be more economical than a professional system. Paying extra for high-output batteries makes little sense if you never use a circular saw or grinder. Conversely, buying the cheapest platform can be frustrating if its battery lineup is limited or its chargers are slow.
Match the tool to failure risks
Cheap tools are usually acceptable when a minor limitation is merely inconvenient. A basic sander that vibrates more, for example, may be perfectly adequate for refinishing one table. A budget tape measure is also fine if its hook is secure and the markings are readable.
Spend more when failure can ruin material or create a safety problem. A circular saw with a sloppy base can make crooked cuts through expensive plywood. A weak clamp can release while glue is setting. A poorly balanced grinder is a poor place to save money because control matters more than a small price difference.
With cordless circular saws, compare shoe rigidity, blade visibility, guard movement, and battery cost. For corded random-orbit sanders, compare dust-port compatibility and pad availability. Replacement sanding discs and blades are ongoing costs, so a tool that accepts common accessories can be cheaper to own.
Use seasonal sales without buying the wrong tool
Tool prices often fall around major holiday promotions, spring home-improvement events, Father’s Day, and Black Friday. Bundles are especially common during these periods. A kit may include a free light or impact driver, but only count that value if you would actually use it.
Check the normal price before a sale. A “$100 discount” may be based on a price the tool rarely sells for. Price history, current competitor listings, and the cost of a comparable kit provide a better baseline.
Buying batteries during a promotion can be worthwhile because they are frequently bundled with a tool at little additional cost. Avoid stockpiling packs for an uncertain future, though. Lithium-ion batteries age even when unused, and a platform that disappears from the market leaves you with expensive orphaned equipment.
A practical decision rule
Choose entry-level when you will use the tool fewer than a dozen times per year, the job is low risk, and replacement would not disrupt an important project. Choose midrange when you expect repeated use, need cleaner results, work with harder materials, or value comfort enough to pay for it.
For many households, the best setup is mixed: a midrange drill-driver and batteries, inexpensive corded tools for occasional sanding or cutting, and budget hand tools for simple repairs. That approach puts money into the equipment you handle often while avoiding premium prices for tools that spend most of the year in a drawer.