How to Plan Tool Purchases for a Garage Renovation in Phases
What's inside
As an Amazon Associate I earn from qualifying purchases. This post may contain affiliate links at no extra cost to you.
Start With the Garage, Not the Shopping Cart
A garage renovation usually needs fewer tools than people expect. The expensive mistake is buying equipment for every possible project before the space is usable. Plan purchases around the work that unlocks the next phase: clearing and measuring first, repairs and installation second, and specialized projects last.
Begin with a written list of jobs. Separate them into three groups: structural work, storage and electrical improvements, and future projects. Structural work may include drywall repair, painting, flooring, or framing. Storage might involve shelves, cabinets, wall panels, and lighting. Future projects could include woodworking, vehicle maintenance, or metalwork.
Measure the garage and record the materials you will cut or install. A 12-foot wall needs different storage planning than a 20-foot wall, and the available electrical circuits may determine whether a large saw or compressor is practical. Set a total tool budget before browsing. A useful split is 60 percent for tools needed during the renovation, 25 percent for safety and measuring equipment, and 15 percent held back for missing accessories and replacement parts.
Phase One: Measure, Clean, and Protect
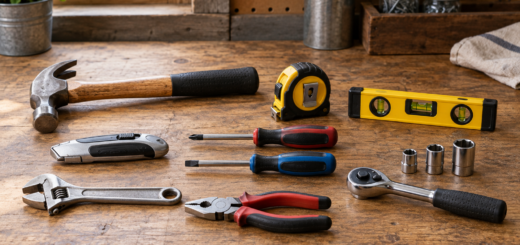
The first purchases should be inexpensive tools that prevent rework. You need a reliable tape measure, a long level, a utility knife, pencils or markers, a stud finder, a socket set, screwdrivers, pliers, and a basic hammer. Add eye protection, hearing protection, a dust mask or properly fitted respirator, and work gloves suited to the material.
This is also the right time for cleanup equipment. A shop vacuum is more useful than a second drill during the early stages, particularly if you will cut drywall, masonry, or pressure-treated lumber indoors. A compact vacuum may be adequate for occasional work, but a larger unit with a good filter and a 1-1/4- or 2-1/2-inch hose handles renovation debris with fewer clogs. Budget for extra filters and disposable collection bags if compatible.
A cheap tape measure is fine if it locks securely and the blade does not buckle at short distances. Do not economize on safety glasses or respiratory protection. Dust in a garage settles on vehicles, tools, and stored belongings, and sweeping it later often puts it back into the air.
Phase Two: Buy One Cordless Platform
For most garage renovations, start with one cordless battery platform rather than mixing brands. Buy a drill-driver kit with two batteries, then add bare tools only when a job justifies them. A compact drill is easier to handle for cabinet hardware and light framing. A hammer drill is worth the extra cost if you will drill into concrete block or masonry, but it does not replace a rotary hammer for repeated anchor holes.
Battery ecosystems have a real price advantage. A kit may cost $100 to $200 and include two batteries and a charger; adding individual tools later can cost $60 to $180 each. The trade-off is that the first platform locks you into its battery prices. Compare the cost of a replacement 4- or 5-Ah battery, not just the promotional kit price.
For a basic renovation, a useful next purchase is an cordless drill-driver kit with two batteries. Choose a midrange platform if you expect to add an impact driver, circular saw, reciprocating saw, or lighting tool. A budget brand is often fine for a few shelves and occasional repairs, but cheaper batteries may have shorter runtimes and less consistent availability.
| Purchase | Budget choice | Spend more when |
|---|---|---|
| Drill-driver kit | $80–$130 kit with two batteries | You will use it weekly or drill large holes |
| Shop vacuum | 6–9 gallon, basic filter system | You will collect fine drywall or concrete dust |
| Circular saw | 15-amp corded saw | You need battery convenience or frequent cuts |
| Laser level | Basic cross-line model | You are installing long runs of cabinets or shelves |
Phase Three: Buy for the Materials
Once the garage is cleared and measured, buy tools for the actual installation sequence. A circular saw is usually a better first cutting tool than a miter saw. It cuts sheet goods, dimensional lumber, and trim, costs less, and takes less space. A corded model can be a strong value at roughly $60 to $120, especially if you already have a safe extension cord and a nearby outlet.
A miter saw becomes worthwhile when you have dozens of repeated crosscuts for shelving, framing, or trim. It is not automatically more accurate: poor support on both sides of the saw can produce crooked cuts, and the machine consumes valuable bench space. If you buy one, budget for a stable stand or outfeed supports as well as a quality blade.
For driving many structural screws, an impact driver reduces wrist strain and speeds installation. It is not a precision tool for small screws; it can strip cabinet hardware or snap fasteners when used without care. For concrete anchors, rent a rotary hammer for a weekend unless you expect recurring masonry work. A rented tool costing $30 to $60 is usually better value than owning a $150 to $300 machine that sits unused.
For drywall, a basic drywall cutting tools kit and a cordless drill are enough for a small repair. Do not buy a drywall lift or specialty sander unless the project volume supports it. Drywall dust can damage unsealed power-tool bearings and shop-vac filters, so isolate the work and clean filters frequently.
Phase Four: Add Storage and Specialty Tools
Storage tools should be chosen after you know what will live in the garage. A wall-mounted system can be efficient, but accessories become costly: hooks, bins, brackets, and shelves can add 50 percent or more to the initial panel price. French cleats made from plywood are cheaper and flexible, though they require accurate cutting and solid wall attachment.
Buy a garage storage wall organizer system when quick installation and adjustable hooks matter more than the lowest price. For heavy tools, verify the stated load rating and fasten into studs or masonry. Drywall anchors alone are a common failure point; a loaded shelf can pull out and damage the wall or vehicle below.
Specialty tools should wait until the garage proves what you actually do. Buy a bench grinder for frequent sharpening or metal cleanup, not because every workshop photo includes one. Buy a compressor only after checking its noise, duty cycle, and airflow. Many small compressors can inflate tires and run a brad nailer but cannot continuously power an impact wrench or spray gun.
Use Seasonal Pricing Without Chasing Every Deal
Tool prices often fall around major holiday promotions, Father’s Day, spring project season, and end-of-year clearance. Cordless kits are commonly discounted when manufacturers refresh batteries or brushless tool lines. Shop vacuums and outdoor cleanup tools can be cheaper in late fall, while heaters and some garage equipment may be discounted in spring.
Track the normal price for two or three weeks before buying. A large “sale” can be a kit with a smaller battery, a weaker charger, or a tool bundled with accessories you do not need. Compare the total cost of the tool, battery, charger, blades, bits, and storage. If a tool is needed to keep the renovation moving, a fair everyday price is often better than delaying a week to save $15.
Before checkout, confirm the return policy, warranty length, battery availability, and replacement accessory costs. A cheap tool that fails during a single weekend can cost more in lost time than a modestly better model. Buy the low-cost option when the workload is light and failure has little consequence; spend more when downtime, accuracy, dust control, or repeated use affects the whole renovation.