How to Plan a Tool Budget for a Kitchen Remodeling Project
What's inside
As an Amazon Associate I earn from qualifying purchases. This post may contain affiliate links at no extra cost to you.
A kitchen remodel can require anything from a small $150 hand-tool refresh to more than $1,000 in cordless and specialty equipment. The right budget depends less on the size of the room than on the work you will actually do. Replacing cabinet hardware is inexpensive. Installing cabinets, cutting panels, modifying plumbing access, and repairing drywall require a much broader kit.
Start With the Work, Not the Shopping List
Break the project into tasks before buying tools: demolition, cabinet removal, layout, cabinet installation, countertop or flooring work, plumbing and electrical access, trim, drywall repair, and painting. Mark each task as either “buy,” “rent,” or “hire out.” This prevents the common mistake of buying a tool for one cut while overlooking basic items such as clamps, levels, bits, and dust control.
For a typical DIY kitchen refresh, set aside roughly $250 to $500 for tools if you already own a drill and basic hand tools. A cabinet installation with new cordless tools commonly lands around $500 to $900. A full remodel involving flooring, drywall, and finish carpentry can exceed $1,000, but renting a demolition hammer, tile saw, or flooring nailer may keep the purchase budget lower.
Keep a separate consumables allowance. Blades, drill bits, screws, shims, sandpaper, caulk, masking materials, and vacuum bags can add $75 to $200. Consumables are not a place to make false savings: a dull blade can damage a cabinet panel or make a straight cut look like a hand saw job.
Build a Priority-Based Tool List
Buy tools in three passes. First, cover accuracy and basic assembly. Second, add tools that save substantial labor. Third, rent equipment used for only a few hours.
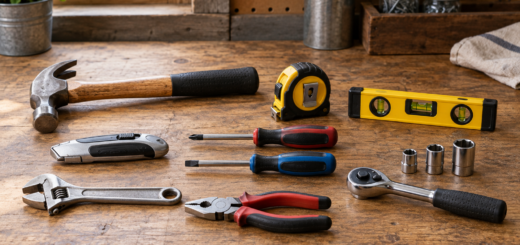
The first pass usually includes a 25-foot tape measure, combination square, 24-inch level, stud finder, utility knife, pencils, screwdrivers, pliers, a hammer, and a drill/driver. Add a second battery if the drill is cordless. A single battery can spend more time charging than working during cabinet installation.
The second pass is where value becomes more important than tool count. A cordless impact driver speeds up long cabinet screws, while a circular saw with a guide or track produces cleaner panel cuts than trying to follow a pencil line freehand. A random-orbit sander is useful for trim and patch repairs, but it is unnecessary if the project involves little exposed wood.
For cabinet work, spend on measurement and clamping before buying specialty power tools. Two 12-inch bar clamps, a good level, and a sharp blade can prevent more problems than an expensive saw. If you need a cabinet installation clamp and level set, choose tools with rigid bodies and readable markings rather than the cheapest multipack.
Budget by Project Type
| Project scope | Likely tool budget | Best buying strategy | Common mistake |
|---|---|---|---|
| Hardware, painting, and minor repairs | $100–$250 | Buy hand tools, a drill, sanding supplies, and protection | Buying a saw that will be used once |
| Cabinet installation or replacement | $350–$800 | Choose one cordless battery platform and buy clamps, levels, and a saw guide | Using short screws or skipping cabinet support |
| Flooring and trim | $300–$700 | Buy measuring and cutting tools; rent flooring-specific equipment | Underbudgeting blades and knee protection |
| Major demolition and wall repair | $400–$1,000+ | Rent heavy equipment and buy dust-control supplies | Ignoring disposal, respirator, and cleanup costs |
These ranges assume normal homeowner-grade tools and exclude tools for code-sensitive electrical or plumbing work. A licensed professional may be the safer and cheaper choice when a mistake could cause a leak, fire, or failed inspection.
Compare Brands by Value, Not Just Price
For occasional kitchen work, an inexpensive drill or circular saw can be perfectly adequate. The trade-off is usually lower battery capacity, rougher adjustment mechanisms, less rigid bases, and shorter warranty support. Those weaknesses matter most when you need repeatable cuts or several hours of work.
Mid-priced brands often offer the best balance for a single remodel. They generally have more compatible tools, better battery availability, and enough power for cabinet screws and plywood. Premium platforms can be worthwhile for contractors or homeowners who expect to keep adding tools, but the first tool purchase commits you to an ecosystem. Batteries and chargers are not interchangeable across most brands.
Compare a kit’s complete cost, not its advertised tool price. A $180 drill-and-driver kit may become a $280 purchase after adding a second battery, charger, and a useful work light. Conversely, a bare tool priced at $100 is not a bargain if you already need a $120 battery and charger.
For a remodel involving many fasteners, a cordless drill and impact driver combo kit is usually better value than buying the tools separately. Choose a platform with readily available replacement batteries. If you only need a drill for knobs and light assembly, corded or budget cordless equipment is fine.
Know When to Rent
Rent tools when the purchase price is high, storage is awkward, or misuse can ruin material. A tile saw may rent for roughly $50 to $100 per day, while buying one can cost several hundred dollars. Flooring nailers, demolition hammers, drywall lifts, and large wet saws are similar cases.
Buy tools that improve accuracy throughout the project. A circular saw, drill, sander, clamps, and shop vacuum can earn their cost across multiple rooms. Rent a tool only after confirming its blade type, included accessories, pickup time, and return-cleaning requirements. A low daily rate is not useful if you need three rental days because the first day was spent learning the setup.
Dust control deserves its own line in the budget. A shop vacuum with a fine-dust or HEPA-rated filter, hose adapter, and collection bags can cost $80 to $250. A vacuum is especially valuable for drywall sanding and cutting cement board. Without it, fine dust settles inside cabinets, appliances, and HVAC openings.
Use Seasonal Sales Without Buying Junk
Major holiday promotions commonly discount cordless kits, hand-tool sets, and storage systems. Spring and early summer are useful for comparing outdoor-tool batteries that share a platform, while fall clearance can produce good prices on renovation tools after peak building season. Watch the normal price for several weeks before assuming a sale is real.
Bundles are strongest when every included item has a job. A kit with two batteries, a charger, and a drill may be better than a larger package containing a rarely used blower or flashlight. Check whether the batteries are full-size or compact; compact packs are lighter but run out sooner under saw or grinder loads.
Finally, reserve 10% to 15% of the tool budget for surprises. Broken bits, a damaged blade, an extra clamp, or a replacement battery can quickly erase a carefully planned budget. The best value is not the lowest receipt total. It is a tool setup that makes accurate work possible, avoids rework, and still has a use after the kitchen is finished.