Best Budget Drywall Tool Kit for a Single-Room Project
What's inside
As an Amazon Associate I earn from qualifying purchases. This post may contain affiliate links at no extra cost to you.
A single-room drywall job does not require a contractor’s van full of tools. For one bedroom, office, or small repair, a sensible kit costs roughly $70 to $160, assuming you already own a drill, utility knife, tape measure, and basic safety gear. The best value comes from buying a few good hand tools, renting the dustiest or most specialized equipment, and avoiding large multi-piece kits filled with tools you will not use.
As an Amazon Associate we earn from qualifying purchases at no extra cost to you.



What you actually need
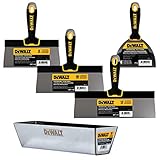
For hanging and finishing new drywall, the core kit is a 6-inch taping knife, a 10- or 12-inch finishing knife, a drywall jab saw, a utility knife, a sanding sponge or pole sander, a chalk line, a rasp, and a pan. Add a drywall screw gun only if you are hanging enough board to justify it; a regular drill with a depth-setting attachment works for a single room.
You will also need a 4-foot level, a pencil, a dust mask rated for fine particles, eye protection, and a shop vacuum. These may already be in your garage. If not, put them in the project budget rather than treating them as optional. Drywall dust gets into hinges, electronics, and furnace filters quickly.
A basic drywall hand tool kit can be a reasonable starting point, but inspect the contents. Some cheap kits include a small knife, flimsy pan, and poor sanding block while omitting a useful 12-inch knife. Buying individual knives often produces a better kit for the same money.
Budget breakdown for one room
| Item | Budget price | What matters |
|---|---|---|
| 6-inch taping knife | $8–$18 | Flexible stainless blade and a comfortable handle |
| 10- or 12-inch finishing knife | $12–$30 | Straight edge without bends or nicks |
| Drywall pan | $8–$20 | Rigid tray that does not flex when scraping |
| Jab saw and utility knife | $12–$30 total | Sharp, replaceable blades; secure handles |
| Sanding tools | $12–$35 | Pole sander for ceilings and large walls |
| Corner tools and accessories | $10–$25 | Useful for outside corners, patches, and cleanup |
| Dust protection | $10–$25 | Safety glasses and a properly fitting respirator |
That puts a practical hand-tool setup at about $72 to $183 before joint compound, tape, screws, and drywall. A realistic value target is $90 to $120. Below that, compromises usually show up as blades that flex, handles that cause blisters, or sanding equipment too small for the job.
Where to spend and where to save
The 6-inch knife is the tool you use most while embedding tape and filling screw heads, so avoid the absolute cheapest stamped blade. A mid-priced stainless knife is easier to clean and less likely to leave ridges. The larger finishing knife does not need a premium brand, but it does need a straight edge. Hold it against a straight surface in the store or check it immediately after delivery.
Cheap pans are fine for a small patch. For a full room, a stainless or coated steel pan is worth the extra $8 to $15 because its corners scrape cleanly and its sides do not bow. Plastic pans weigh less and will not rust, but thin ones can flex enough to make loading a knife awkward.
You can save safely on a jab saw, sanding sponge, and chalk line. These tools see less precision-critical work. Do not save by skipping a pole sander. Hand-sanding ceilings or upper walls with a small block takes longer and makes it harder to keep the surface flat. A drywall pole sander is one of the few inexpensive upgrades that noticeably improves a single-room job.
For cutting board, a sharp utility knife and a long straightedge are enough. Score the face paper firmly, snap the panel away from the cut, and slice the back paper. Repeatedly sawing through the gypsum creates dust and rough edges. Keep spare blades available; a dull blade causes torn paper, which later bubbles under joint compound.
Drill, screw gun, or rental?
If you already have a variable-speed drill, use it with a drywall screw setter or depth-control bit. Set each screw just below the paper surface without breaking the paper. A screw driven too deep loses holding power; one left proud telegraphs through the finish. Practice on a scrap before hanging the first sheet.
A dedicated drywall screw gun with depth stop is faster and more consistent, but it is hard to justify for one room unless you can buy a used tool or expect more drywall work. Cordless versions are convenient but add battery cost. Corded versions are cheaper, though the cord is irritating on ladders and around loose sheets.
Panel lifts are another rental item worth considering. For ceilings, a lift can cost less than replacing a cracked sheet or straining your back. Renting one for a day is usually better value than buying a low-cost lift that is difficult to adjust or unstable at full height.
Finishing costs and common failure modes
Most first-time drywall problems are not caused by a missing specialty tool. They come from rushing the compound. Plan on at least three applications: embedding tape, filling and widening the joint, then a thin finish coat. Allow each coat to dry fully, commonly 12 to 24 hours depending on thickness, humidity, and the compound. Sanding too soon rolls the compound into lumps.
Use paper tape on flat seams when strength matters. Mesh tape is easier for small repairs but usually needs setting-type compound and can crack on movement-prone joints. Outside corners need metal- or vinyl-reinforced corner bead; a corner knife does not replace properly installed bead. For a small repair, premixed lightweight compound is convenient. For a full room, standard premixed compound costs less per usable volume, while setting compound saves time but requires faster, cleaner work.
Buy a medium and fine drywall sanding sponge rather than relying on ordinary sandpaper. Use medium grit to knock down ridges and fine grit for the final pass. Do not aggressively sand exposed tape or paper; once the paper is scuffed, primer can reveal a fuzzy, difficult-to-hide patch.
Seasonal buying advice
Tool prices often soften around major holiday sales, spring home-improvement promotions, and late fall clearance. The best discounts are usually on kits, sanders, and cordless tools, not inexpensive individual knives. Compare the kit contents against separate prices before buying: a $49 bundle is poor value if you still need a 12-inch knife, pan, and pole sander.
For one room, buy consumables close to the job and avoid stockpiling compound. Premixed compound can dry in a partly sealed bucket, and bargain blades lose their edge in storage. If the project is flexible, shop first for a discounted stainless knife and rent the lift or specialized sander only when the work is scheduled. That approach gives you a dependable kit without paying for professional quantities you will not use.