Best Circular Saw Blades for Composite Decking
What's inside
- Best Circular Saw Blade for Composite Decking: Quick Picks by Situation
- What to Choose for Your Material and Cut
- How Tooth Geometry Affects Composite Cuts
- Carbide, Kerf, and Blade Fit
- Reduce Melting, Chipping, and Edge Damage
- A Practical Selection and Setup Sequence
- Ownership: What Wears First
- Bottom Line
- Related Guides
- Best Circular Saw Blade for Composite Decking: Quick Picks by Situation
- What to Choose for Your Material and Cut
- How Tooth Geometry Affects Composite Cuts
- Carbide, Kerf, and Blade Fit
- Reduce Melting, Chipping, and Edge Damage
- A Practical Selection and Setup Sequence
- Ownership: What Wears First
- Bottom Line
- Related Guides
As an Amazon Associate I earn from qualifying purchases. This post may contain affiliate links at no extra cost to you.
Best Circular Saw Blade for Composite Decking: Quick Picks by Situation
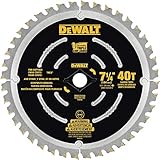
For most composite decking, the best circular saw blade for composite decking is a sharp, carbide-tipped finish blade with a 7-1/4-inch diameter, a thin kerf, and roughly 40 to 60 teeth. Choose 40 teeth for faster cuts through ordinary deck boards; choose 60 teeth when clean, visible edges matter more. Check the board maker’s cutting guidance first, because capped composite, solid PVC, and wood-plastic composite can respond differently to heat and tooth shape.
What to Choose for Your Material and Cut
| Situation | Useful blade specification | Why it fits |
|---|---|---|
| Routine crosscuts in hollow or standard composite boards | 7-1/4 in., 40 teeth, carbide tips, thin kerf (about 0.060–0.090 in.) | Balances feed speed with a reasonably clean edge; removes less material than a thick-kerf blade. |
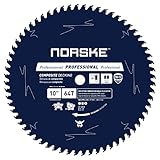
| Visible end cuts or frequent trim work | 7-1/4 in., 60 teeth, carbide tips, thin kerf | More teeth generally leave a smoother edge, provided the blade stays sharp and the cut does not overheat. |
| Long rip cuts along a board | 7-1/4 in., 24–40 teeth, carbide tips | Fewer teeth clear material more readily and can reduce rubbing during a long cut. |
| Thick solid PVC or dense capped boards | Use the decking maker’s recommended tooth count; typically 40–60 teeth for a 7-1/4-in. blade | Material density and cap construction vary. A high tooth count is not automatically better if it makes the cut slow or hot. |
| Compact saw with a 6-1/2-in. arbor-compatible blade | 6-1/2 in., around 40–60 teeth, carbide tips | Works only if the saw’s manual permits that diameter and the blade’s arbor matches. Confirm cut depth is sufficient. |
Tooth counts in the table are practical starting points, not a substitute for the decking manufacturer’s instructions. Tooth geometry and blade condition matter as much as the number printed on the package.
As an Amazon Associate we earn from qualifying purchases at no extra cost to you.


How Tooth Geometry Affects Composite Cuts
Many finish blades use an alternate-top-bevel (ATB) grind: neighboring teeth bevel in opposite directions to score the surface and reduce splintering. That can help on capped boards, where a torn or chipped cap is especially noticeable. A high-ATB finish blade may produce a cleaner edge, but it can cut more slowly and is not the best choice if you are making many long rips.
Flat-top or combination tooth designs prioritize material removal and durability over the finest crosscut finish. They can suit rough cuts or ripping, but may leave more edge cleanup. For an unfamiliar board, begin with a carbide-tipped ATB or combination blade in the tooth-count range recommended by the board maker, then make a test cut on an offcut.
Do not assume that “more teeth” always means a better result. If a 60-tooth blade advances too slowly, its teeth can rub rather than clear chips, building heat that softens plastic. A sharp 40-tooth blade, steady feed, and supported workpiece may leave a better edge than a dull, high-tooth-count blade forced through the board.
Carbide, Kerf, and Blade Fit
Carbide-tipped teeth are the sensible default for composite decking. They hold an edge longer than basic steel teeth when cutting abrasive material, although the carbide can still dull, chip, or collect residue. A thin-kerf blade removes less material and can reduce load on a compact or cordless saw; a standard-kerf blade may be more rigid. Use only a blade diameter, arbor size, and speed rating allowed by the saw manufacturer.
Before buying, verify the blade’s maximum RPM meets or exceeds the saw’s no-load speed. Also check the cutting depth: a 6-1/2-inch blade has less reach than a 7-1/4-inch blade, and the saw’s advertised maximum depth may not be available at every bevel angle. Never remove a guard or use a blade that does not fit the arbor securely.
Reduce Melting, Chipping, and Edge Damage
- Start with a clean, sharp blade. Pitch and plastic residue can make teeth rub and heat the cut. Clean the blade with a product suitable for its coating, following the cleaner and blade makers’ directions.
- Support the board close to the cut. Use a stable work surface and prevent the offcut from pinching the blade. Unsupported boards can vibrate, chip, or bind.
- Let the saw reach full speed. Keep the base plate flat and feed smoothly. Avoid stopping with the blade buried in the kerf; if you must pause, switch off and wait for the blade to stop before repositioning.
- Use a moderate, continuous feed. Forcing the saw risks chipping and overload; creeping excessively can increase rubbing and heat. Adjust your pace if chips stop clearing or the cut begins to smear.
- Test the face orientation. Circular-saw tooth direction affects which face is more prone to breakout. Make a test cut in scrap from the same board and place the cleaner face where it will show. A fine-tooth blade or suitable backing can help, but neither guarantees a chip-free edge.
- Cut in appropriate conditions. Follow the board maker’s temperature guidance. Cold material may be more prone to chipping, while hot material can be more susceptible to smearing or deformation.
If the kerf looks glossy, melted, or smeared, stop and inspect the setup. Check for a dull or dirty blade, a pinched kerf, poor support, and an overly slow feed. Do not keep pushing through a binding cut.
A Practical Selection and Setup Sequence
- Identify the board. Find out whether it is wood-plastic composite, capped composite, or solid PVC, and check the maker’s saw-blade recommendation.
- Match blade to task. Choose a carbide 40-tooth blade for general work or ripping, and consider 60 teeth for visible crosscuts if the material guidance allows it.
- Confirm compatibility. Match diameter and arbor, check RPM and cut depth, and follow the saw manual.
- Make a test cut. Use an offcut, the same support, and the same face orientation planned for the finished boards. Inspect for chips, burrs, and melted edges.
- Adjust one factor at a time. Try a cleaner blade, steadier feed, or improved support before switching to a much higher tooth count. This helps identify the cause rather than masking it.
Ownership: What Wears First
Composite cutting can wear teeth through abrasive fillers and surface caps. Resin or plastic residue may also build up, making a blade perform as if it were dull before the carbide is actually worn. Look for slower cutting, increased effort, rougher edges, or repeated heat marks. Clean the blade as directed and inspect teeth for missing or damaged carbide; a blade with chipped teeth should not be used.
For occasional deck repairs, one correctly sized carbide blade is usually more useful than buying several tooth counts. If you cut decking frequently, keeping a clean spare blade can reduce downtime and help maintain consistent edges. General market prices vary by diameter, tooth count, and construction; basic carbide blades are commonly in the tens of dollars, while premium finish blades can cost more. Consider replacement cost against how often you cut and how visible the cut edges will be.
Bottom Line
For a dependable starting point, choose a 7-1/4-inch, thin-kerf, carbide-tipped blade with 40 teeth for general composite-decking cuts. Move to about 60 teeth for cleaner visible crosscuts when the board maker permits it and you can maintain a steady feed. The best results come from matching the blade to the exact decking material, supporting the work, and correcting heat or chipping at the setup—not simply choosing the blade with the most teeth.
