Best Value Tools for Installing a Mailbox and House Numbers
What's inside
As an Amazon Associate I earn from qualifying purchases. This post may contain affiliate links at no extra cost to you.
Installing a mailbox and mounting house numbers is a small job, but the wrong tool can turn it into a crooked, loose, or damaged installation. The best value setup is usually not a large power-tool collection. You need a drill, the right bits, a level, a measuring tool, and—if the mailbox is post-mounted—a way to dig and secure the post.
As an Amazon Associate we earn from qualifying purchases at no extra cost to you.


The best-value tool kit
For most installations, start with a cordless drill-driver kit in the $40 to $100 range. A basic 12-volt drill is enough for mailbox hardware, wood screws, plastic anchors, and small pilot holes. An 18-volt or 20-volt drill costs more but is the better choice if you will drill into brick, concrete block, thick wood, or other projects later.
Choose a kit with a clutch, two-speed gearbox, and a battery included. A bare tool may look inexpensive at $30 to $60, but adding a battery and charger can push the total above a complete kit. For a single mailbox, corded drills are rarely the best value: they are often cheaper, but the cord is inconvenient around a post and driveway.
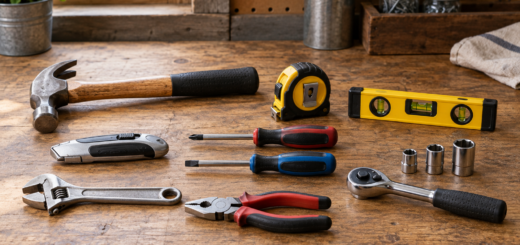
A 9- or 12-inch torpedo level typically costs $8 to $20. It is sufficient for checking a mailbox post, box, and house numbers. A longer 24-inch level gives more reliable readings on a tall post, but it is not essential unless you already lack one. A tape measure, pencil, screwdriver bit set, and utility knife round out the basic kit.
| Tool or supply | Typical budget | Best use | Where cheap is fine |
|---|---|---|---|
| 12V cordless drill | $40–$80 | Mailbox hardware and house numbers | Fine for wood, vinyl, and plastic anchors |
| 18V/20V cordless drill | $70–$150 | Masonry, larger pilot holes, repeated projects | Worth it if you already own compatible batteries |
| Torpedo level | $8–$20 | Checking vertical and horizontal alignment | Fine for one installation if the vial is accurate |
| HSS drill-bit set | $10–$25 | Metal mailbox and screw pilot holes | Fine for a few holes; dull bits create oversized holes |
| Masonry bit set | $10–$30 | Brick, block, and concrete | Fine for several small anchor holes, not heavy drilling |
| Post-hole digger or digging bar | $25–$60 | Installing a buried mailbox post | Rent or borrow for one job |
Spend on bits and fasteners, not just the drill
A low-cost drill with good bits usually performs better than an expensive drill using worn-out bits. For a metal mailbox, use a sharp high-speed-steel bit, commonly called an HSS bit. Start with a small pilot hole, then enlarge it to match the mounting screw. Forcing a large bit immediately can grab the thin metal and distort the box.
For wood posts, exterior-rated screws are a sensible upgrade over generic interior screws. Stainless steel resists rust best, while coated exterior screws cost less and are adequate in many climates. Use washers under screw heads when the mailbox mounting slots are large. Without washers, the screw head can pull through the slot when the box shifts in wind.
For brick or concrete, a masonry drill-bit set and appropriate anchors are necessary. A regular twist bit may heat up, dull quickly, and make a hole that will not hold an anchor. A hammer drill is faster in concrete, but a standard drill can handle a few small holes in brick or block if you work slowly and keep the bit from overheating.
Post-mounted mailboxes: where the budget changes
Mounting a box to an existing post may take less than an hour. Installing a new post is a different job. A manual post-hole digger costs roughly $25 to $60 and is usually the best value for one mailbox. Rocky soil can make it frustrating; a digging bar helps break compacted soil and small stones.
Do not buy a post-hole auger solely for one mailbox unless you have unusually soft soil or several posts to install. Rental prices for powered augers vary, but renting or borrowing is normally cheaper than buying a tool that may sit unused. Before digging, check local utility-marking requirements and keep the post clear of the road edge, sidewalk, and snow-plow path.
Set the post deep enough for stability and follow the mailbox manufacturer’s height and setback instructions. A post that is only slightly loose will become noticeably worse after rain, frost, and repeated door slams. Concrete can improve rigidity, but drainage matters: avoid creating a pocket that keeps the wood post wet. Gravel at the bottom and a properly sloped surrounding surface can be preferable for some wood-post installations.
Tools for mounting house numbers
House numbers are easy to install badly because small measurement errors are obvious from the street. Use a level and tape measure to mark a baseline, then make a paper or cardboard template from the number spacing. This is cheaper and more accurate than measuring each number separately.
For vinyl siding, use mounting blocks or fasteners designed for siding rather than driving a screw tightly into the panel. Siding expands and contracts, and a tight fastener can cause buckling. For stucco, brick, or concrete, use masonry bits and outdoor-rated anchors. For painted wood or trim, drill pilot holes to prevent splitting and seal exposed holes with a small amount of exterior caulk.
A magnetic torpedo level is convenient on metal surfaces, but magnetic strength is not important for house-number work. Accuracy matters more. Check the level on a known flat surface or reverse it in the same location; if the bubble changes position relative to the vial, replace it.
Brand value and when to buy
For occasional work, store brands and entry-level lines from established tool companies are often the best value. They generally have adequate drills, bits, and replacement batteries without the price premium of professional brushless equipment. Brushless motors can offer longer runtime and durability, but they are unnecessary for drilling a dozen small holes.
Battery-platform compatibility is the main reason to spend more. If you already own batteries from a major 18V or 20V system, buy the matching bare drill only if the total cost is genuinely lower than a new kit. Otherwise, a kit with one battery and charger is easier to price and avoids buying into an unused platform.
Prices are often strongest around spring home-improvement sales, late-summer clearance, and November holiday promotions. Compare the complete kit price, not the advertised tool price. Bit sets and levels are also frequently discounted in spring, while post-hole diggers and other digging tools may be cheaper after the main planting season. For one installation, borrowing a specialty tool and buying only the drill, bits, anchors, and exterior fasteners is usually the lowest-cost approach.