Best Value Tools for Installing a Wall-Mounted Television
What's inside
As an Amazon Associate I earn from qualifying purchases. This post may contain affiliate links at no extra cost to you.
What you need for a safe installation
A wall-mounted TV job usually calls for four things: a stud finder, a level, a drill and bits, and a mount suited to the TV and wall. A socket wrench helps tighten the mount’s lag bolts without damaging their heads. You may already own most of this; buying a complete installation kit is rarely the best value if you only need one missing tool.
First check the TV’s weight and VESA pattern—the spacing of the four mounting holes on its back. Then check the mount’s instructions for compatible screen sizes, weight limits, bolt sizes, and wall types. A mount’s advertised screen-size range alone does not confirm compatibility. For drywall over wood studs, attach the mount to the studs, not just the drywall. Brick, concrete, metal studs, and masonry veneer require different fasteners and may call for a different installation plan.
As an Amazon Associate we earn from qualifying purchases at no extra cost to you.



Where to spend and where to save
For a single TV, a basic electronic stud finder, a 24-inch level, and a corded drill or reliable household cordless drill are usually enough. Spend extra on accuracy or durability only when the job demands it: a full-motion mount puts more leverage on its fasteners than a fixed mount, and a large TV is harder to hold in position while you mark holes.
A manual level is cheap and does not need batteries. A small torpedo level works for short brackets, but a longer level makes it easier to spot a bracket that is visibly out of line. A laser level is convenient for lining up a screen with furniture or a second display, but it does not confirm that the mount itself is attached to studs. Don’t buy one solely for a one-TV installation unless you expect to use it again.
Compare the cost of replacing or borrowing a tool against how often you will use it. A low-cost drill can handle pilot holes in wood studs; drilling into concrete needs a hammer drill and masonry bit, which may be cheaper to rent or borrow. For a typical wood-stud install, a basic electronic stud finder is a more useful first purchase than a premium laser.
Tool comparison for a typical home installation
| Tool | Budget choice | When to spend more | Common failure mode |
|---|---|---|---|
| Stud finder | Basic electronic model | Frequent installs or scanning through thicker finishes | False reading from pipes, wiring, or inconsistent scanning |
| Level | 24-inch manual level | Several screens or precise room layout | Reading a short bracket without checking it in both directions |
| Drill | Existing household drill | Hardwood studs, repeated work, or masonry | Wrong bit, oversized pilot hole, or driving too fast |
| Socket wrench | Basic socket set | Regular assembly work or cramped access | Over-tightening or using the wrong socket size |
| TV mount | Fixed mount for a direct-on view | Need for tilt, swiveling, or access behind the TV | Choosing by screen size without checking weight and VESA fit |
Choose the mount before drilling
A fixed mount is generally the lowest-cost option and keeps the TV close to the wall. It suits a viewing position directly in front of the screen. A tilting mount costs more but can help reduce glare or improve the view when the TV is mounted above eye level. A full-motion mount is useful when viewers sit in different parts of the room or you need to reach cables, but it extends farther from the wall and increases leverage. Its installation still needs to follow the manufacturer’s stud and fastener requirements.
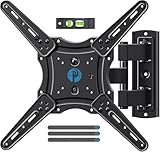
Check how far a mount projects from the wall, how much swivel it allows, and whether the TV’s ports remain accessible. A cheaper mount is fine if it has the right weight rating, VESA compatibility, hardware, and clear instructions for your wall type. Don’t substitute generic drywall anchors for the fasteners specified for a stud-mounted bracket. For a straightforward setup, compare a fixed VESA TV mount with a tilting or full-motion option before paying for movement you may not use.
Spend carefully on locating and drilling
Stud finders can be thrown off by textured walls, foil-backed insulation, wiring, pipes, or a weak battery. Scan slowly in both directions and mark the stud edges; finding the center between them gives a better target than trusting a single beep. Confirm spacing against the bracket’s holes and instructions. If readings conflict or the wall construction is unclear, stop rather than drilling exploratory holes where wiring or plumbing may run.
Use the pilot-hole size specified by the mount maker. Too small a hole can make a lag bolt hard to drive and increase the risk of stripping or splitting wood; too large a hole reduces its grip. Keep the drill square to the wall and tighten fasteners firmly, not with maximum force. A cordless drill-driver kit is a sensible buy if you also need it for household jobs. If your current drill can make clean pilot holes, using it is better value than upgrading for one bracket.
When to buy and when to rent
Tool promotions often cluster around major holiday sales, Father’s Day, and spring home-improvement events, but a discount only matters if it lowers the cost of a tool you need. Compare the complete price: a drill advertised cheaply may require a battery and charger, while a kit includes both. Check return terms, especially for mounts, since a mismatch in VESA pattern or wall type can make a discounted item unusable.
Rent or borrow a hammer drill for a one-off concrete installation rather than buying one you will rarely use. For a wood-stud wall, renting basic tools usually costs more than borrowing them and may not save money over a budget purchase. If you are unsure whether the wall contains wood studs, metal studs, masonry, or a nonstandard build, confirm before shopping; the wrong drill or mount can turn a low-cost job into rework.
Checks that prevent costly mistakes
Before lifting the TV, verify the bracket is level, the fasteners are in the intended framing, and each bolt is tightened as directed. Have a second person help with a large or awkward screen. Follow the mount’s instructions for the locking tabs or safety screws, and check that cables are not pinched when the TV is seated. If the mount shifts, a fastener spins, or the wall material crumbles, take the TV down and reassess rather than hoping the connection will hold.