Best Value Tools for Insulating and Sealing a Drafty Attic Hatch
What's inside
As an Amazon Associate I earn from qualifying purchases. This post may contain affiliate links at no extra cost to you.
A drafty attic hatch usually needs two fixes: an airtight seal around the opening and insulation on the hatch itself. A caulk gun, utility knife, tape measure and a few inexpensive materials can handle most jobs. Spending more makes sense when you need a durable ladder-hatch seal or safer access—not just because a tool is marketed for insulation.
As an Amazon Associate we earn from qualifying purchases at no extra cost to you.


What to buy for the job
For a basic pull-down or ceiling hatch, start with closed-cell foam weatherstripping, rigid foam board, compatible adhesive and a way to fasten the insulation. The hatch must still open and close freely, so measure its thickness and clearance before buying materials. If the gap around the frame is larger than about 1/4 inch, low-expansion window-and-door spray foam may help fill it; use it sparingly, since expanding foam can bow trim or obstruct a moving hatch.
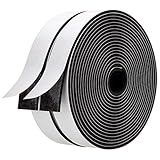
A closed-cell foam weatherstripping roll is usually the best-value seal for a simple hatch. A 10- to 17-foot roll commonly costs about $5–$15, depending on thickness and width. Choose a profile that compresses when the hatch closes without making the latch hard to operate. A seal that is too thin leaves leaks; one that is too thick may keep the hatch from seating.
Tool value: what is worth paying for?
| Tool or material | Typical price range | Best use | Value note |
|---|---|---|---|
| Manual utility knife | $5–$15 | Cutting foam board and tape | Fine for one hatch; use sharp blades and replace them when cuts drag. |
| Caulk gun | $5–$20 | Applying sealant around a fixed frame | A basic smooth-rod gun is adequate for occasional work. |
| Closed-cell weatherstripping | $5–$15 per roll | Sealing the hatch perimeter | Prioritize correct thickness and adhesive over brand. |
| Rigid foam board | $10–$30 per sheet | Adding insulation to the hatch | One sheet often covers several hatches; check thickness and clearance. |
| Low-expansion spray foam | $6–$12 per can | Filling irregular gaps around a stationary frame | Useful for awkward cracks, but messy and easy to overapply. |
| Staple gun | $15–$35 | Securing a fabric or plastic insulation cover | Worth buying only if you have other household uses. |
For a one-time repair, borrow a staple gun or use compatible adhesive rather than buying a tool for a single task. A rigid foam insulation board is generally more cost-effective than a specialty attic-hatch insulation kit when the opening is a standard shape and you are comfortable measuring and cutting. Kits can save time on unusual openings or when they include a gasket and ready-made cover, but compare the contents: some are mostly pre-cut foam and hardware you could buy separately.
Seal the frame before adding insulation
Close the hatch and inspect its perimeter for visible gaps, loose trim or a weak latch. A smoke pencil or a strip of tissue held near the edges on a windy day can help locate air movement. Don’t use an open flame. Clean the contact surface, measure all four sides and apply weatherstripping as a continuous loop. Butt the ends together rather than leaving a corner gap, and test the hatch several times before trimming anything permanent.
For cracks between a fixed frame and ceiling, use caulk on small, stable joints and low-expansion foam on larger irregular gaps. A low-expansion window-and-door foam is safer around finished trim than general-purpose high-expansion foam, but it can still spread farther than expected. Apply a shallow bead, let it cure according to the label, then trim excess. Wear gloves and eye protection; uncured foam sticks to skin and clothing and is difficult to remove.
Add insulation without blocking the hatch
Cut foam board to fit the attic-facing side of the hatch, leaving room around hinges, folding arms and the latch. For a basic DIY job, 1- to 2-inch rigid foam board is a practical starting point. It is light, easy to cut and adds insulation without much cost, though thicker board may prevent the hatch from closing or reduce access clearance. Check the product label for its R-value; thickness alone does not tell you the exact thermal performance.
Use an adhesive labeled for foam board, since some solvent-based products can melt foam. If you add a cover over loose-fill insulation, use a durable, secured enclosure rather than relying on a loose piece of plastic. Avoid leaving exposed foam where it can be damaged or where local fire rules require a protective covering. Follow product instructions and local requirements, especially if the hatch is near recessed lights, wiring or other heat sources.
Brand value and when to shop
For basic hand tools, store brands are often adequate: a utility knife does not need a premium label, and an inexpensive caulk gun is fine if it advances smoothly and releases pressure when you stop squeezing. Spend extra on a comfortable knife if you will use it often, or on a sturdier gun for repeated sealant work. For tape, adhesive and weatherstripping, compare material type, dimensions and stated temperature range. A familiar brand is not a substitute for choosing the right foam profile.
Late summer and early fall are convenient times to shop because you can install the seal before cold weather, and home-improvement retailers may discount weatherization supplies. Prices vary, so compare the cost per foot of gasket and per square foot of insulation rather than judging by package price alone. Don’t stock up on adhesive or sealant for a small job unless you have another use; opened products can cure or lose performance before you need them.
Common mistakes that waste money
Buying the thickest gasket without checking latch pressure is a common failure: the hatch may sit crooked or pop open. Another is insulating over an air leak without sealing it first. Insulation slows heat transfer, but air still moves through gaps. Finally, measure twice before cutting foam board. A slightly oversized panel can interfere with hinges, while a loose panel may fall into the attic. If the hatch is warped, the frame is badly out of square or the ladder mechanism is damaged, fix that problem before investing in a kit.