Best Affordable Brad Nailer for Small Woodworking and Craft Projects
What's inside
As an Amazon Associate I earn from qualifying purchases. This post may contain affiliate links at no extra cost to you.
A brad nailer is one of the most useful tools for small woodworking, trim repairs, picture frames, craft furniture, and shop projects. For occasional work, however, it is easy to spend more than necessary on features you will rarely use. The best affordable brad nailer is usually an 18-gauge tool with adjustable depth control, a narrow nose, and enough power to drive 5/8- to 2-inch brads without constant jams.
Expect to spend about $25 to $60 for a basic pneumatic nailer, $70 to $150 for a cordless model with a battery, and more for premium cordless systems. Your compressor, battery platform, and expected workload matter more than a small difference in advertised driving power.
As an Amazon Associate we earn from qualifying purchases at no extra cost to you.


What to Look For in an Affordable Brad Nailer
For general craft and woodworking use, choose an 18-gauge brad nailer. It fires relatively thin nails that leave small holes and are less likely to split narrow trim than 15- or 16-gauge finish nails. Brad lengths commonly range from 5/8 inch to 2-1/8 inches, although many budget tools work best within a narrower range.
Depth adjustment is important. Without it, nails may sit proud of the surface in hard wood or sink too deeply into soft pine and leave a crater. Look for a tool with a dial or tool-free adjustment near the nose. A selectable trigger is useful but not essential for most small projects; a single-shot setting gives better control when positioning delicate pieces.
Other worthwhile features include a rear exhaust, a low-nail indicator, a comfortable grip, and a jam-release mechanism that opens without special tools. Do not treat a long warranty as proof of better performance. A cheap nailer that drives consistently is more useful than a feature-heavy model that jams every few shots.
Pneumatic vs. Cordless: Which Is Cheaper in Practice?
A pneumatic brad nailer normally costs the least. If you already own an air compressor, a budget pneumatic unit is hard to beat for value. It is light, has little downtime, and can fire hundreds of nails during a project. The trade-off is the hose, compressor noise, and the need to add a few drops of pneumatic oil unless the manufacturer specifies an oil-free design.
If you do not own a compressor, the calculation changes. A small compressor, hose, fittings, and nailer can easily bring the total above $150. In that situation, a cordless tool may be cheaper and more convenient, especially for short jobs around the house. Battery nailers are heavier and usually cost more, but they eliminate setup time and work well where there is no outlet.
For a first purchase, compare complete system cost rather than tool-only pricing. A bare cordless nailer is not a bargain if you also need a battery and charger. Conversely, a pneumatic nailer is not a $30 solution if you need to buy an air system.
| Type | Typical entry cost | Best use | Main drawback |
|---|---|---|---|
| Pneumatic 18-gauge | $25–$60, plus compressor | Frequent shop use and lowest operating cost | Hose, compressor noise, and setup |
| Cordless battery | $70–$150 with battery | Repairs, installation, and portable work | Higher price and added weight |
| Corded electric | Uncommon | Occasional stationary work | Limited selection and a power cord |
Best Budget Choice for Most Small Projects
For a home workshop that already has compressed air, buy a basic 18-gauge pneumatic brad nailer. Look for a model rated for at least 5/8- to 2-inch brads, with an operating range around 70 to 110 PSI. You do not need a high-capacity magazine for crafts; 100 nails is already plenty for most small assemblies.
Cheap pneumatic nailers are fine when the work is occasional and the material is forgiving. They are particularly suitable for attaching thin trim, assembling pine boxes, installing drawer bottoms, and holding glued joints while the adhesive cures. The most common compromises are rougher depth adjustment, a less comfortable trigger, and occasional feeding problems with very short brads.
Use a small compressor with a tank of at least 1 to 2 gallons for light work, and set the pressure according to the nailer’s instructions. A compressor that cannot recover quickly may cause shallow drives during rapid firing. That is a compressor limitation, not necessarily a nailer failure.
When a Cordless Brad Nailer Is Worth the Extra Cost
Choose a cordless 18-gauge brad nailer kit if you work in finished rooms, move between job locations, or only need a nailer a few times each month. Battery tools are also easier for beginners because there is no compressor pressure to adjust and no hose dragging across a project.
The cheaper cordless options generally use a flywheel or motor-driven mechanism and may have a noticeable pause between trigger pulls. That is acceptable for picture frames and small cabinets but frustrating for long runs of trim. Pneumatic nailers usually feel faster and more consistent.
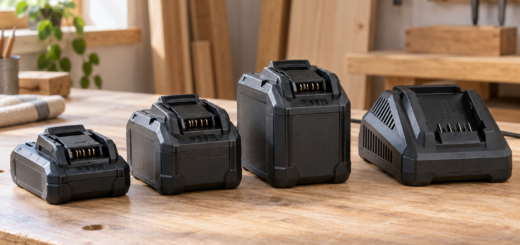
Pay attention to battery availability. If you already own tools from a battery platform, a bare tool can be good value. If not, compare the cost of a second battery, because small packs can run down before a full afternoon of trim work. Battery nailers may also leave more marks in soft wood because their heavier nose must be pressed firmly against the surface.
Nails, Wood Choice, and Common Failure Modes
Use galvanized or stainless brads where moisture is possible, and match the nail length to the material. A practical rule is to have the brad penetrate the second piece by roughly two to three times the thickness of the first piece. A 1-1/4-inch brad often suits 1/4-inch trim over a thicker backing, while a 2-inch brad may be excessive for thin craft stock.
Jams often come from bent nails, mixed nail lengths, or a magazine loaded with the wrong angle or brand specification. Clear the magazine before repeatedly pulling the trigger. Dry firing can damage some mechanisms and will not improve a poor feed.
If the nail bends or exits the side, reduce the pressure slightly, hold the nose square, and avoid firing too close to an edge. If the brad sinks too far, lower the pressure or reduce the depth setting. Always test on scrap from the same material before working on the visible face.
When to Buy and Where the Value Changes
Prices tend to improve during major holiday sales, spring home-improvement promotions, and November discount events. Cordless kits often receive the largest discounts because retailers bundle a battery or charger. Pneumatic nailers are inexpensive year-round, so waiting for a sale is less important unless the price includes a compressor.
Before buying, check the cost of compatible brads and replacement batteries. A nailer that saves $20 but requires expensive proprietary batteries may cost more over several years. For a hobbyist doing a few projects per season, the cheaper pneumatic option is fine if a compressor is already available. For quick repairs and portable work, paying extra for cordless convenience is usually the better value.