How to Calculate Cost Per Use for Expensive Workshop Tools
What's inside
As an Amazon Associate I earn from qualifying purchases. This post may contain affiliate links at no extra cost to you.
An expensive workshop tool is not automatically a good value, and a cheap tool is not automatically a bargain. The useful number is cost per use: how much the tool costs each time you put it to work. That figure helps compare a $900 table saw used weekly with a $180 saw used twice a year, or a premium cordless platform with a cheaper brand that has fewer compatible tools.
The Basic Cost-Per-Use Formula
Start with the total ownership cost, not just the shelf price:
Cost per use = (purchase price + ownership costs − resale value) ÷ expected uses
Ownership costs include consumables, replacement parts, batteries, blades, filters, maintenance, and accessories that are required to use the tool safely. Subtract realistic resale value because a well-kept professional tool may still be worth 30% to 60% of its purchase price after several years. A broken or obsolete tool may be worth almost nothing.
Count a “use” consistently. For a sander, one use might be a complete project session. For a drill, it could be one job rather than every individual hole. If you count every hole for one tool and every project for another, the comparison becomes meaningless.
A Realistic Example
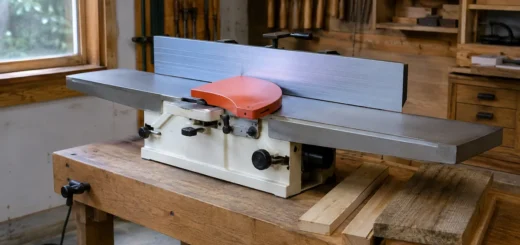
Suppose you are choosing between a $250 benchtop planer and a $700 heavier-duty planer. The cheaper machine may be adequate for occasional furniture repairs, while the expensive one may feed stock faster and need fewer adjustments.
| Item | $250 planer | $700 planer |
|---|---|---|
| Purchase price | $250 | $700 |
| Blades and maintenance over five years | $180 | $240 |
| Expected resale value | $50 | $350 |
| Expected uses | 40 | 160 |
| Approximate cost per use | $9.50 | $3.69 |
The premium planer costs nearly three times as much initially, but it wins if you really use it 160 times. If your actual workload is only 20 uses, its cost per use becomes roughly $29.50. That is a poor value unless the cheaper machine cannot handle the work.
Use your past behavior, not an optimistic plan. If you bought a tool “for future projects” that never happened, assume a lower use count this time. A spreadsheet with purchase price, date, project name, and maintenance cost is enough to build a useful history.
Include Time and Failure Costs
Two tools with the same cost per use may not have the same value. A tool that takes twice as long, produces poor results, or fails during a deadline can be more expensive in practice.
Estimate labor savings separately. If a better dust extractor saves 15 minutes per woodworking session and you value your time at $25 per hour, that is $6.25 of practical value per use. A more reliable compressor may prevent a $40 ruined finish or a wasted afternoon, but do not assign that benefit to every use unless failures are genuinely common.
Failure costs include damaged work, replacement parts, shipping, downtime, and the cost of renting another tool. Cheap tools are often fine when the job is low-risk: drilling softwood, assembling flat-pack furniture, or making a one-time repair. A cheaper option is harder to justify for work where a slipping chuck, inaccurate fence, overheating motor, or poor dust control can ruin expensive material.
Compare Tool Categories, Not Just Prices
Before comparing brands, decide whether you need the category at all. Renting a floor sander, concrete saw, or large router may beat ownership even when the rental price looks high. For a tool used twice a year, compare purchase cost plus storage and maintenance against two rental days annually.
For occasional drilling and driving, a compact cordless drill-driver kit is usually enough. A premium brushless kit makes more sense when you use it weekly, work in demanding materials, or expect to add several tools to the same battery system.
Battery platforms need a separate calculation. The first kit includes a charger and batteries, but bare tools are cheaper afterward. If you already own compatible batteries, compare the bare-tool price. If you are starting from zero, include at least one spare battery and the replacement cost after its likely service life. A low-priced tool line with expensive batteries can lose its advantage quickly.
Brand Value and Repairability
Brand value is more than a logo. Look for available parts, published manuals, service centers, warranty handling, accessory availability, and a stable battery platform. A $400 tool that runs for ten years may beat a $250 tool replaced twice, even before counting downtime.
Do not pay for professional durability when the job cannot stress the tool. A homeowner cutting one 2-by-4 occasionally may not benefit from the heaviest cordless circular saw. On the other hand, frequent sheet-goods work rewards a rigid base, accurate guide, good dust collection, and a motor that does not bog down.
Consumables also expose hidden brand costs. Check the price and availability of blades, sanding discs, filters, collets, hoses, and proprietary accessories. A tool that uses common abrasives may cost less over its life than one requiring a special part.
Seasonal Buying Strategy
Buy expensive tools when demand and inventory patterns work in your favor. Cordless outdoor equipment often sees discounts late in the season, while workshop tools commonly drop around major holiday sales and year-end clearance periods. Spring promotions can be useful for starter kits, but check whether the “free” accessory is something you would buy anyway.
Track the normal price for at least a month. A 20% discount from an inflated list price is not a real saving. Compare the complete kit, warranty, shipping, and included accessories. A slightly higher-priced package with two batteries may have a lower cost per use than a bare tool that forces a second purchase.
Make the Final Decision
Calculate cost per use using a conservative use count, then calculate it again using your best realistic estimate. If the expensive tool only wins under optimistic assumptions, buy the cheaper one or rent. If it wins under conservative assumptions and also saves time or reduces failure risk, the premium is easier to defend.
For a final check, ask three questions: Can the cheaper tool safely handle the material? Will its consumables and batteries remain available? What happens if it fails halfway through the job? The right purchase is the one that delivers acceptable results at a cost you can justify—not necessarily the tool with the lowest price or the most impressive specifications.