Best Budget Tools for Adding Weatherstripping to Exterior Doors
What's inside
As an Amazon Associate I earn from qualifying purchases. This post may contain affiliate links at no extra cost to you.
Weatherstripping is a low-cost door fix, but the wrong tool can turn a simple afternoon job into a frustrating one. Most exterior doors need little more than a tape measure, utility knife, screwdriver, and a way to remove old adhesive. The worthwhile upgrade depends on the door: a staple gun helps with some kerf-insert seals, while a compact handsaw or chisel may be needed to adjust a door that will not close after new weatherstripping goes in.
As an Amazon Associate we earn from qualifying purchases at no extra cost to you.


Start with the door, not the tool
Check where air or light gets through before buying anything. Close the door on a strip of paper; if it pulls out with almost no resistance, that spot may need a tighter seal. Look for gaps along the jamb and head, and inspect the sweep at the bottom. A gap wider than about 1/8 inch is often a sign that the existing seal is worn, poorly fitted, or the door needs adjustment.
Measure the jamb perimeter before shopping. For a typical 36-by-80-inch door, the two sides and top total about 16 feet; buy enough material to cover that run, plus a little extra for mistakes. A threshold sweep is measured separately. Weatherstripping that is too thick can make the latch hard to close, so do not assume the fullest-looking seal is best.
The essential tools: spend little, use them well
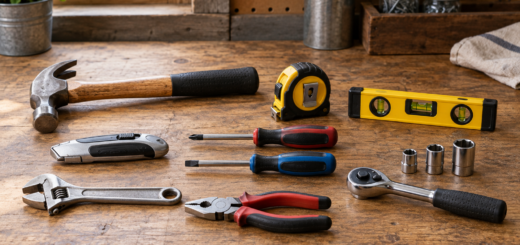
A tape measure and sharp utility knife are the essentials. A 16-foot tape is enough for one door, and a basic retractable knife works if you fit it with a fresh blade. Dull blades crush foam and leave ragged cuts, especially on rubber seals. A small pair of scissors can make cleaner cuts in soft foam, but it is not a substitute for a knife on dense vinyl or rubber.
For removing old adhesive, start with a plastic scraper. It is less likely than a metal putty knife to gouge painted wood or scratch a metal jamb. If residue remains, try a little adhesive remover on an inconspicuous area first; some solvents soften paint or damage finishes. A screwdriver is useful for removing a worn door sweep and tightening loose hinges, which can sometimes correct a gap without adding thicker seals.
If you need to outfit a basic kit, compare a basic tape measure, utility knife, and plastic scraper set with tools you already own. There is little value in paying for a large home-repair kit when the job calls for only a few accurate cuts.
Budget tool choices by job
| Tool | Typical budget range | Best use | When to skip it |
|---|---|---|---|
| Tape measure, 16-foot | $5–$15 | Measuring jambs and sweep length | Do not skip; use a ruler only for small checks |
| Utility knife | $5–$12 | Trimming vinyl, rubber, and backing | Skip a premium model for one door; buy spare blades instead |
| Plastic scraper | $3–$10 | Lifting old adhesive without gouging paint | Skip if the jamb is bare metal and residue is minimal |
| Staple gun | $15–$30 | Attaching compatible staple-on seals | Skip for adhesive-backed or kerf-insert products |
| Small hacksaw | $10–$25 | Cutting a metal-backed door sweep to width | Skip if the sweep is already the correct size or cuts with shears |
Match the seal to the door
Adhesive-backed foam is the cheapest and easiest option, often around $5–$12 per package. It is reasonable for a lightly used door with small, even gaps. Its weak point is durability: dust, moisture, temperature swings, and repeated compression can loosen the adhesive or flatten the foam. Clean and dry the surface carefully, and avoid stretching the strip as you apply it.
Rubber or vinyl compression seals generally cost more, roughly $10–$25 for a door-sized kit, but tend to hold their shape longer. Some fit into a groove, or kerf, in the jamb. These can make a neater, more durable seal, but check that your frame has the required slot before ordering. A staple gun is useful only for seals designed to be stapled; staples driven into the wrong product can split the material or prevent it from seating properly.
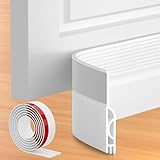
For the bottom, a door sweep or replacement shoe is usually more effective than stacking foam along the threshold. Basic sweeps often cost $10–$25. Measure the door width and the clearance at the threshold. A sweep that drags heavily can wear quickly, make the door difficult to open, or pull loose; one set too high leaves an air gap. A replacement exterior door sweep should match the door’s thickness and attachment style, not just its width.
Where a small upgrade pays off
Buy a better knife if you expect to do several doors or other repair work. A comfortable handle and blade lock make repeated trimming safer, but the blade matters more than brand: replace it as soon as it starts tearing the seal instead of cutting cleanly. For a single door, a basic knife and a spare blade are usually enough.
A staple gun is worth buying only if your chosen seal requires staples or you have other uses for it. Entry-level manual models commonly cost $15–$30. They can be tiring for a long run of staples, and a weak tool may not drive them fully into dense hardwood. Test on scrap first. Do not substitute staples for the adhesive or fasteners specified by the seal manufacturer.
A small hacksaw makes sense when a sweep has a metal rail that must be shortened. Measure twice, mark the cut, and keep the blade square. For a plastic-only sweep, heavy scissors may do the job. Paying for a powered saw for one short cut is hard to justify.
Buy before the cold snap
Weatherstripping and basic hand tools are widely available, but demand rises when temperatures drop. Shop before the first cold week if you want time to compare seal profiles and check door measurements. In spring, clearance pricing may be better, though stock can be limited to common sizes. Compare cost per foot rather than package price: a cheaper roll that falls short of the jamb perimeter is not a bargain.
Install one side at a time and test the latch after each run. The door should close firmly without slamming, and the seal should compress lightly rather than buckle. If the door becomes difficult to latch, remove the new strip and check its thickness and placement before trimming the door. A careful fit with inexpensive tools usually outlasts a premium seal installed over dust or cut too thick.