Best Budget Tools for Fixing Cabinet Drawers and Door Hardware
What's inside
As an Amazon Associate I earn from qualifying purchases. This post may contain affiliate links at no extra cost to you.
Cabinet drawers and door hardware rarely need expensive tools. Most repairs come down to three jobs: tightening loose screws, correcting alignment, or rebuilding a stripped hole. A small hand-tool kit will handle nearly all of them, and buying the right inexpensive tool is usually better than buying a large “cabinet hardware” set full of duplicate bits.
As an Amazon Associate we earn from qualifying purchases at no extra cost to you.


The basic kit worth buying
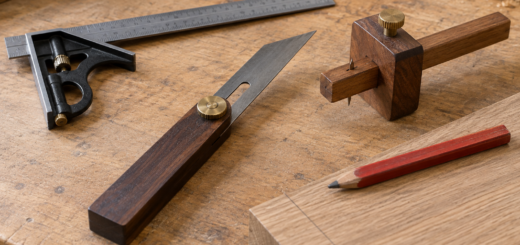
Start with a #2 Phillips screwdriver, a small flat-head screwdriver, a 1/4-inch hex-bit driver, a tape measure, a combination square, and a sharp pencil. The #2 Phillips fits most hinge and drawer-slide screws. A stubby version helps inside narrow cabinets, while a 6-inch driver gives better reach.
A magnetic screwdriver and bit set is usually the best budget choice if your existing screwdrivers are worn. Expect to spend about $15 to $30 for a usable set. Avoid sets with dozens of vague, poorly marked bits; they often have soft tips that round out after a few screws.
For occasional work, a manual driver is enough. A cordless drill or screwdriver saves time when removing six or more screws, but use its lowest clutch setting for hinge screws. Driving too hard can strip the screw head or pull the screw through particleboard.
What to buy and what to skip
| Tool | Typical budget | Best use | Budget buying advice |
|---|---|---|---|
| #2 Phillips screwdriver | $5–$12 | Hinges, handles, drawer slides | Prioritize a hardened tip and comfortable grip |
| Stubby screwdriver | $6–$15 | Tight cabinet interiors | Useful, but not essential if space is open |
| 1/4-inch hex-bit driver | $8–$20 | Hex socket screws and adjustment screws | Buy if your hinges use hex adjustments |
| Drill/driver | $35–$80 | Repeated repairs and pilot holes | A bare tool is poor value unless you already own the battery |
| Self-centering hinge bit | $8–$18 | Accurate hinge-cup screw holes | Worthwhile for replacements, unnecessary for simple adjustment |
| Two-part epoxy or wood filler | $6–$15 | Stripped screw holes | Use epoxy for strength; filler is mainly cosmetic |
Skip oversized multi-piece kits unless the price is close to a small quality set. A $10 kit can be fine for one loose handle, but cheap bits are a false economy when the tip slips and damages a visible screw. For a homeowner, a modest set from a reputable hand-tool brand generally offers better value than the cheapest no-name assortment. You are paying for fit and durability, not a longer warranty.
Fixing loose and stripped screws
First, remove the screw and inspect both the screw head and the hole. If the head is damaged, replace it with the same diameter and a similar length. A longer screw is not automatically stronger: it can hit the cabinet side, interfere with a drawer, or break through a thin door rail.
For a slightly loose hole in solid wood, pack it with hardwood toothpicks or a small wood sliver, add a little wood glue, let it dry, and drill a small pilot hole before reinstalling the screw. This is a practical repair, but it is not ideal for particleboard. In chipboard, the repair can pull out again if the hinge is under constant load.
For badly damaged particleboard, use a two-part epoxy made for wood or a dedicated screw-hole repair product. Let it cure fully—often several hours or overnight—then drill a pilot hole. Do not immediately drive a screw into wet filler. That failure leaves a crumbly hole and may require moving the hinge.
A cabinet screw-hole repair kit makes sense if you have multiple failed hinge holes. For one minor repair, toothpicks and glue cost less and work well in solid wood.
Aligning drawers and doors without special jigs
Before adjusting anything, check that the cabinet box itself is square and that the screws holding the hinge or slide are tight. Many “bad hinge” problems are actually loose mounting screws. Place a level on the cabinet and measure the gaps around the door. A consistent gap is more useful than trying to make every door perfectly flush.
European-style concealed hinges normally provide side-to-side, depth, and height adjustment. Turn one adjustment screw a quarter-turn at a time, close the door, and check the gap. Large turns make it easy to lose track of the starting position. Support a heavy door while loosening mounting screws; otherwise the hinge can twist or the door can drop.
For side-mount drawer slides, measure the required gap before buying replacements. Many need about 1/2 inch of clearance per side, but not all slides use the same dimension. Measure the existing slide, drawer width, and cabinet opening. A slide that is only 1/16 inch too wide may bind, while excessive clearance allows the drawer to rack and sag.
A self-centering hinge drill bit is useful when installing replacement hinges because it centers the small mounting holes. It is unnecessary if you are only turning hinge adjustments. For drawer slides, a combination square and a few clamps usually provide enough accuracy; a specialized slide jig is convenient but hard to justify for one kitchen.
When a drill adds value
If you buy a drill, choose a compact 12V or 18V drill/driver with a clutch, two-speed gearbox, and a keyless chuck. For cabinet work, control matters more than maximum torque. A very powerful drill can destroy a soft screw hole in less than a second.
Use a 1/16- to 1/8-inch pilot bit for most small cabinet screws, but check the screw diameter and material first. Drill only as deep as needed and mark the bit with tape. For new knobs and pulls, use a sharp brad-point bit and clamp a scrap board behind the door to prevent blowout.
Do not buy into a battery platform solely for one drawer repair. A corded drill is often cheaper if you already have an extension cord, while a bare cordless tool is only a bargain when you own compatible batteries. If you need a complete kit, compare the included battery, charger, and warranty—not just the tool’s advertised price.
Seasonal buying and value checks
Hand-tool sets commonly see discounts during spring home-improvement sales, Father’s Day promotions, and November holiday events. Cordless kits are often cheapest when manufacturers introduce updated battery platforms, but older batteries may become harder to find later. Buy replacement slides, hinges, and screws when needed rather than stockpiling: dimensions and finishes change, and unused hardware is easy to misplace.
For one loose handle, buy a screwdriver. For several doors, add a drill and a square. For repeated stripped holes, spend on the repair material and a good pilot bit. That tiered approach keeps the repair inexpensive while avoiding the most common costs: damaged screw heads, crooked replacement hardware, and buying a complete tool collection for a ten-minute fix.