Best Value Cross-Line Laser for Hanging Cabinets on a Tight Budget
What's inside
As an Amazon Associate I earn from qualifying purchases. This post may contain affiliate links at no extra cost to you.
For hanging cabinets, a cross-line laser is usually the best-value layout tool: one horizontal line shows the cabinet run height, while one vertical line helps position cabinet edges and fillers. You do not need a $300 construction laser for this job. A dependable budget model in the $30–$80 range can handle cabinet installation, provided you understand its limits.
As an Amazon Associate we earn from qualifying purchases at no extra cost to you.



What matters for cabinet installation
Prioritize a bright horizontal line, a self-leveling pendulum, and a mounting method that works on your wall. Most budget cross-line lasers claim accuracy around 1/8 inch at 30 feet. That is adequate for typical cabinet work, where the wall, ceiling, and cabinet boxes often vary more than the laser itself. A tool rated closer to 1/16 inch at 30 feet is better, but usually costs more.
Self-leveling range is another important specification. A typical inexpensive laser can correct roughly 3 to 4 degrees of tilt. If the tool is outside that range, it may flash or beep instead of projecting a trustworthy line. That warning is useful only if you notice it. Set the laser on a stable surface, let it settle, and check that the line is steady before marking anything.
For a small kitchen, a green-beam model is easier to see in daylight than a red-beam model. The trade-off is price and battery life. Green lasers commonly cost $15 to $30 more, and inexpensive green diodes may not be as impressive as their packaging suggests. In a dim room or after removing the upper cabinets, a red beam is often perfectly serviceable.
The best-value configuration
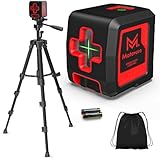
For most homeowners, the sweet spot is a budget self-leveling red cross-line laser with a magnetic bracket and a standard tripod thread. Expect to pay about $35–$60. This combination gives you the functions needed for cabinet layout without paying for 360-degree lines, a detector, or jobsite-level impact protection.
A magnetic mount is useful when a metal corner bead, appliance, or temporary steel bracket is available, but it will not attach to ordinary drywall. A clamp-style bracket is more versatile, especially when working from a ladder or cabinet box. A laser that includes only a tiny tabletop base may be cheap, but you may spend the savings on improvised blocking and repeated setup.
If the kitchen is bright or the line must reach more than 15 feet, consider a green-beam self-leveling cross-line laser. It is a sensible upgrade when you will also use the tool for tile, shelves, wainscoting, and flooring. It is not automatically more accurate than a red laser.
| Laser type | Typical price | Best use | Main compromise |
|---|---|---|---|
| Red cross-line | $25–$50 | One cabinet run indoors | Harder to see in strong light |
| Green cross-line | $40–$90 | Bright rooms and repeated projects | Higher cost and battery use |
| 360-degree cross-line | $70–$150 | Multiple walls or full-room layout | Extra features you may not need |
| Professional rugged laser | $150–$300+ | Frequent jobsite use | Poor value for one kitchen |
How to use it for hanging cabinets
Start by finding the finished floor’s highest point. Measure up from several places, because floors are rarely level. Mark the intended bottom of the upper cabinets, then transfer that mark around the room. Set the laser so its horizontal line lands exactly on that reference. The line now gives you a continuous cabinet-bottom guide, even where the wall bows.
Do not confuse a level line with the cabinet support height. If the cabinet has a hanging rail, measure the distance from the cabinet bottom to the rail and mark that dimension above the laser line. For example, if the cabinet bottom is 54 inches above the finished floor and the rail is 2 inches above the bottom, the rail line belongs at 56 inches.
Use the vertical line to check the starting cabinet edge, filler position, or the centerline of a range hood. A budget cross-line laser is not a stud finder. Locate studs separately with a stud finder and confirm them with small exploratory holes. Cabinets should be fastened into structural framing or properly installed blocking, not just drywall anchors.
Where cheap lasers fail
The most common failure is a line that appears level but is not. Test the laser before trusting it: project the horizontal line on a wall, mark it, rotate the tool 180 degrees from the same position, and compare the lines. At 10 feet, a difference of more than about 1/8 inch deserves caution. Return a new tool that fails this test rather than trying to compensate for it.
Budget units also have weak pendulum locks, narrow mounting bases, and inconsistent switches. A knock against the wall can move the setup enough to shift a cabinet mark by 1/16 inch or more. Keep the laser on a stable surface, use the locking mode only for transferring angled marks, and recheck the line after moving a ladder or cabinet.
Many low-cost tools advertise IP ratings or drop resistance without offering the same durability as established professional brands. That matters on a remodeling site, but less in a homeowner’s toolbox. Store the laser in its case, remove batteries between long storage periods, and avoid leaving it in a hot vehicle.
When a more expensive model is worthwhile
Spend more for a 360-degree model if the cabinet run turns a corner or you are laying out several walls at once. A full horizontal plane can save repeated repositioning. Pay extra for a detector only when the laser must work outdoors or across a very bright, long-distance space; a receiver does little for ordinary indoor cabinet installation.
Brand-name options from established tool companies generally offer better calibration consistency, clearer instructions, stronger mounts, and easier warranty service. If you install cabinets professionally, those advantages can repay the price quickly. For a single kitchen, a well-reviewed budget unit is usually enough if you test its accuracy first.
For shoppers comparing several inexpensive designs, start with cross-line lasers with a magnetic bracket and tripod mount. Check recent reviews for reports of calibration problems, not just brightness claims. Also verify whether the package includes batteries, a wall mount, and a case; a $40 laser missing those accessories may be a worse value than a $55 kit.
Best time to buy
Laser levels are often discounted around spring remodeling season, Father’s Day, Black Friday, and major holiday tool promotions. Red-beam models tend to offer the best everyday value, while green-beam prices can drop sharply during seasonal sales. Compare the final kit price, warranty, mount, and return policy rather than chasing the lowest sticker price.
If you are buying only for one cabinet project, set a practical ceiling of about $60 for red or $90 for green. Above that, make sure you are receiving a feature you will use—360-degree coverage, better mounting, or verified ruggedness—not simply a brighter package and a longer specification sheet.