Best Budget Cross-Line Laser for Installing Cabinets
What's inside
As an Amazon Associate I earn from qualifying purchases. This post may contain affiliate links at no extra cost to you.
A cross-line laser is useful for cabinet work because it gives you a level reference across a long wall and a plumb reference for lining up cabinet sides. You do not need a construction-grade rotary laser for a typical kitchen. The best budget choice is usually a self-leveling 360-degree horizontal laser with a vertical line, a locking mode, and a mount that lets you adjust the height precisely.
As an Amazon Associate we earn from qualifying purchases at no extra cost to you.

What cabinet installation actually needs
For a run of base cabinets, the important reference is a level line at the cabinet-top height. Set the laser above the tallest point on the floor, then measure down from that line to find where each cabinet needs shimming. For wall cabinets, a level line helps keep the bottoms aligned; a vertical line helps check that cabinet sides and end panels are plumb.
A single horizontal line can do this job, but a 360-degree horizontal line is easier when you are working around corners or checking several walls. A vertical line is useful, but a second vertical line is not essential for ordinary cabinet installation. More lines can make layout faster, yet they often add cost without improving the finished result.
Budget features worth paying for
Look for a self-leveling model with an accuracy rating around ±1/8 inch at 30 feet or better. That is ample for cabinet layout: cabinets are adjusted and fastened in place, not installed to a machine-tool tolerance. Check the stated working range as well. A practical range of 30 to 50 feet covers most kitchens indoors, where walls and cabinetry are the targets rather than distant outdoor points.
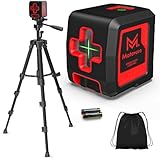
A locking pendulum matters. It lets you switch off self-leveling and project a deliberately angled line, and it protects the mechanism during transport. A magnetic bracket or adjustable wall mount is more useful than a long list of laser modes; you need to move the line up or down by small amounts without repositioning the whole tripod. A 1/4-inch tripod thread is a useful extra if you already own a photo or tool tripod.
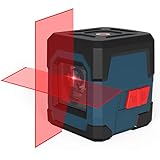
For a straightforward budget buy, compare self-leveling cross-line lasers with a 360-degree horizontal line. If your cabinet run is short and you can reposition the tool easily, a basic cross-line laser can cost less and still be accurate enough.
How the options compare
| Type | Typical strengths | Trade-offs | Good fit |
|---|---|---|---|
| Basic self-leveling cross-line | Low cost; simple setup; horizontal and vertical lines | May need moving to cover a long run; fewer mounting options | Small kitchen, laundry room, or occasional DIY work |
| 360-degree horizontal with one vertical line | Horizontal reference wraps around the room; useful for cabinet runs | Costs more; a bright line can be harder to see in strong light | Most cabinet installations and repeat indoor projects |
| Three-plane or multi-line laser | More simultaneous reference lines; convenient for several layout tasks | Higher price and more features than cabinet work usually needs | Frequent renovation or framing work beyond cabinets |
Prices change often, so compare the current price with the package contents rather than relying on a fixed “budget” cutoff. A bare laser without a usable mount may be a worse value than a slightly pricier kit. Conversely, a case full of accessories is not worth paying extra for if you will only use the tool on one kitchen.
Brightness and battery trade-offs
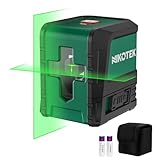
Green lasers are easier to see than red lasers in many indoor conditions, particularly across a bright room. They usually cost more and can use batteries faster. A red laser is fine in a dim or moderately lit kitchen if you can see the line clearly at the working distance. Before buying, think about daylight from windows and task lighting: a line that disappears on a sunlit wall can slow you down even if the stated range looks generous.
Some budget models use common AA batteries; others use a rechargeable pack. AA batteries are easy to replace on a job, while rechargeable systems can save money if you use the tool regularly. Check whether the kit includes a battery and charger. Do not assume that a USB port means the laser can run while charging.
Using a budget laser accurately
Put the laser on a stable surface or mount it securely, then let the self-leveling mechanism settle. If the tool flashes or beeps, it may be outside its leveling range; move it closer to level instead of trusting the projected line. Mark the reference at several points, especially across a long wall, and verify it with a tape measure or a second reference before drilling.
A common mistake is treating the laser line as the cabinet position rather than a datum. Measure from the line to the cabinet top or bottom at each location, and account for the actual cabinet dimensions. Floors can vary by 1/2 inch or more across a room, so base cabinets may need different shim thicknesses even when the tops finish level. Do not use a laser line to hide a bowed wall; check the wall with a straightedge and plan for filler strips or scribing where needed.
Check calibration before relying on an unfamiliar tool. Set it near a wall, mark the line, rotate the laser 180 degrees without changing its height, and compare the marks. A noticeable mismatch suggests the tool may be out of calibration or damaged. Follow the manufacturer’s tolerance and return or service it if the discrepancy exceeds that rating.
When to spend more—and when not to
Spend more for a 360-degree line if you expect to install cabinets on multiple walls without repeatedly moving the laser. Pay extra for better mounting hardware if you need frequent fine height adjustments. Choose a brighter green model if your work area is consistently well lit and a red beam is hard to see.
Skip the upgrade if this is a one-room project and a basic self-leveling unit gives you a clear line at the distances you need. Check seasonal sale prices around major tool promotions, but compare the exact features and included mount: a discount on a more capable laser is not automatically better value if the cheaper tool already covers your cabinet run. For many DIY kitchens, a dependable 360-degree horizontal model with one vertical line is the sensible middle ground—not the cheapest laser, and not a professional multi-plane kit.