Best Affordable Tools for Preparing a House for Sale
What's inside
- Buy the tools that improve the listing, not the tool collection
- The best-value hand tools
- Patch, sand, and paint without overspending
- Cleaning tools that make rooms photograph better
- Affordable exterior tools with a visible payoff
- Where the budget should go
- When to buy and when to rent
- Avoiding expensive mistakes
- Buy the tools that improve the listing, not the tool collection
- The best-value hand tools
- Patch, sand, and paint without overspending
- Cleaning tools that make rooms photograph better
- Affordable exterior tools with a visible payoff
- Where the budget should go
- When to buy and when to rent
- Avoiding expensive mistakes
As an Amazon Associate I earn from qualifying purchases. This post may contain affiliate links at no extra cost to you.
Buy the tools that improve the listing, not the tool collection
Preparing a house for sale usually means fixing visible defects, cleaning neglected areas, and making rooms look brighter in listing photos. You rarely need professional-grade equipment for that work. A small group of reliable, affordable tools will handle most jobs: tightening hardware, patching walls, touching up paint, cleaning trim, and improving the yard.
Start with a short inspection before shopping. Walk through each room with a notepad and mark loose cabinet pulls, sticking doors, nail pops, wall holes, damaged caulk, burned-out bulbs, and dirty vents. Group purchases by task instead of buying a large kit. A cheap tool that solves three common problems is better value than a premium tool that sits unused after closing.
As an Amazon Associate we earn from qualifying purchases at no extra cost to you.




The best-value hand tools
A basic screwdriver set is essential for cabinet hardware, switch plates, curtain brackets, and door adjustments. Choose one with Phillips and slotted bits in several sizes. A 10- or 12-piece set is usually enough; oversized kits add bits you are unlikely to use and make it harder to find the right one.
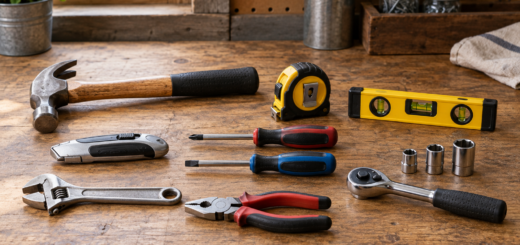
Add a 16- or 25-foot tape measure, a utility knife with replaceable blades, a small claw hammer, adjustable pliers, and a 9- or 12-inch level. A putty knife between 2 and 4 inches wide is easier to control than a broad drywall knife for filling nail holes. Look for a tape with a readable blade and a lock that does not slip. The cheapest tapes often work, but a poor lock makes measuring cabinets and trim frustrating.
If you do not already own one, a cordless drill-driver kit is the most useful power-tool purchase. A 12-volt model is lighter and sufficient for hardware and pilot holes. An 18- or 20-volt model is preferable if you will remove many screws, drill into masonry, or assemble fencing. For a single sale-preparation project, battery compatibility matters more than maximum voltage. A kit with two batteries prevents waiting during a long repair session.
Patch, sand, and paint without overspending
Small wall repairs need lightweight spackle, a putty knife, fine sanding sponges, and matching paint. Lightweight spackle is convenient for nail holes but can shrink in deeper dents. Fill a deep hole in two thin applications rather than one thick layer. Let it dry fully before sanding; painting over soft filler creates a visible depression.
Buy a sanding sponge in the 120- to 150-grit range for repairs and a 220-grit sponge for smoothing the final coat. Sanding too aggressively can widen the patch and expose drywall paper. Use a damp microfiber cloth afterward to remove dust before priming or painting.
For touch-ups, a small angled brush and a 4-inch roller are usually better value than a complete painting kit. An angled brush cuts around trim and corners, while a mini roller produces a more even finish on broad patches. If you must repaint a room, buy a 9-inch roller frame, a quality cover, a paint tray, painter’s tape, and a drop cloth. The cheapest roller covers can shed lint into the finish; spending a few extra dollars is worthwhile on visible walls.
Use the existing wall paint if possible. Even an accurate color match can look different when the old paint has faded or accumulated grime. If the repair is larger than a few inches, paint the entire wall from corner to corner rather than creating a noticeable rectangle.
Cleaning tools that make rooms photograph better
Deep cleaning often produces more visible value than another decorative upgrade. A stiff nylon scrub brush, microfiber cloths, a plastic scraper, a bucket, and a basic squeegee cover most kitchens and bathrooms. Microfiber cloths are reusable and less likely than paper towels to leave lint on stainless steel and mirrors.
A handheld steam cleaner can help with greasy backsplash seams, shower doors, and textured surfaces, but it is not a substitute for detergent. Steam may loosen grime without removing it, and it can damage unsealed wood, laminate edges, or painted surfaces. Test an inconspicuous area first. For most sellers, a scrub brush and appropriate cleaner are cheaper and more dependable.
Replace cracked caulk around sinks, tubs, and counters. A basic caulk gun, painter’s tape, a plastic smoothing tool, and mildew-resistant bathroom caulk are enough. Remove all loose old caulk before applying new material. New caulk over moldy or damp joints will peel quickly. Allow the bead to cure according to the label before exposing it to water, commonly 24 hours.
Affordable exterior tools with a visible payoff
Exterior condition affects first impressions, but you do not need a complete landscaping arsenal. Buy or borrow pruning shears, a rake, a stiff outdoor broom, work gloves, and a garden hose nozzle. These tools handle overgrown edges, leaves, cobwebs, and dirty entry steps.
A compact electric pressure washer can clean concrete walks, siding, and decks faster than a hose. The trade-off is damage risk: a narrow spray held too close can remove paint, gouge soft wood, or force water behind siding. Keep the nozzle moving, start at low pressure, and test a hidden area. If the driveway only has light dirt, renting a washer for one day is usually better value than buying one.
Where the budget should go
| Tool or supply | Budget choice | Spend more when | Typical value |
|---|---|---|---|
| Screwdriver set | Basic multi-size set | Bits slip or handles hurt your hand | High; used on nearly every room |
| Cordless drill | 12-volt kit | Drilling masonry or doing heavy work | High if you have many repairs |
| Paint tools | Small brush, roller, sanding sponge | Painting several rooms | High for visible defects |
| Pressure washer | Rental or basic electric unit | Frequent exterior cleaning | Medium; rent for one listing |
| Cleaning supplies | Microfiber cloths and scrub brushes | Large carpet or upholstery job | High; inexpensive and reusable |
When to buy and when to rent
Buy hand tools whenever you lack them; their prices vary less than power equipment, and they remain useful after the sale. Paint and caulk are often discounted during spring home-improvement promotions, but check the color and product age rather than buying excess stock. Paint can separate or freeze in storage.
Look for cordless-tool promotions that include a free battery or second tool. The battery is often a large part of the replacement cost, so a bare tool is not automatically cheaper. Avoid joining a battery platform solely for one small project unless the kit price is substantially lower than renting.
Rent pressure washers, carpet cleaners, floor sanders, and specialty ladders when the job is limited to one weekend. Before renting, confirm cleaning fees, pickup times, and whether damage from incorrect use is your responsibility. For ordinary sale preparation, spend first on patching, paint touch-ups, lighting, and cleaning; those improvements are less likely to damage the house and are easier to complete well.
Avoiding expensive mistakes
Use eye protection when sanding or pressure washing, gloves for caustic cleaners, and a stable step ladder instead of a chair. Do not pressure-wash electrical fixtures, force a drill into unknown wiring, or mix cleaning chemicals. Test every repair under bright light and view it from several angles. A rushed patch or shiny caulk line can draw more attention than the original defect.
Before listing photos, tighten loose hardware, replace failed bulbs with matching color temperatures, remove tools and supplies, and clean dust from baseboards and vents. The best affordable tool purchase is the one that leaves the home looking maintained without creating a new repair for the buyer to notice.