Best Value Thermal Camera Attachment for Finding Household Heat Loss
What's inside
As an Amazon Associate I earn from qualifying purchases. This post may contain affiliate links at no extra cost to you.
Best Value Thermal Camera Attachment for Finding Household Heat Loss
For most homeowners, a phone-connected thermal camera attachment is the cheapest practical way to find missing insulation, leaky window frames, and overheated electrical connections. The best value is not necessarily the lowest-priced camera. A usable attachment should show enough thermal detail to distinguish a cold air leak from a cold nail head, connect reliably to your phone, and produce images you can understand later.
Expect to spend roughly $150 to $300 for a reasonable entry-level attachment, and $300 to $500 for a clearer image, better app, or wider temperature range. Standalone handheld cameras usually cost more, but they are easier to share with a contractor and do not depend on your phone’s connector or battery.
As an Amazon Associate we earn from qualifying purchases at no extra cost to you.
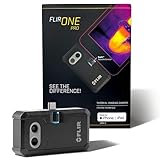


What you actually need for household heat loss
Resolution matters, but it is often overstated in product listings. A camera with 160 × 120 infrared pixels gives you 19,200 thermal measurement points. That is enough for finding broad insulation gaps around attic hatches, baseboards, recessed lights, and window openings. A 256 × 192 camera gives a visibly sharper image and makes small problems easier to investigate, but it is not essential for a first energy audit.
Look for a temperature range that extends from at least about -4°F to 752°F, even though household heat-loss work rarely requires temperatures above 150°F. More important is thermal sensitivity, often listed as NETD. A lower number is better. Around 50 millikelvins is adequate for home inspections; 40 mK or lower helps reveal subtle differences across walls.
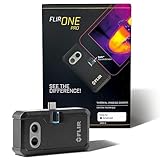
A phone attachment also needs a suitable connector. USB-C is the practical choice for most current Android phones and newer iPhones, but not every USB-C phone supports the same accessories. Some cameras are made specifically for Lightning iPhones, while others require an adapter. Check compatibility before buying, particularly if your phone has a protective case that blocks the connector.
These USB-C thermal camera attachments are generally the best starting point for Android users. iPhone owners should search for a version made for their exact connector rather than assuming an adapter will work.
Best-value options compared
| Camera type | Typical price | Best use | Main drawback |
|---|---|---|---|
| Basic phone attachment | $150–$250 | Drafts, missing insulation, windows, plumbing | Lower detail and phone compatibility concerns |
| Higher-resolution phone attachment | $250–$450 | Repeated inspections and small targets | More expensive; app quality still varies |
| Budget handheld camera | $200–$400 | Shared household or jobsite use | Usually bulkier and less convenient for reports |
| Professional handheld camera | $500 and up | Contractors, detailed documentation | Overkill for one home energy check |
The basic phone attachment is fine when your goal is to locate obvious trouble spots. A temperature difference of 10°F to 20°F across part of a wall is usually easy to see, especially during a cold day. Paying for a sharper sensor makes more sense if you inspect several properties, need to identify small electrical hot spots, or want images that hold up in a report.
FLIR and Seek are the established names in this category, but brand value depends heavily on the exact model and current price. A cheaper camera with a better app and a clear return policy can be a better purchase than a premium attachment discounted only slightly. Compare sensor resolution, included software features, and connector type rather than buying by logo alone.
How to use the camera correctly
Thermal cameras do not see through walls. They measure infrared radiation from the surface. That means they show the effect of missing insulation, air movement, or moisture—not the hidden defect itself.
For a useful scan, create a temperature difference of at least 15°F between indoors and outdoors. A winter morning is ideal. Run the heating system normally for several hours, close exterior doors and windows, and avoid scanning walls in direct sunlight. In summer, reverse the process with air conditioning. Strong sun can heat siding and window trim enough to create misleading patterns.
Move slowly and scan from several angles. A cold vertical stripe beside a window may indicate air leakage, but it could also be a reflective surface or a metal fastener. Use the camera’s visual-light image, center spot, and temperature scale to investigate. For suspected drafts, confirm the finding with an incense stick, smoke pencil, or tissue held near the joint.
Pay particular attention to attic hatches, kneewalls, plumbing penetrations, electrical outlets on exterior walls, rim joists, duct connections, and the edges of replacement windows. A large rectangular cold area usually points to missing insulation. Small, evenly spaced cold dots may simply be framing or fasteners.
Common buying mistakes and failure modes
The most common mistake is expecting a thermal camera to measure energy savings precisely. It cannot tell you that a room is losing “$42 per month” through one wall. It can help you prioritize repairs, but air-sealing and insulation decisions still require judgment.
Another problem is confusing a wide temperature range with accuracy. A camera rated to 1,000°F is not automatically better at finding a 5°F difference on a wall. For home use, image clarity, thermal sensitivity, focus, and a responsive app matter more than extreme temperature specifications.
Phone attachments can also fail at the least convenient time because the phone battery is low, the app loses connection, or the connector is obstructed by a case. If you will use the tool outdoors in winter, a standalone unit avoids some of these issues. For occasional indoor inspections, the phone format remains smaller and easier to justify.
When to buy and when to spend more
Prices often improve during Black Friday, January home-improvement promotions, and spring renovation sales. Winter is the best season to use a thermal camera for heating-related heat loss, but it is not always the best time to buy. Watch prices before the cold season and set a target rather than chasing a claimed percentage discount.
For a single home, buy a basic USB-C or iPhone-compatible attachment in the $150–$250 range, provided it has a usable app and a return policy. These FLIR phone thermal cameras are worth considering when software support and image sharing matter more than the lowest price.
Choose a higher-resolution attachment if you expect to inspect multiple homes or want to distinguish small gaps around windows and electrical components. If several people will use the tool, or the phone compatibility is uncertain, a handheld thermal imaging camera is often the safer long-term value. Spend more only when the extra resolution, durability, or independence from a phone will actually be used.