How to Convert a Circular Saw to a Table Saw
What's inside
As an Amazon Associate I earn from qualifying purchases. This post may contain affiliate links at no extra cost to you.
To convert a circular saw to a table, the safest practical route is a purpose-built saw-table attachment or a commercially designed conversion system; a rigid homemade insert can work for occasional rough cuts, but it does not provide the guarding, alignment, and stopping controls of a real table saw.
This project is sometimes called a skill saw to table conversion, because “Skilsaw” is commonly used as a generic name for a circular saw. The basic idea is simple: mount the saw beneath a flat surface so the blade projects through a narrow slot. The difficult part is making the blade, fence, switch, and guard remain predictable when the saw vibrates, heats up, or encounters a knot.
As an Amazon Associate we earn from qualifying purchases at no extra cost to you.


Choose the conversion approach before buying materials
| Approach | Typical cost | Practical rip capacity | Setup time | Best suited to | Main limitation |
|---|---|---|---|---|---|
| Commercial circular-saw table attachment | $80–$250 | 18–24 in. | 1–3 hours | Occasional home projects | Compatibility and limited adjustment |
| Rigid homemade table with enclosed mounting bracket | $60–$180 | 24–30 in. | 4–10 hours | Experienced woodworkers | Guarding and alignment are your responsibility |
| Portable jobsite table saw | $300–$700 | 24–32 in. | 15–30 minutes | Frequent cutting and sheet goods | Higher initial cost and storage space |
| Full-size contractor or cabinet saw | $700–$2,000+ | 30–52 in. | Permanent setup | Regular furniture and cabinet work | Weight, dust collection, and floor space |
The table makes the decision clearer: conversion is attractive when you already own a suitable circular saw and need a temporary workstation. If you expect to rip boards every week, a purpose-built table saw is usually safer, faster, and less expensive over its useful life.
Safer ways to convert a circular saw to a table
1. Use a purpose-built conversion system
A commercial attachment normally includes a metal or reinforced polymer mounting plate, a throat opening, an adjustable fence, and provisions for a switch or trigger lock. Some systems accept only specific saw shapes, so check the manufacturer’s compatibility list rather than assuming any 7-1/4-inch saw will fit.
This is the preferred circular saw table conversion for beginners because the mounting geometry has already been considered. You still need to verify that the saw sits flat, the blade is centered in the slot, and the fence is parallel to the blade.
2. Build a fixed table with a proper mounting cradle
An experienced woodworker can build a conversion from 18-millimeter plywood, phenolic sheet, or a flat steel plate. The saw should sit in a cradle that prevents movement in every direction, not merely on two screws through the shoe. Use four-point attachment where possible, with wide washers or a shaped bracket that supports the saw body without crushing its housing.
A homemade conversion should be treated as a dedicated machine, not as a board with a saw hanging underneath. Include a removable throat plate, a solid subframe, adjustable leveling screws, and a clearly accessible power switch. Do not rely on a zip tie, tape, or a permanently squeezed trigger as the primary control.
3. Buy a portable table saw instead
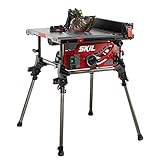
This is the better answer when you need repeatable cuts, a riving knife, a blade guard, or more than about 20 to 30 inches of ripping capacity. A portable table saw also has a designed arbor position, above-table controls, and a fence that locks from the front. Those details matter more than the low material cost of a homemade fixture.
Materials and dimensions for a basic fixture
- 18-millimeter plywood or a similarly rigid sheet for the top and base.
- A steel or aluminum mounting plate, preferably at least 3 millimeters thick.
- Four machine bolts, locking nuts, and large washers for the saw cradle.
- A replaceable throat plate made from 6–12 millimeter plywood, plastic laminate, or phenolic sheet.
- A straight, adjustable fence at least 600 millimeters long and 75 millimeters high.
- A mechanical riving knife or splitter that matches the blade’s kerf, if your design can safely support one.
- A guarded, latching power switch or no-volt-release switch rated for the saw’s voltage and current.
- Dust-extraction fittings, clamps, and a stable base that cannot slide during a cut.
A useful starting size is a 600 by 900 millimeter top for small work, or 750 by 1,200 millimeters if you regularly cut sheet material. A larger top is not automatically safer: unsupported plywood can sag, and a long homemade fence can deflect unless it has a stiff box construction.
Step-by-step setup
1. Inspect the saw
Use a saw with a working lower blade guard, a firm shoe, and no play in the arbor or bevel mechanism. A 7-1/4-inch saw commonly cuts about 2-1/2 inches deep at 90 degrees when handheld, but mounting it below a top reduces that capacity. Expect approximately 1-3/4 to 2-1/4 inches above a 18-millimeter top, depending on the saw and mounting plate.
2. Create the opening and mounting surface
Mark the blade path with the saw unplugged and the blade fully retracted. Make the throat opening only as wide as needed for the blade and guard movement. A narrow opening gives better support near the cut, while an oversized opening allows offcuts and fingers to enter the mechanism.
Mount the saw so the shoe or mounting plate is fully supported. Check clearance at both bevel extremes, even if you plan to cut only at 90 degrees. A bevel adjustment that contacts the table can shift the saw during use.
3. Align the blade
Set the blade square to the table with a reliable try square or digital angle gauge. Measure from the same tooth or blade plate to the fence slot at the front and rear of the table. The difference should be no more than about 0.5 millimeter over 600 millimeters. If the rear of the blade is closer to the fence, the work can pinch and kick back.
4. Fit the fence
The fence must lock firmly at both ends and remain parallel to the blade. A T-square-style fence or front-and-rear locking rail is preferable to a single clamp. Add a low-friction face made from laminate or smooth hardwood, but do not make the face so tall that it obstructs the blade guard or encourages you to push material over the blade.
For narrow cuts, use a push stick or push block. Keep your hands at least 150 millimeters from the blade and never reach behind the blade to retrieve an offcut while the saw is running.
5. Install guarding and switching
Do not remove the saw’s lower guard simply because the saw is upside down. In many homemade fixtures, the original guard cannot operate correctly; if so, the design needs a compatible overhead guard and splitter or riving knife rather than a permanently disabled guard.
Place the stop switch where you can hit it with a knee or hand without reaching over the blade. The switch should turn the saw off if power is interrupted and restored. Test the switch with the blade removed or the saw unplugged before making a powered cut.
6. Make a test cut
Use scrap timber first. Confirm that the blade starts smoothly, the table does not move, the fence stays locked, the guard returns freely, and the offcut does not wedge between the blade and fence. Stop immediately if you see smoke, unusual vibration, a drifting cut, or a fence that shifts under hand pressure.
Cutting capacity and operating limits
A converted circular saw is generally most useful for ripping construction lumber, battens, and narrow plywood strips. It is less suitable for thick hardwood, repeated production cuts, large sheet goods, or joinery requiring a consistently precise fence. A typical 15-amp circular saw may have enough power for occasional 2-inch stock, but the table, fence, and dust control can become the limiting factors.
Support long stock with an outfeed stand or roller support set level with the table. For sheet goods, break down the panel with the saw used in its normal handheld position, then use the table fixture for narrower final cuts. Trying to balance a full 4-by-8-foot sheet on a small homemade table is an avoidable kickback and control risk.
Ownership realities and common mistakes
The first parts likely to wear are the throat plate, fence face, mounting holes, and saw brushes or bearings if the converted tool is used heavily. Fine dust can clog the lower guard pivot and cooling vents, so vacuum the fixture after each session and inspect the guard before the next cut. Replace a warped throat plate or swollen plywood top rather than shimming around it indefinitely.
- Do not mount the saw using only the plastic shoe or one central bolt.
- Do not use a fence that is merely clamped to the tabletop for every cut.
- Do not cut without a splitter, riving knife, or suitable guard arrangement where the design requires one.
- Do not stand directly behind the blade; stand slightly to the side of the anticipated kickback path.
- Do not use the conversion for dadoes, rabbets, or other operations unless the saw and fixture are specifically designed for them.
Which option should you choose?
Choose a commercial attachment if your budget is under roughly $250, your cuts are occasional, and you are comfortable checking alignment before every session. Choose a homemade fixture only if you can design a rigid mounting cradle, proper switching, effective guarding, and a fence that stays parallel under force. Choose a portable table saw if you cut weekly, need more than 20 inches of rip width, or want repeatable results with less setup.
In short, you can turn a circular saw to a table, but the conversion does not turn the tool into a full table saw. The safest decision is to match the fixture to the work: use a handheld saw for breaking down large panels, a carefully guarded conversion for light occasional ripping, and a purpose-built table saw for frequent, precise, or demanding work.
