Best Budget Tools for Hanging Doors and Adjusting Hinges
What's inside
As an Amazon Associate I earn from qualifying purchases. This post may contain affiliate links at no extra cost to you.
What you need to hang a door
A basic interior door job does not require a dedicated door-hanging kit. The useful budget setup is a sharp chisel, a drill or driver, a combination square, a tape measure, and a way to support the slab while you work. Add a hinge-mortising jig only if you expect to hang several doors or want repeatable recesses without much marking.
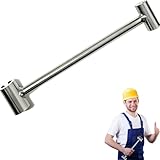
For one or two doors, spend first on a decent ¾-inch chisel and a fresh utility-knife blade. A dull chisel is more likely to crush the hinge pocket’s edges or skid into the face than save time. If you need a hinge template, compare door hinge mortising jigs before buying; check that the template suits your hinge size and can be clamped securely to the door edge.
As an Amazon Associate we earn from qualifying purchases at no extra cost to you.


Budget tool comparison
| Tool | Typical budget range | Best for | Main trade-off |
|---|---|---|---|
| Basic bevel-edge chisel | $8–$20 | One-off mortises and small hinge adjustments | Needs sharpening; cheaper steel may lose its edge quickly |
| Hinge mortising jig | $20–$50 | Several doors or consistent pocket layouts | Setup takes time; compatibility and clamping matter |
| Door-installation shims | $5–$15 | Holding the slab at a repeatable height and spacing | Disposable, and thin shims can slip under load |
| Long level | $15–$40 | Checking jambs and hinge-side plumb | Inexpensive levels may be inaccurate; verify before relying on one |
| Driver bit set | $8–$25 | Installing hinge screws without damaging heads | Soft bits wear or cam out; use the correct drive size |
Prices are broad retail ranges, not fixed quotes. Store-brand hand tools are often adequate for occasional use; the biggest difference is usually edge retention, fit, or durability rather than whether the tool can do the job at all.
Where to spend—and where not to
Buy a chisel that feels comfortable and has a flat back. A budget chisel can work well after honing, but some arrive with a rough edge or a slightly rounded back that makes precise paring harder. Test it on scrap before touching the door. A small sharpening stone or inexpensive honing guide is more useful than replacing a usable chisel because its factory edge is poor.
A jig can make three hinge recesses look alike, but it does not fix bad measurements. For a single replacement door, careful knife lines, a square, and a chisel are usually better value. For multiple doors, a jig reduces layout time and helps limit uneven recesses. Check its capacity against the actual hinge leaf, and practice on a cutoff: a router set too deep can leave the hinge below the door surface.
Use door installation shims to hold the slab while setting clearances. They are inexpensive, but do not trust one loose wedge to support the full weight. Use paired shims where possible, keep the door stable, and get help lifting a heavy solid-core slab. A hollow-core door is lighter, but its edges are easier to damage with a clamp or careless impact.
If you lack a reliable level, a 24-inch spirit level is a practical size for checking a jamb. Verify it by placing it on a flat surface, noting the bubble, then turning it end-for-end. If the reading changes, do not use it to diagnose a hinge problem.
Adjusting hinges without buying more tools
Start by identifying the symptom. A door that rubs at the top latch corner may have a loose top hinge or a jamb that has shifted; rubbing along the hinge edge can point to a jamb that is out of plumb. Tighten hinge screws with the correct driver bit before cutting wood. A screw that spins without gripping may have a stripped hole; replacing it with a longer screw can help if there is solid framing behind the jamb, but forcing a screw into a damaged hole can split the jamb.
To correct a shallow hinge mortise, remove the door and pare small amounts from the pocket with a sharp chisel. Work from the scored edges toward the center, and check the hinge fit often. Taking off 1/32 inch is already enough to affect alignment. If the leaf sits too deep, a thin cardboard shim behind it may bring it outward, but a thick or uneven shim can tilt the hinge and make the door bind elsewhere. Avoid stacking scraps until the hinge becomes visibly skewed.
When a hinge pin is stiff, clean out dust and use a small amount of suitable lubricant. Do not hammer a pin sideways against the door edge; that can dent the wood or loosen the hinge. If the knuckles are bent or the hinge leaf is cracked, adjustment is unlikely to last. Replace the hinge with one matching the original size, screw pattern, and finish rather than trying to straighten damaged hardware on the door.
When to shop for value
Hand tools are rarely worth buying at full price if the job is weeks away. Watch for spring home-improvement promotions and late-year tool sales, but compare the final price with the normal shelf price: a discount on a large kit is poor value if it includes tools you will not use. For a one-door repair, borrow or rent a router and jig before buying them. A chisel, square, and driver have more repeat use around the house.
Buy a replacement hinge only after measuring the leaf and checking the screw pattern. A small mismatch may force you to fill old holes or recut the mortise, turning a cheap part into extra work. For occasional DIY repairs, prioritize a sharp cutting edge, secure door support, and accurate layout; those matter more than paying for a premium tool set.