Best Budget Tools for Simple Furniture Restoration
What's inside
As an Amazon Associate I earn from qualifying purchases. This post may contain affiliate links at no extra cost to you.
Simple furniture restoration usually needs fewer tools than the packaging suggests. For a small table, chair, or dresser, the useful basics are a sanding block or modest random-orbit sander, a few hand tools, dust protection, and the right brush or roller for the finish. Spend on tools that improve control or save repeated effort; borrow or skip equipment for a one-off job.
As an Amazon Associate we earn from qualifying purchases at no extra cost to you.


Start with the job, not the tool aisle
Check what the furniture is made of and what condition it is in before buying anything. A solid-wood tabletop with worn varnish can often be sanded and refinished. Veneer is much thinner: aggressive sanding can cut through it and expose the substrate. Painted pieces may have lead-based paint if they are old, so do not dry-sand uncertain finishes; use an appropriate test kit and follow local safety guidance.
For a small project, set aside roughly $40–$100 for basic hand tools and consumables, or about $80–$180 if you also buy a decent random-orbit sander and a suitable vacuum attachment. Those are broad US price ranges, not a promise of a particular sale price. Sandpaper, tack cloths, gloves, and finish can add $20–$50, depending on the surface and product.
Where a small budget pays off
A 5-inch random-orbit sander is useful for broad, flat surfaces and saves time compared with sanding an entire tabletop by hand. A basic corded tool is generally the better value for occasional shop work: it avoids battery-platform costs and does not need charging. A roughly 2–3 amp model is usually adequate for furniture. Check that replacement hook-and-loop discs are easy to find, and use a dust bag or vacuum port if available.
Do not expect a sander to reach inside corners, narrow rails, or turned legs. A $5–$15 sanding block and a few sheets of 120-, 180-, and 220-grit paper handle those areas more safely. Start with the least aggressive grit that removes the damaged coating, then work through finer grits. Jumping straight to coarse paper can leave scratches that show through a clear finish.
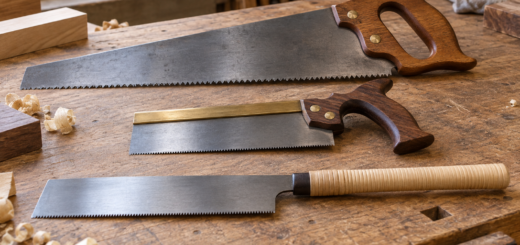
For assembly and repairs, a basic small chisel set is useful for cleaning glue from joints or easing a tight fit, but it is not essential for a simple repaint. A screwdriver set, a small hammer, a putty knife, and a few clamps often cover more beginner repairs. Cheap chisels may need sharpening before use; dull edges crush wood and are harder to control.
Compare the value, not just the sticker price
| Tool or approach | Typical budget | Best for | Main trade-off |
|---|---|---|---|
| Sanding block and paper | $5–$15 | One chair, edges, detail work | Slow on large surfaces; effort is easy to underestimate |
| Entry-level corded random-orbit sander | $30–$70 | Tables, doors, broad panels | Needs dust control; cannot replace hand sanding in corners |
| Entry-level cordless sander | $50–$120 before battery costs | Quick work away from an outlet | Battery and charger can make it poor value if you own no compatible tools |
| Brush and small foam roller | $8–$25 | Paint and water-based finishes | Very cheap brushes may shed bristles or leave uneven marks |
| Borrowed or rented detail tool | Often free to a modest rental fee | One unusual repair or short job | Availability and return timing can constrain the work |
Brand loyalty matters most when you already own batteries. If you have a cordless platform, buying a bare tool from that system may be economical. Starting from scratch, compare the full kit price, battery capacity, warranty, dust collection, and disc availability—not just the tool’s advertised price. For one restoration, a corded sander from a reputable budget line is often less expensive overall.
Brushes, rollers, and finish choices
For painted furniture, a mid-priced synthetic-bristle brush and a small high-density foam roller can give a better result than the cheapest multipack. Expect to spend about $8–$25 for a practical set. A bargain brush that sheds can leave hairs embedded in wet paint; a roller that is too thick can create texture on a smooth tabletop. Test the tools on scrap or an inconspicuous spot before coating the whole piece.
For clear finishes, follow the label on whether the product calls for a brush, cloth, or applicator. A quality synthetic furniture brush is a sensible reusable purchase for many water-based products. Do not assume that a more expensive brush fixes dust, poor surface preparation, or a finish applied too thickly. Those are common causes of rough or streaky results.
Avoid false savings and common failures
Buy abrasives in small quantities until you know what the project needs. Clogged paper stops cutting and can burnish a surface, especially when sanding old paint or resinous wood. Keep the sander moving, use light pressure, and inspect the surface often. Excess pressure can leave swirl marks or flatten edges; a powered sander is not a shortcut for careful inspection.
Dust protection is not optional. Use eye protection and a properly fitted respirator appropriate to the dust and finish involved, and connect dust collection where practical. A cheap disposable dust mask is not a universal substitute. For chemical strippers or solvent-based coatings, follow the product’s ventilation and protective-equipment instructions rather than improvising.
Before spending on a specialty tool, price the consumables and consider whether a hand method is adequate. A detail sander may be convenient on slats, but folded sandpaper can be cheaper and gives better control near delicate edges. A heat gun or paint sprayer is rarely a good first purchase for one small piece: both introduce safety, cleanup, and practice requirements that can outweigh the time saved.
When to buy
Tool prices often move around holiday promotions, spring home-improvement sales, and end-of-year clearance, but discounts vary by retailer and model. Compare the tool-only price with the kit price, and check whether the apparent deal includes a battery, charger, case, or accessories you will actually use. For a one-piece project, borrowing a sander or waiting for a local tool-library checkout can beat a sale. Buy when you have a real project and can inspect the return policy; a low price is not a bargain if the tool vibrates badly, lacks compatible abrasives, or sits unused afterward.