How to Set a Realistic Budget for a First Home Workshop
What's inside
As an Amazon Associate I earn from qualifying purchases. This post may contain affiliate links at no extra cost to you.
Start with the work, not the tools
A first workshop budget is easiest to get wrong when it starts with a shopping list. A better starting point is the work you expect to do in the next year: repairs, furniture projects, bike maintenance, or home improvement. Each calls for different equipment. A woodworker may need a saw and dust control; someone fixing household items may get more use from a drill, a sturdy work surface, and hand tools.
Write down three to five likely projects, then list the tools and materials each requires. Mark which tools you already own, which can be borrowed or rented, and which will see repeated use. Budget for the repeated-use items first. A tool bought for one uncertain project can cost more to store than to rent.
As an Amazon Associate we earn from qualifying purchases at no extra cost to you.




For a modest setup focused on common household repairs and basic woodworking, plan on roughly $500 to $1,200, excluding major shop equipment and the cost of the space. You can start below that if you already own a drill or hand tools. A dedicated woodworking shop with a table saw, dust collection, and larger workbench can quickly exceed $2,000.
Divide the budget into useful categories
One workable way to allocate a $900 starting budget is to put about $300 toward power tools, $200 toward hand tools and measuring, $150 toward the bench and storage, $100 toward safety and dust control, and $150 toward consumables and unexpected needs. These are planning figures, not fixed rules. If you mainly do repairs, spend less on woodworking machinery and more on fasteners, bits, and a reliable drill.
Keep a separate reserve of 10 to 15 percent. A project often reveals a missing clamp, the wrong blade, or a need for a longer extension cord. Spending every dollar on headline tools leaves no room for those necessities.
Include the costs people often overlook: screws, sandpaper, drill bits, saw blades, glue, batteries, eye and hearing protection, and a safe way to manage dust. A $20 blade that cuts cleanly can matter more than upgrading a saw by $100. Likewise, a bargain drill is poor value if its battery platform is unavailable or replacement batteries cost nearly as much as the tool.
Buy the basics first
For general home use, a cordless drill-driver kit is usually a sensible first power-tool purchase. It handles pilot holes, screws, and many small jobs. A basic kit commonly costs around $80 to $180, depending on battery capacity and whether it includes a second battery. A low-cost kit is fine for occasional repairs; for frequent use, compare battery availability and warranty terms before choosing a platform.
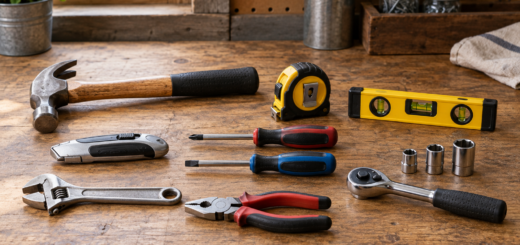
Add a tape measure, combination square, utility knife, screwdrivers, hammer, adjustable wrench, and a set of clamps. Buy a few useful clamps rather than a large set of flimsy ones. For light assembly, four clamps may be enough; larger panel work can demand more. A stable workbench or a solid, secured work surface is also important. A wobbly bench makes accurate cutting harder and can turn a manageable job into a safety problem.
Do not buy a full collection of specialty tools “just in case.” A jigsaw is useful for curves and rough cuts, but it does not replace a circular saw for straight sheet cuts. A miter saw is convenient for repeated crosscuts, but it is expensive and takes up space. Rent one or borrow it until repeat use justifies owning it.
Compare where the money goes
These tiers show how spending changes what a starter setup can reasonably do. Prices vary by region, sales, and whether you buy new or used.
| Budget level | Typical spend | What it covers | Main limitation |
|---|---|---|---|
| Lean | $250–$500 | Basic hand tools, one drill, simple bench, safety gear | Limited cutting capacity; borrow or rent larger tools |
| Practical starter | $500–$1,200 | Drill, selected saw, measuring tools, clamps, storage, consumables | Not enough for a full dust-controlled woodworking shop |
| Dedicated hobby setup | $1,500–$3,000+ | Bench machinery, dust collection, more clamps and accessories | Space, electrical needs, and maintenance become significant |
The lean tier is not a failed workshop. It is often the better choice when you are still learning which projects you enjoy. Put money into accurate measuring and safe workholding before buying a second or third power tool.
Choose quality where failure costs time
Spend more on tools that must be accurate, secure, or used often: measuring tools, clamps that hold under load, a dependable drill, and protective equipment that fits. A cheap tape measure may be adequate for rough layout, but an inaccurate square can make every cut in a project slightly wrong. Check a square against a known straight edge before relying on it.
Lower-cost tools can be entirely adequate for occasional use. A basic jigsaw or corded sander may serve a few weekends a year. The trade-off is usually less power, rougher adjustment, shorter life, or fewer repair options—not automatic failure. Read warranty terms and check whether consumables and replacement batteries are easy to find.
Used tools can stretch the budget, especially for cast-iron equipment, vises, and older corded machines. Test the switch, cord, guards, and adjustment mechanisms. Watch for cracked housings, excessive blade or spindle play, missing guards, and motors that smell burnt. A low price is no bargain if a replacement part is unavailable or the tool cannot be made safe. Skip used lithium-ion batteries unless their condition and compatibility are clear.
Budget for safety and buy at the right time
Include safety equipment from the beginning: impact-rated eye protection, hearing protection for loud tools, and a suitable dust mask or respirator for the material and task. Wood dust and fine dust from masonry are not harmless shop clutter. Use extraction or ventilation where practical, and follow the tool and protective-equipment instructions. A cheap shop vacuum may collect larger debris, but it may not adequately control fine dust without appropriate filtration.
Seasonal discounts can help, but compare the sale price with the cost of a bare tool, battery, and charger. Kits are often good value when you need the whole platform; they are wasteful if you already own compatible batteries. Watch for sales around major holiday periods and end-of-season clearances, but do not buy an extra tool simply because it is discounted. A small set of woodworking clamps may be a more useful sale purchase than another powered tool.
Before buying, check the tool’s footprint, storage needs, and electrical requirements. Then keep a simple spending log: purchase price, accessories, and how often you use each tool. After a few months, the pattern will show whether your next dollar belongs in a better blade, dust collection, a more capable saw, or nowhere at all.