Best Budget Shop Tools for Making Cabinets in a Garage
What's inside
As an Amazon Associate I earn from qualifying purchases. This post may contain affiliate links at no extra cost to you.
A garage cabinet shop does not need a contractor-grade tool lineup. It needs accurate cuts, repeatable holes, and a way to control dust in a tight space. Put the budget toward the tools that establish square and consistent parts; save on machines that can be upgraded later.
As an Amazon Associate we earn from qualifying purchases at no extra cost to you.


Start with the cut list
Most garage-built cabinets use 3/4-inch plywood for sides, bottoms, and shelves, plus 1/4-inch plywood for backs. A typical 4-by-8-foot sheet weighs roughly 50 to 75 pounds, depending on material, so handling it alone is awkward and risky. Before buying tools, decide whether you will break sheets down at the lumberyard or cut them at home. Many yards will make a few rough cuts for a small fee, which can be better value than buying a large saw just to handle full sheets.
Cabinet-grade plywood is rarely perfectly flat or exactly 3/4 inch thick. Measure the actual stock, and size dados, rabbets, and drawer parts to the material in hand. A tape measure and pencil are not enough for accurate cabinet work: add a reliable square, a long straightedge, and a marking knife or sharp pencil.
The best-value first purchases
A circular saw and straightedge or track guide is a practical first setup for sheet goods. A basic saw can cost far less than a cabinet saw, and a guide helps produce straight cuts without requiring a large infeed and outfeed area. Expect to spend about $100 to $250 for a budget saw-and-guide arrangement, with more for a track-compatible saw or longer rail. Check the guide’s usable length and whether it can be clamped; a short, shifting guide defeats the point.
Use a sharp plywood blade with a high tooth count, support the entire panel, and make a shallow scoring pass if the saw allows it. Tear-out is the common failure: the show face may splinter, especially when the blade is dull or the panel is poorly supported. A sacrificial sheet of rigid foam beneath the plywood supports the cut and costs little. For cabinets with exposed edges, leave a small amount of extra width and trim to final size after the first cut.
A corded drill or basic cordless drill/driver handles pilot holes, screws, and hardware. A 12-volt cordless drill is adequate for most cabinet assembly; an 18- or 20-volt kit is more comfortable for repeated work and larger bits. Do not pay extra for a hammer-drill feature unless you also drill masonry. Buy a set of decent drill bits and countersinks rather than the cheapest oversized assortment—dull bits wander and overheat, while a poor countersink can leave ragged screw heads.
What to buy for each job
| Tool | Budget range | Cabinet use | Main trade-off |
|---|---|---|---|
| Circular saw with guide | $100–$250 | Breaking down plywood and trimming panels | Needs careful setup; not as fast as a table saw |
| Random-orbit sander | $40–$100 | Smoothing face frames, doors, and edges | Dust collection varies; sanding cannot fix bad joints |
| Router with edge guide | $80–$180 | Flush-trimming edging and cutting shallow grooves | Requires practice and secure workholding |
| Clamps and assembly square | $50–$150 | Holding boxes square while fastening | Too few clamps slow assembly; bargain clamps may slip |
Prices are broad U.S. street-price ranges, not quotes; sales and kit contents change them. A 5-inch random-orbit sander is worth buying early if you will finish plywood edges or paint face frames. The entry-level models are fine for occasional cabinet projects. Their weak point is often dust capture, not sanding performance. Use a vacuum-compatible shroud or a shop vacuum with a clean filter, and start around 120 grit for ordinary preparation. Sanding too aggressively through veneer is an expensive mistake; plywood face layers can be thin.
Tools worth delaying
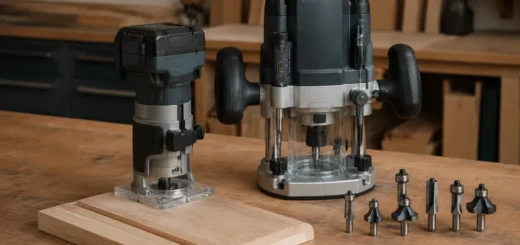
A router is useful for trimming solid-wood edging flush, easing sharp corners, and cutting grooves. A budget fixed-base router can do these jobs, but feed it slowly and clamp the work securely. Burning, chatter, and a groove that wanders are common when the bit is dull, the router is pushed too fast, or the fence is loose. If your cabinets will use iron-on edge banding and simple screw assembly, you may not need a router for the first build.
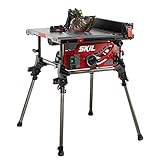
A table saw becomes valuable when you make many repeated cuts or want to rip face-frame stock accurately. It is not automatically the best first purchase in a one-car garage: even a compact saw needs safe infeed and outfeed space, and a cheap fence that moves can produce tapered parts. If buying used, check that the fence locks parallel to the blade, the blade has no visible wobble, and guards are present. A used saw with a sound fence can outperform a new bargain saw, but transport and missing parts may erase the savings.
Pocket-hole jigs are convenient for face frames and quick utility cabinets, but they do not make a cabinet square by themselves. Clamp the box square, check diagonals, then fasten it. For a cabinet carcass, a back panel fitted into a groove or carefully fastened across the rear helps resist racking. Skipping the back or leaving it loose can let a box turn out of square even when the front edges looked aligned.
Buying season and used tools
Watch for sales around major holiday weekends, Father’s Day, and year-end clearance, but compare the kit against the bare-tool price. A discount is poor value if it includes batteries you will not use or a short guide rail that cannot handle your panels. For cordless tools, staying within one battery platform usually saves money over time. A cheaper brand is reasonable for a drill or occasional sander; prioritize a stable fence, accurate guide, or dependable clamp where a failure can ruin a panel.
Used tools are often the best budget route for a router, shop vacuum, or table saw. Test switches, bearings, and adjustments before paying. For a vacuum, inspect the hose and filter availability: a low purchase price is not a bargain if replacement filters are hard to find. Keep some budget for blades, bits, clamps, and a dust mask. Those consumables are easy to overlook, yet a sharp blade and a square assembly setup often improve cabinet results more than stepping up to a more expensive motor.