Best Budget Tools for Installing a Ceiling-Mounted Storage Rack
What's inside
As an Amazon Associate I earn from qualifying purchases. This post may contain affiliate links at no extra cost to you.
A ceiling-mounted storage rack is only as dependable as the fasteners holding it to the framing. You do not need premium tools for a typical garage installation, but you do need a way to find joists, drill accurately overhead, and tighten the rack hardware without exhausting yourself or stripping a bolt. Spend first on tools that reduce those risks; save on features you will rarely use.
What to buy first
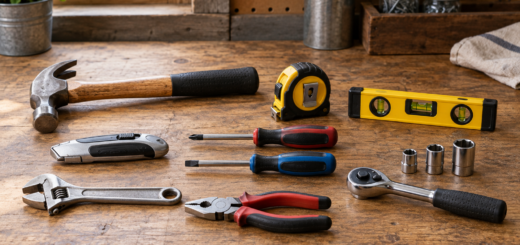
For a one-time installation, a basic stud finder, a quality tape measure, a pencil, a drill, and a socket set will usually cover the work. A second person is more useful than an expensive laser: overhead rails and platforms are awkward to hold level while marking holes.
Check the rack instructions before shopping. They may specify lag screws, pilot-hole diameter, spacing, and the joist types the rack can attach to. Most garage ceilings use wood joists, but some homes have engineered trusses, metal framing, or a finished ceiling that hides the structure. Do not assume drywall anchors can support a loaded rack. Follow the manufacturer’s attachment requirements and confirm that the ceiling framing can carry the intended load.
Budget tool comparison
| Tool | Budget choice | When spending more helps | Common failure |
|---|---|---|---|
| Stud finder | Basic electronic model, often around $15–$30 | Irregular framing or repeated projects; better models may add deep scanning or clearer indicators | False readings through textured drywall, near corners, or over dense framing |
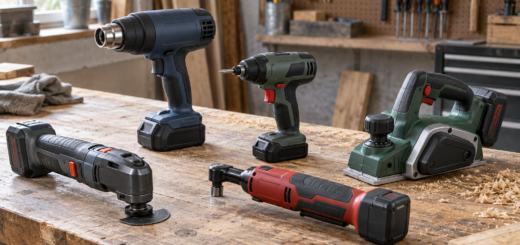
| Drill/driver | Entry-level cordless drill or a corded drill | Multiple racks, heavy drilling, or a battery platform you already own | Low battery, slipping bit, or excessive force enlarging the pilot hole |
| Socket set | Basic 3/8-inch drive set with the correct socket | Frequent use; a ratchet with a comfortable handle saves effort | Wrong-size socket rounds the fastener head |
| Level | Basic 24-inch level | Long rails or solo work; a longer level or cross-line laser can make alignment easier | Reading from an uneven ceiling or trusting a tool that is out of calibration |
| Step ladder | Stable ladder rated for the user and tools | Frequent overhead work; wider platforms and lighter frames improve comfort | Overreaching sideways or standing on a prohibited top step |
Find framing before drilling
A low-cost electronic stud finder is generally fine for a straightforward drywall ceiling. Scan in both directions, mark both edges of each joist, and verify the center rather than relying on a single beep. Repeat the scan from another spot. A strong magnet can help locate drywall screws in a joist, but it is slower and may miss screws set deep beneath compound.
Stud finders are not proof of safe framing. If the results conflict, stop and investigate instead of drilling a row of exploratory holes. Check the attic if accessible, or use a small pilot hole only where the rack instructions and framing layout make it appropriate. A missed joist can leave a hole to patch; a rack attached to drywall alone can pull loose under load.
For a basic option, compare basic electronic stud finders by checking whether they can scan ceilings and whether replacement instructions are clear. Paying extra for several detection modes is worthwhile mainly if your walls or ceilings are difficult to read.
Choose a drill and the right fasteners
An entry-level drill/driver is enough for drilling pilot holes and driving rack hardware in wood. A 12-volt model is lighter overhead and adequate for occasional jobs; an 18- or 20-volt drill is a sensible buy if you already own its battery platform or expect to use it on other projects. Corded drills can be inexpensive and avoid battery wear, but the cord is a nuisance on a ladder.
Use the pilot-hole size specified by the rack maker and the fastener packaging. Too small a hole can make a lag screw difficult to drive or split wood; too large a hole reduces its grip. Start the screw with the drill at a controlled speed, then finish by hand if you are unsure about torque. A socket on a ratchet gives better control than forcing a drill until the fastener stops. Never substitute a longer or thicker screw without confirming it will not interfere with wiring or other services.
If you need a drill, look for a basic 12-volt cordless drill/driver with a battery and charger included. A bare tool looks cheaper but may cost more once you add batteries. Avoid buying a premium impact driver just for this installation; it can drive screws quickly, but its force makes it easier to over-tighten or damage a fastener.
Leveling and working overhead
A 24-inch level is inexpensive and sufficient for many rack rails. Measure the rack’s layout from fixed reference points, mark the specified joist positions, and check the rail before tightening every fastener. If the ceiling is uneven, follow the rack instructions rather than trying to force the frame flat against it.
A cross-line laser is a convenience, not a requirement. It can help one person align several marks, but a budget laser may be difficult to see in a bright garage and still needs careful setup. For a single rack, a tape measure, pencil, and helper usually deliver better value. A basic 24-inch spirit level is a reasonable purchase if you do not already have one.
Use a stable ladder with a load rating that covers your weight plus tools. Keep your belt buckle between the rails and climb down to reposition instead of reaching across. If the platform is too heavy or awkward to hold, assemble it in manageable sections and have a helper support it. That is cheaper than rushing a lift alone and misaligning a rail.
Where to save, and when to buy
For one rack, borrowing a drill, level, or stud finder can beat buying the cheapest version of each. If you buy, favor tools with clear instructions and a return policy; a tool that gives inconsistent readings is no bargain. Spend more on a drill only if it will see regular use, and on a ladder if you will use it repeatedly or need a higher load rating.
Tool prices often dip during major holiday sales and seasonal home-improvement promotions, but discounts vary by brand and battery bundle. Compare the complete kit price, not just the advertised tool price, and check whether the battery system matches tools you already own. Do not delay a safe installation just to chase a small discount on a level or socket set. The rack’s specified hardware, accurate framing marks, and a stable working setup matter more than premium tool features.