Best Budget Tools for Repairing a Small Area of Stucco
What's inside
As an Amazon Associate I earn from qualifying purchases. This post may contain affiliate links at no extra cost to you.
What you need for a small stucco repair
For a palm-sized chip or shallow patch, you usually do not need a powered tool or a full contractor’s kit. A basic repair can be done with a margin trowel, a small hawk or mixing board, a stiff brush, and a bucket. The right stucco mix matters more than buying a premium trowel: the wrong material can crack, debond, or dry to a noticeably different texture.
First check what you’re repairing. Traditional cement stucco and synthetic stucco (EIFS) are different systems; an ordinary cement patch is not a safe substitute for an EIFS repair. If the wall is soft, damp, bulging, or cracked across a wide area, find and address the cause before patching. A small cosmetic patch will not fix water intrusion or movement.
As an Amazon Associate we earn from qualifying purchases at no extra cost to you.



A sensible budget kit
For a small cement-stucco patch, expect to spend roughly $25–$60 on basic hand tools and enough repair material, depending on what you already own and local prices. A bargain kit can cost less, but weak handles, thin blades, and poor-fitting edges make accurate work harder. You do not need professional-grade tools for one repair; choose tools that are comfortable and sturdy enough to control.
- Margin trowel: A 5- or 6-inch blade is useful for mixing small batches and pressing material into a hole. A basic stainless-steel or carbon-steel tool is fine.
- Small hawk or mixing board: A hawk gives you a portable surface for working overhead or on a wall. For one ground-level patch, a clean scrap of plywood or a sturdy plastic tray can do the job at no added cost.
- Stiff nylon or masonry brush: Use it to remove loose grit and dust. A soft household brush tends to leave debris behind.
- Bucket and measuring cup: Accurate water measurement makes the mix more repeatable. A drill and mixing paddle are unnecessary for a few pounds of material; vigorous hand mixing is usually enough.
A useful starting point is a basic stucco margin trowel. Compare blade width and handle comfort rather than paying extra for a brand name. If you already own a clean putty knife, it can handle tiny touch-ups, but its flexible blade is less effective for packing a deeper patch.
Where to spend—and where to save
| Item | Budget choice | When the upgrade helps | Skip it when |
|---|---|---|---|
| Margin trowel | Basic hand tool, often about $8–$20 | You expect repeated repairs or want a more comfortable handle and straighter blade | You have a clean, rigid putty knife for a very shallow chip |
| Hawk | Plastic hawk or clean board, roughly $8–$20 | You are applying material to several patches or working above shoulder height | The repair is small and within easy reach of a mixing tray |
| Mixing paddle | Hand mix in a bucket at no cost | You are mixing larger batches or doing multiple repairs | You need only a few pounds; a paddle can waste material in the bucket |
| Texture tool | Brush or sponge you already own | The surrounding finish has a distinct pattern you need to reproduce | The patch is hidden or the wall has a very fine, simple finish |
Prices are approximate and vary by retailer and region. For a first repair, a plastic plastering hawk is a reasonable low-cost option. Metal is often more durable, but it is not necessary for occasional use. A flimsy hawk that flexes under a loaded trowel, however, makes it harder to control the patch.
Buy the right repair material
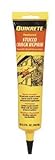
Choose a patch product labeled for the stucco system and repair depth, and follow its instructions for mixing, bonding, and curing. A ready-mixed acrylic patch can be convenient for a very small, shallow defect, but it may not match the appearance or performance of a cement-based stucco repair. Cementitious mixes are often a better fit for traditional stucco, though they require careful water control and protection while curing.
Do not buy a large bag just because its price per pound looks better. Unused cement-based material can spoil after moisture gets into the package, and a leftover color-matched product may not blend after the existing wall weathers. A small package costs more per pound but can save money if the alternative is throwing most of a larger bag away. If the finish color matters, test a small sample and allow it to dry: wet stucco looks darker, and patches commonly dry to a different shade than older walls.
Use the tools in this order
Remove loose material until the edges are firm; do not simply skim over a hollow or crumbling section. Brush away dust and prepare the surface as directed by the product label. Some repairs need dampened masonry or a bonding agent, while others specify a different preparation. Keep the patch area within the product’s stated thickness limits. A deep void may need more than one lift rather than one thick application that shrinks or cracks as it dries.
Mix only what you can place within the product’s working time. Add water gradually: a mix that is soupy may slump, shrink, or weaken, while an overly stiff mix can fail to bond to the edges. Press material firmly into the opening, then shape it to match the neighboring surface. For a textured wall, practice on scrap board first. A brush dragged lightly across a tacky patch can create a different pattern from tapping or dabbing; there is no universal texture tool that reproduces every finish.
Protect the patch from direct hot sun, strong wind, and rain during the specified curing period. Rapid drying is a common cause of surface cracking. Do not paint until the patch has cured as directed, and do not expect paint alone to hide a mismatch in texture or sheen.
When to buy, and when to wait
Repair products and hand tools are often easiest to compare in spring, when home-improvement stores stock up for exterior work. End-of-season clearance can be useful for unused tools, but check that bagged mix is dry, sealed, and within any stated shelf-life guidance. A discounted, moisture-damaged bag is no bargain. In cold weather, many repair products require minimum air and surface temperatures; buying tools ahead is fine, but wait to apply the patch until conditions meet the label’s requirements.
For a single small repair, buy the minimum material, use a basic trowel, and borrow or improvise the mixing surface if practical. Spend more only where the job demands it: repeated repairs justify sturdier tools, while a matching texture or a damaged underlying wall may call for a more suitable repair system—or a professional assessment—rather than a larger tool budget.